A Comprehensive Guide to Installing Plywood Plank Flooring
Plywood plank flooring is a versatile and durable option that can enhance the aesthetics and value of your home. Installing plywood plank flooring is a rewarding DIY project that requires proper preparation and execution. Here's a comprehensive tutorial to guide you through the essential aspects of installing plywood plank flooring.
Materials Required
Before getting started, ensure you have the following materials:
- Plywood planks
- Underlayment
- Adhesive
- Nail gun
- Nails
- Spacer blocks
- Level
- Circular saw
- Safety glasses
Surface Preparation
Begin by preparing the subfloor. The subfloor should be clean, level, and dry. If necessary, level the subfloor using a self-leveling compound. Install an underlayment to provide a moisture barrier and enhance sound insulation.
Laying the First Row
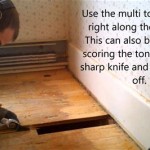
Establish a starting point and mark a chalk line for the first row of planks. Apply adhesive to the subfloor and place the planks end-to-end along the line. Use spacer blocks to maintain a consistent gap between the planks and the walls. Secure the planks with nails using a nail gun.
Subsequent Rows
Continue laying subsequent rows by staggering the joints between the planks. Staggering ensures strength and stability. Apply adhesive to the subfloor and the tongue of the previous row. Fit the plank into place and secure it with nails through the face.
Trimming and Cutting
Use a circular saw to trim planks to the desired length for the last row. Measure and mark the length, then cut along the marked line. Avoid cutting too short, as you can always trim more later if needed.
Finishing Touches
Once all the planks are installed, remove the spacer blocks. Install baseboards or moldings around the perimeter of the flooring to conceal the expansion gap and enhance the finished look. Allow the adhesive to cure for the recommended time before walking or placing furniture on the floor.
Tips for Success
- Check the moisture content of the plywood planks and subfloor before installation.
- Use a moisture barrier (underlayment) to prevent moisture from damaging the flooring.
- Be precise when cutting the planks to ensure a tight fit.
- Always wear safety glasses while using power tools.
- Allow the adhesive to cure completely before using the floor.
By following these steps and paying attention to the essential aspects of plywood plank flooring installation, you can create a beautiful and durable floor that will enhance your living space for years to come.

Diy Plywood Plank Flooring Two Paws Farmhouse

Diy Plywood Plank Floors Centsational Style

Beautiful Maple Plywood Flooring How To Install It Buildsbykristen Com

Plywood Flooring How To Install Floors Alternative Hardwood Part 1

Diy Plywood Floors Remodelando La Casa

Diy Rustic Wide Plank Plywood Flooring Our Project Ideas

Diy Rustic Wide Plank Plywood Flooring Our Project Ideas

Diy Plywood Plank Floors Centsational Style

Wide Plank Plywood Flooring An Economical Solution Remodelando La Casa

Diy Plywood Plank Flooring Two Paws Farmhouse
Related Posts

