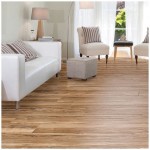
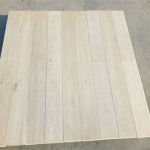
Parquet Flooring Repair: A Comprehensive DIY Guide
Parquet flooring adds an air of elegance and sophistication to any home. However, like all flooring materials, it is prone to wear and tear over time. If your parquet flooring has seen better days, don't despair! With a little know-how and the right tools, you can restore its beauty and functionality yourself.
1. Identifying the Damage
The first step in repairing parquet flooring is to accurately diagnose the extent of the damage. Common issues include:
- Scratches and dents: Superficial damage that can be repaired with sanding or filling.
- Buckling: Occurs when the planks are exposed to moisture or temperature fluctuations, causing them to lift and separate.
- Cracks: Can be caused by excessive weight, impact, or humidity changes.
- Loose or missing planks: A result of improper installation or moisture damage.
2. Preparing for Repairs
Once you have identified the damage, it's time to gather the necessary materials and tools:
- Sandpaper (grit 80-120)
- Wood filler
- Putty knife li>Hammer or nail gun
- Adhesive
- Sealant
3. Repairing Scratches and Dents
Sand the affected area lightly with sandpaper until the scratch or dent is no longer visible. Apply wood filler to the sanded area and smooth it out with a putty knife. Allow the filler to dry and sand it flush with the surrounding wood.
4. Repairing Buckling
Buckling requires more extensive repairs. Remove the affected planks and check for any underlying moisture issues. Replace any damaged planks and re-nail the planks securely to the subfloor. If necessary, use a moisture barrier to prevent future buckling.
5. Repairing Cracks
Fill the cracks with wood filler or epoxy. Use a putty knife to smooth the filler and allow it to dry completely. Sand the repaired area until it is even with the rest of the floor.
6. Replacing Loose or Missing Planks
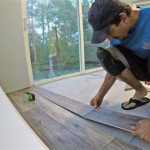
Remove the damaged planks by carefully prying them up with a hammer or nail gun. Apply adhesive to the subfloor and gently press the new planks into place. Secure the planks with nails or a nail gun.
7. Finishing Touches
Once the repairs are complete, seal the repaired areas with a polyurethane finish to protect them from damage. Allow the finish to dry thoroughly and enjoy your newly restored parquet flooring!
Additional Tips
- Always test any repair materials on an inconspicuous area first.
- Use a sanding block for even sanding results.
- Allow ample drying time for all repairs.
- If the damage is extensive or you are unsure of your abilities, it may be best to consult a professional flooring installer.

Easy And Cost Effective Ways For Wood Floor Repair

How To Update Parquet Floors

Parquet Home Diy 1 2 3 How To Repair Wood Floor Gaps S Part

The Ultimate Guide To Parquet Wood Floor Restoration

Flooring Wood Floor Repair Diy Home Hardwood

7 Tips For Diy Parquet Flooring Repair Dw Floor Polishing Singapore

7 Tips For Diy Parquet Flooring Repair Dw Floor Polishing Singapore

The Ultimate Guide To Parquet Wood Floor Restoration

How To Repair Parquet Flooring Home Repairs Diy

9 Diy Tips For Wood Floor Scratch Repair Bob Vila

