Nailing Hardwood Flooring Close To Walls: A Comprehensive Guide
Installing hardwood flooring presents unique challenges, particularly when approaching walls and other vertical obstructions. Maintaining consistent spacing and secure fastening in these areas is critical for a professional-looking and long-lasting installation. This article details the techniques and considerations involved in nailing hardwood flooring close to walls, ensuring a seamless and structurally sound finished product.
The ability to nail hardwood flooring effectively near walls is essential for several reasons. It contributes to the overall stability of the floor, preventing movement and potential squeaking. It also ensures a neat and professional aesthetic, minimizing gaps and creating a smooth transition where the floor meets the wall. Ignoring these considerations can lead to unsightly gaps, uneven flooring, and potential structural issues down the line.
Prior to beginning installation, it is important to ensure that the subfloor is properly prepared. A level and clean subfloor is a prerequisite for a successful hardwood flooring installation, regardless of how close to the walls you’re working. Any imperfections in the subfloor will be magnified in the finished floor, leading to unevenness and potential problems with the nailing process. The subfloor should be thoroughly swept and vacuumed to remove any debris. Any unevenness should be addressed with leveling compounds or by sanding down high spots.
Acclimation of the hardwood flooring is another critical step often overlooked. Hardwood is a natural material that expands and contracts with changes in humidity. Allowing the flooring to acclimate to the environment in which it will be installed minimizes the risk of gapping or buckling after installation. Manufacturers typically provide specific acclimation instructions, which should be followed meticulously. This usually involves storing the flooring in the room where it will be installed for several days, allowing it to adjust to the temperature and humidity levels.
Key Considerations Before Nailing
Several factors should be considered before beginning the nailing process near walls. These include the type of hardwood flooring being installed, the type of subfloor, and the available tools. Different types of hardwood flooring may require different nailing patterns and techniques. Similarly, the type of subfloor will influence the type of nails or fasteners that should be used. Plywood or OSB subfloors will require different considerations than concrete subfloors, which may require adhesive or specialized fasteners.
Understanding the direction of the flooring is also a crucial step. Typically, hardwood flooring is installed perpendicular to the floor joists. This provides maximum support and minimizes the risk of sagging. When approaching walls, the direction of the flooring may need to be adjusted slightly to ensure a proper fit. Careful planning and measurement are essential to avoid unnecessary cuts and waste.
The use of proper safety equipment is paramount. Safety glasses should be worn at all times to protect the eyes from flying debris. Hearing protection is also recommended, especially when using pneumatic nailers. Gloves can protect hands from splinters and abrasions. Furthermore, it is important to be aware of the location of any electrical wiring or plumbing behind the walls to avoid accidental damage. A stud finder can be used to locate studs, which can provide a solid nailing surface.
The type of nailer used also plays a significant role in the success of nailing hardwood flooring near walls. A flooring nailer, specifically designed for this purpose, is recommended. These nailers drive nails at a 45-degree angle through the tongue of the flooring, concealing the nail heads and providing a secure hold. Manual flooring nailers, which require the use of a mallet, are suitable for smaller projects or areas where space is limited. Pneumatic flooring nailers, which are powered by compressed air, are faster and more efficient for larger projects.
When using a manual flooring nailer, it is important to strike the plunger squarely and firmly with the mallet to ensure that the nail is driven properly. Overstriking can damage the flooring, while understriking can leave the nail protruding. With pneumatic nailers, the air pressure should be adjusted to ensure that the nails are driven flush with the surface of the flooring without damaging the material. Regular maintenance of the nailer, including cleaning and lubrication, is essential for optimal performance.
Techniques for Nailing Close to Walls
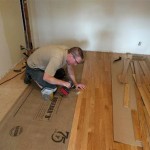
Nailing hardwood flooring close to walls requires a different approach compared to nailing in the open field. Standard flooring nailers are often too bulky to fit close to walls, necessitating the use of alternative tools and techniques. Hand nailing, using a nail set and hammer, is a common method for securing the final rows of flooring. This allows for precise placement of nails without damaging the wall or trim.
When hand nailing, it is important to pre-drill pilot holes to prevent splitting the wood. The diameter of the pilot hole should be slightly smaller than the diameter of the nail. This ensures that the nail will grip the wood securely without causing it to crack. The pilot holes should be drilled at a 45-degree angle, mirroring the angle of the nails driven by the flooring nailer.
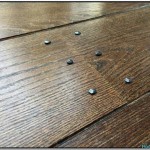
Using a nail set is crucial for setting the nail heads below the surface of the flooring. This prevents the nail heads from interfering with the installation of baseboards or other trim. The nail set should be placed directly on the nail head, and a hammer should be used to tap it gently until the nail head is flush with or slightly below the surface. Care should be taken not to damage the surrounding wood.
Another technique for nailing close to walls is the use of a trim nailer. Trim nailers are smaller and more maneuverable than flooring nailers, making them ideal for tight spaces. These nailers use smaller gauge nails, which are less likely to split the wood. However, trim nails may not provide the same level of holding power as flooring nails, so it is important to use them in conjunction with adhesive or other fasteners.
When using a trim nailer, the nails should be driven at a slight angle to provide maximum grip. The depth of the nails should be adjusted to ensure that they are driven flush with the surface of the flooring without damaging the material. A test piece of flooring should be used to determine the optimal depth setting before beginning the actual installation.
In some cases, it may be necessary to use a combination of hand nailing and trim nailing to secure the final rows of flooring. Hand nailing can be used in the tightest spaces, while trim nailing can be used in areas where there is slightly more room. The key is to use the appropriate tool and technique for each situation.
Addressing Common Challenges
Installing hardwood flooring near walls can present several challenges. One common issue is uneven walls, which can make it difficult to achieve a consistent gap between the flooring and the wall. In these cases, it may be necessary to scribe the flooring to match the contours of the wall.
Scribing involves using a compass or other marking tool to trace the outline of the wall onto the flooring. The flooring is then cut along the marked line, creating a custom fit. This technique requires patience and precision, but it can result in a seamless and professional-looking installation. A jigsaw or a coping saw can be used to make the cut, depending on the complexity of the curve.
Another challenge is dealing with obstructions such as pipes or door jambs. In these cases, the flooring may need to be cut to fit around the obstruction. A template can be used to accurately transfer the shape of the obstruction onto the flooring. A jigsaw or a multi-tool can be used to make the cut, depending on the size and shape of the obstruction.
When cutting flooring to fit around obstructions, it is important to leave a small expansion gap to allow for movement. This gap can be filled with a flexible sealant or covered with trim. The key is to ensure that the flooring has room to expand and contract without being impeded by the obstruction.
Sometimes, the last row of flooring may be too narrow to be nailed securely. In these cases, it may be necessary to use adhesive in addition to nails. Construction adhesive can be applied to the back of the flooring to provide extra holding power. The adhesive should be applied in a zigzag pattern to ensure even coverage.
Proper spacing is also crucial. Maintaining a consistent expansion gap between the flooring and the wall is essential to prevent buckling or warping. This gap allows the flooring to expand and contract with changes in humidity. The recommended expansion gap varies depending on the type of flooring and the climate, but it is typically around ¼ to ½ inch. Spacers can be used to maintain a consistent gap during installation.
Finally, ensuring that the nails are properly set is critical. Protruding nail heads can interfere with the installation of baseboards or other trim. They can also create a tripping hazard. A nail set should be used to set any protruding nail heads below the surface of the flooring. The nail set should be placed directly on the nail head, and a hammer should be used to tap it gently until the nail head is flush with or slightly below the surface.

Installing Unfinished Hardwood Flooring Nail Down Close To A Wall

Installing A Wood Floor Against The Wall

Installing A Hardwood Floor Connecting Row Up Against Wall

How To Install Hardwood Flooring Like A Floorwright

A Quick Tip On Installing Hardwood Flooring When You Get Close To The Wall

Installing A Wood Floor Against The Wall

Installing A Wood Floor Against The Wall

Nailer Hardwood Flooring Power Palm Pneumatic Nail Close To The Wall Eds Al S

Laying Hardwoods Around A Wall Or Cabinet Peninsula New First Board

Installing Unfinished Hardwood Flooring Nail Down Close To A Wall
Related Posts


