Essential Aspects of Lumber Liquidators Laminate Flooring Installation
Lumber Liquidators offers high-quality laminate flooring that can transform the look and feel of your home. Installing laminate flooring can be a rewarding home improvement project, but it's essential to follow the proper steps to ensure a successful installation. Here are some crucial aspects to consider for a seamless Lumber Liquidators laminate flooring installation:
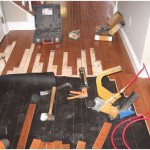
1. Subfloor Preparation: The subfloor must be level, dry, and free of debris. Uneven surfaces can cause laminate planks to buckle or warp. Installing an underlayment will provide a smooth and supportive base for your new flooring.
2. Acclimation: Allow the laminate flooring to acclimate to the room temperature and humidity for 48-72 hours before installation. This will prevent planks from expanding or contracting excessively, which can lead to gaps or buckling.
3. Planking Orientation: Determine the best plank orientation for the room, whether parallel or perpendicular to the longest wall. Planning the layout will minimize waste and ensure the even distribution of seams.
4. Expansion Gaps: Leave expansion gaps around the perimeter of the room and around any fixed objects. These gaps allow the flooring to expand and contract with changes in temperature and humidity, preventing buckling or cracking.
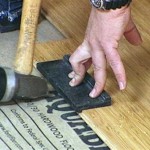
5. Floating Installation: Most Lumber Liquidators laminate flooring is installed using a floating method. Planks are clicked together and laid on the underlayment, without being nailed or glued to the subfloor. This allows for easier repairs and replacement if needed.
6. Moisture Protection: Laminate flooring is not waterproof, so it's important to protect it from moisture. Install a vapor barrier underlayment to prevent moisture from rising from the subfloor. Additionally, consider using waterproof glue for joints in areas that may experience moisture, such as bathrooms or kitchens.
7. Transitions and Moldings: Transitions, such as T-moldings or reducers, are used to connect different flooring types or to create a finished edge. Moldings, such as baseboards, add a touch of elegance and cover expansion gaps at the perimeter.
8. Tools and Skills: Installing laminate flooring requires basic tools such as a saw, spacers, and a hammer. If you're not confident in your DIY skills, consider hiring a professional installer to ensure a flawless finish.
By following these essential aspects, you can achieve a professional-looking and durable Lumber Liquidators laminate flooring installation. Enjoy the beauty and functionality of your new floor for years to come.

How To Install Laminate Flooring Lock Fold Ll

How To Install Laminate Flooring Ll Formerly Lumber Liquidators

Installation Tips And Guides Ll Flooring

Installation Tips And Guides Ll Flooring

Installing Laminate Flooring And A New Rug Too Bright Green Door

Installing Laminate Flooring And A New Rug Too Bright Green Door

Dream Home Laminate Flooring Installation Review How To Install Quarter Round Lumber Liquidators

Hybrid Timber Laminate Flooring Installation Comprehensive Guide

Installing Laminate Flooring And A New Rug Too Bright Green Door

Lumber Liquidators St James Laminate Flooring
Related Posts