Essential Aspects of Lumber Liquidators Cork Flooring Installation
Enhancing the aesthetic appeal and durability of your home with cork flooring from Lumber Liquidators is a worthwhile investment. However, proper installation is crucial for its longevity and performance. This guide will take you through the essential aspects of cork flooring installation to ensure a seamless and satisfactory outcome.
1. Subfloor Preparation
A stable and level subfloor is essential for a successful cork flooring installation. Inspect the existing subfloor for any imperfections, such as unevenness, moisture damage, or loose boards. Repair or replace any damaged areas as needed. Ensure the subfloor is clean, dry, and free from debris.
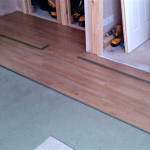
2. Underlayment Installation
An underlayment provides an additional layer of cushioning, sound absorption, and moisture protection for your cork flooring. Utilize a high-quality underlayment specifically designed for cork flooring. Unroll the underlayment and ensure it overlaps slightly at the seams. Use tape to secure the underlayment firmly to the subfloor.
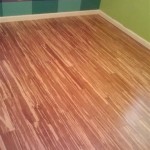
3. Cork Flooring Installation
Begin installing the cork flooring in a corner of the room, starting with the groove side facing the wall. Use a tapping block and mallet to gently tap each plank into place. Maintain a 1/8-inch expansion gap around the perimeter of the room to allow for natural movement of the flooring. Stagger the planks for added stability.
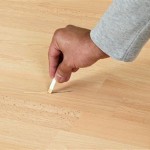
4. Seaming and Edging
Once the cork flooring is installed, it's crucial to seal the seams. Apply cork sealant to the grooves and use a cork roller to press the planks together. This prevents moisture penetration and ensures a tight, durable seam. Install transition strips or moldings around the edges of the room where they meet other flooring surfaces or walls.
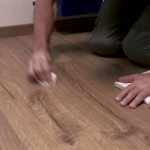
5. Finishing Touches
After the flooring is installed, complete the project with appropriate finishing touches. Trim any excess flooring along the edges using a utility knife. Clean the floor thoroughly using a damp mop and a pH-neutral cleaning solution specifically designed for cork flooring. Avoid using abrasive cleaners or excessive moisture.
6. Maintenance and Care
Cork flooring is relatively low maintenance but requires occasional cleaning and care to maintain its appearance and longevity. Regularly sweep or vacuum the floor to remove dirt and dust. Mop the floor using a damp mop and a pH-neutral cleaning solution as needed. Avoid using harsh chemicals or abrasive cleaners.
7. Additional Tips
For optimal results, acclimate the cork flooring to the room temperature for at least 48 hours before installation. Use a moisture meter to ensure the subfloor is dry before installing the flooring. Allow the adhesive to dry completely before walking on the floor. Avoid moving heavy objects on the floor immediately after installation. These tips will help ensure the successful installation and longevity of your Lumber Liquidators cork flooring.

How To Install A Cork Floor Young House Love

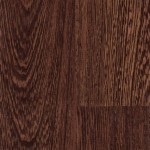
Renature 10 5mm Maverick Cork Flooring 11 62 In Wide X 35 Long Ll

Guide For Natural Cork Flooring Ll

Choosing Between Pergo And Cork For Our Kitchen Floors Young House Love

How To Install A Cork Floor Young House Love

Pros And Cons Of Cork Flooring Is It Right For You Bob Vila

We Cork Glue Down Floor Installation

Diy Steps For Installing A Insulated Basement Floor Extreme How To

Guide For Natural Cork Flooring Ll Lumber Liquidators

Lumber Liquidators St James Laminate Flooring