Laying Wooden Flooring On Chipboard: A Comprehensive Guide
Installing wooden flooring on chipboard can elevate the aesthetics and functionality of your home. However, ensuring a flawless installation requires meticulous preparation and execution. This guide will delve into the essential aspects of laying wooden flooring on chipboard, empowering you to achieve a durable and visually stunning outcome.
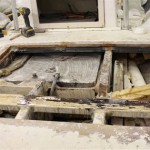
Preparing the Chipboard
Before commencing the installation, it's crucial to prepare the chipboard properly. This involves:
- Ensuring the chipboard is flat, stable, and free from moisture.
- Laying a vapor barrier over the chipboard to prevent moisture penetration.
- Installing an underlayment to absorb impact and provide additional sound insulation.
Choosing the Right Flooring
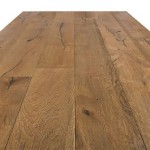
Selecting the appropriate wooden flooring is essential for durability and aesthetics. Consider the following factors:
- Type of wood: Oak, walnut, and maple are popular choices due to their durability.
- Thickness: Thicker planks are more durable and can better withstand wear and tear.
- Finish: Choose a finish that complements your interior design and provides the desired level of protection.
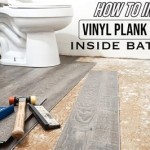
Laying the Flooring
To ensure a secure and level installation, follow these steps:
- Start from a corner: Begin laying the first row of planks from a corner, perpendicular to the longest wall.
- Use spacers: Insert spacers between the planks and the walls to maintain a uniform gap for expansion.
- Stagger the joints: Offset the joints of each row to create a more visually appealing and stable floor.
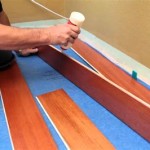
Securing the Flooring
Secure the wooden flooring to the chipboard using the appropriate method:
- Glue: Apply adhesive to the chipboard and planks for a strong and permanent bond.
- Nails or screws: Drive nails or screws through the tongue and groove joints of the planks.
- Floating floor: Some wooden flooring systems feature a floating installation, where the planks are clicked together without nails or glue.
Finishing Touches
Once the flooring is laid and secured, add the finishing touches:
- Trim: Install baseboards and moldings to conceal expansion gaps and enhance the overall appearance.
- Expansion gaps: Allow for expansion gaps around the perimeter of the room to prevent buckling due to temperature changes.
- Maintenance: Regularly clean and maintain the wooden flooring to preserve its beauty and longevity.

Fitting Hardwood Flooring To Chipboard Wood And Beyond Blog

How To Install Hardwood Flooring For Beginners

How To Install Hardwood Flooring Step By Forbes Home

Laying New Wood Flooring Over Original Uneven Floorboards Le Arthur Wells

Laying Solid Wood Flooring Onto Existing Floorboards And Beyond Blog

Installing Wood Flooring Over Concrete Diy

Fitting Hardwood Flooring To Diffe Subfloors Ambience

How To Install Hardwood Flooring The Home Depot

How To Install Hardwood Floors Directly Over Joists Wood Floor Fitting

How To Install Laminate Flooring For Beginners
Related Posts