Laying Wood Flooring: Determining the Optimal Direction
The installation of wood flooring is a significant undertaking that enhances the aesthetic appeal and value of a property. A crucial decision in this process is determining the direction in which the planks will be laid. This choice impacts the visual perception of space, the structural integrity of the floor, and the overall flow of the room. Understanding the factors that influence this decision is paramount for achieving a successful and visually pleasing result.
The perceived direction of wood flooring significantly affects how one experiences a room. Lines, whether created by the seams of the planks or the wood grain itself, lead the eye. Laying the flooring in a particular direction can either elongate or widen the space, creating different effects depending on the room's dimensions and purpose. Therefore, careful consideration must be given to the existing architectural features and the desired ambience.
Beyond aesthetics, the structural support provided by the subfloor and the presence of joists plays a role in the longevity of the wood floor. Proper alignment can minimize potential issues like sagging or unevenness, ensuring a stable and durable surface for years to come. Ignoring these structural considerations can lead to costly repairs and compromises the integrity of the floor.
Finally, the ease of installation and the amount of material waste generated are also influenced by the chosen direction. Certain room shapes and architectural features may present challenges that require adjustments to the installation plan. Considering these practical aspects can help streamline the process and optimize material usage.
Maximizing Visual Impact: Room Shape and Light Source
The dimensions of the room are a primary factor when choosing the direction of wood flooring. In a rectangular room, laying the planks parallel to the longest wall visually elongates the space. This technique can be particularly effective in narrow rooms, such as hallways, to create a more spacious feel. Conversely, laying planks perpendicular to the longest wall will visually widen the room, making it appear broader. This approach can benefit square rooms or rooms that feel too long and narrow.
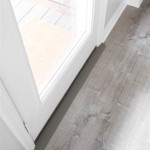
The direction of natural light also plays a crucial role in highlighting the wood grain and texture. Ideally, flooring should be installed parallel to the primary light source, typically the largest window or patio door. This arrangement allows the light to flow along the length of the planks, accentuating the wood's natural beauty and minimizing the appearance of seams and imperfections. When light hits the floor at an angle, it can emphasize any slight variations in height between planks, making them more noticeable. Laying the flooring parallel to the incoming light diffuses the light more evenly, creating a smoother and more visually appealing surface.
In rooms with multiple light sources, the dominant source should be considered. If the light is evenly distributed from multiple directions, the decision can be based on the room's dimensions and the desired visual effect. It is also worth noting that the color and finish of the wood flooring can influence the impact of light. Lighter-colored floors reflect more light and can brighten a room, while darker floors absorb more light and can create a more intimate atmosphere.
For irregularly shaped rooms or rooms with angled walls, the decision can be more complex. In these cases, consider the overall flow of traffic and the focal point of the room. Aligning the flooring with the most prominent architectural feature, such as a fireplace or a large window, can create a sense of cohesion and visual balance. In some cases, it may be necessary to transition the direction of the flooring in different areas of the room to accommodate the shape and features of the space. This can be achieved by using transition strips or subtly changing the angle of the planks to create a seamless flow.
Structural Considerations: Joist Direction and Subfloor Support
The structural integrity of a wood floor is dependent on the subfloor and the underlying joists. Understanding the direction of the floor joists is essential for ensuring adequate support and preventing future problems. Ideally, wood flooring should be installed perpendicular to the floor joists. This configuration distributes the weight more evenly across the joists, minimizing deflection and preventing sagging. If the flooring is installed parallel to the joists, it is more likely to flex under weight, potentially leading to squeaking and other issues.
If it is not possible to install the flooring perpendicular to the joists due to aesthetic or logistical constraints, it is necessary to strengthen the subfloor. This can be achieved by adding a layer of plywood or oriented strand board (OSB) to increase the stiffness and stability of the subfloor. The added layer should be installed perpendicular to the joists and securely fastened to the existing subfloor. The thickness of the added layer will depend on the spacing of the joists and the type of wood flooring being installed. Consult with a qualified flooring professional or structural engineer to determine the appropriate thickness and fastening schedule.
The condition of the subfloor is also critical for the success of the wood flooring installation. The subfloor should be clean, level, and free of any defects, such as cracks, holes, or moisture. Any necessary repairs should be made before installing the wood flooring. Unevenness in the subfloor can cause the wood flooring to flex and squeak, while moisture can lead to warping and other problems. If the subfloor is significantly uneven, it may be necessary to use a self-leveling compound to create a smooth and level surface.
When working with concrete subfloors, it is important to test for moisture before installing wood flooring. Concrete is porous and can absorb moisture from the ground, which can damage the wood flooring over time. A moisture meter can be used to measure the moisture content of the concrete. If the moisture level is too high, it may be necessary to install a moisture barrier before installing the wood flooring. This barrier will prevent moisture from migrating into the wood flooring and causing problems.
Practical Aspects: Installation Efficiency and Material Waste
The chosen direction of the wood flooring can also influence the ease and efficiency of the installation process. In a rectangular room, laying the flooring parallel to the longest wall generally results in fewer cuts and less material waste. This is because the planks can be laid in long, continuous runs without the need for frequent trimming. Conversely, laying the flooring perpendicular to the longest wall may require more cuts, especially at the ends of the rows, leading to increased waste.
Room shape and architectural features such as doorways, hallways, and built-in cabinets can also affect the amount of material waste. In rooms with many angles or irregular shapes, it may be necessary to cut the planks to fit around these features, resulting in more waste. Planning the layout carefully and minimizing the number of cuts can help reduce waste and save money. It is also important to order enough material to account for waste. A general rule of thumb is to add 5-10% to the total square footage of the room to allow for cuts and mistakes.
The type of wood flooring being installed can also influence the ease of installation. Engineered wood flooring, for example, is often easier to install than solid wood flooring because it is more dimensionally stable and less susceptible to warping. Engineered wood flooring also comes in longer lengths, which can reduce the number of seams and speed up the installation process. Solid wood flooring, on the other hand, requires more skill and experience to install properly. It is also more susceptible to expansion and contraction due to changes in humidity, which can lead to problems if not installed correctly.
When installing wood flooring, it is important to use the proper tools and techniques. A flooring nailer or stapler is essential for securing the planks to the subfloor. A tapping block and mallet are used to ensure that the planks are tightly fitted together. A saw is needed for cutting the planks to the correct length and shape. It is also important to wear safety glasses and gloves to protect yourself from injury. Following the manufacturer's instructions and consulting with a qualified flooring professional can help ensure a successful and efficient installation.

Determining The Direction To Lay Install Hardwood Laminate Or Luxury Vinyl Plank Flooring

Which Direction Should The Floor Be Laid Real Wood Floors

Which Direction To Lay Your Hardwood Flooring Riterug

Everything You Need To Know About The Process Including Best Direction In Which Should Laying Wood Floors Wooden Plank Flooring Vinyl

Which Direction To Lay Your Hardwood Flooring Construction2style

Tips From The Table Laying Your Floor

Which Direction Is The Right Way To Lay Hardwood Flooring

Direction To Install Hardwood Floors Ceramic Tile Advice Forums John Bridge

Which Direction To Lay Your Hardwood Flooring Riterug

The Best Direction To Lay Hardwood Flooring Elite
Related Posts