Laying Wood Flooring Over Tile: A Comprehensive Guide
Installing wood flooring over existing tile can be a cost-effective and time-saving alternative to removing the tile entirely. This approach allows for a new aesthetic without the labor-intensive and often messy process of demolition. However, successful installation requires careful assessment, preparation, and execution. This article provides a detailed guide to laying wood flooring over tile, encompassing necessary considerations, preparatory steps, and installation techniques.
Before embarking on this project, a thorough evaluation of the existing tile and subfloor is paramount. The condition of the existing tile directly influences the feasibility and longevity of the new wood floor. Any underlying issues, if ignored, can compromise the structural integrity and appearance of the finished floor.
Assessing the Existing Tile and Subfloor
The first step is to meticulously inspect the tile surface for any cracks, loose tiles, or unevenness. Loose tiles must be re-secured or replaced to provide a stable base. If numerous tiles are loose or cracked, removal of the existing tile might be a more prudent long-term solution. The rationale is simple: a compromised foundation cannot adequately support a new flooring system.
The flatness of the tile surface is equally critical. Significant variations in height—anything exceeding 3/16 inch over a 10-foot span—can lead to uneven installation and potential problems down the line, such as squeaking or buckling. A long, straight edge or a level can be used to identify high and low spots. These irregularities will need to be addressed by leveling the surface, which will be detailed later in this guide.
Beyond the surface, it is essential to understand the subfloor composition beneath the tile. Is it concrete, plywood, or another underlying material? The type of subfloor will dictate the appropriate wood flooring type and installation method. Concrete subfloors are typically more durable but can be prone to moisture issues, whereas plywood subfloors are susceptible to damage from water leaks.
A moisture test is also crucial, particularly for concrete subfloors. Excessive moisture can cause wood flooring to warp, cup, or buckle. A simple plastic sheet test involves taping a square of plastic sheeting (approximately 2 feet by 2 feet) to the tile surface and leaving it for 24-48 hours. If condensation forms beneath the plastic, it indicates a moisture problem that needs to be resolved before proceeding. Solutions might include a moisture barrier applied to the tile surface or addressing the source of the moisture intrusion.
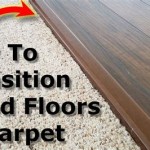
Finally, consider the height of the existing tile relative to adjacent flooring or thresholds. Adding wood flooring on top will raise the floor level, potentially creating tripping hazards or requiring modifications to doorways. Careful planning is necessary to ensure a seamless transition between different flooring types.
Once the assessment is complete, and the existing tile is deemed a suitable base, the preparation phase can begin. This phase primarily focuses on cleaning, leveling, and creating a bonding surface for the new wood floor.
Preparing the Tile Surface
Thorough cleaning is the first step in preparing the tile surface. Vacuum the entire area to remove loose debris, dust, and dirt. Follow this with a deep cleaning using a suitable tile cleaner to remove any grease, oil, or wax residue. A degreaser may be necessary for areas with stubborn stains.
After cleaning, any remaining imperfections, such as small cracks or chips, should be filled with a cement-based patching compound designed for tile. Allow the patching compound to dry completely according to the manufacturer's instructions before proceeding. This step ensures a smooth and uniform surface for the wood flooring.
Leveling the tile surface is often the most critical and time-consuming aspect of the preparation process. Self-leveling underlayment is typically used to correct any significant height variations. This cement-based mixture is poured over the tile and spreads out to create a perfectly level surface. Follow the manufacturer's instructions carefully regarding mixing ratios and application thickness. Multiple thin layers might be necessary for severely uneven surfaces.
Before applying the self-leveling underlayment, it is generally recommended to prime the tile surface with a bonding agent. This primer promotes adhesion between the tile and the underlayment, preventing cracking or separation over time. Allow the primer to dry completely before pouring the self-leveling compound.
Once the self-leveling underlayment has fully cured, inspect the surface for any remaining imperfections. Minor bumps or ridges can be sanded down to create an even surface. Vacuum the entire area again to remove dust and debris before proceeding to the installation phase.
Depending on the chosen wood flooring type and installation method, further surface preparation may be required. For example, if using a glue-down installation, a specific adhesive primer may be necessary to ensure proper bonding between the underlayment and the wood flooring adhesive.
Selecting the appropriate wood flooring type is the next critical decision. Not all wood flooring is suitable for installation over tile. The ambient conditions, subfloor characteristics, and personal preferences all play a role.
Selecting the Appropriate Wood Flooring
Engineered wood flooring is generally considered the best option for installation over tile. Its multi-layered construction provides greater stability and resistance to moisture compared to solid hardwood. This stability is crucial for installations over tile, where moisture levels can potentially fluctuate.
Solid hardwood flooring, while aesthetically pleasing, is more susceptible to expansion and contraction due to changes in humidity. This movement can cause problems when installed over a rigid surface like tile, potentially leading to warping or gapping. If solid hardwood is desired, it is imperative to install a robust moisture barrier and ensure excellent ventilation in the room.
The thickness of the wood flooring also matters. Thicker planks generally offer greater durability and stability but also increase the overall floor height. Consider the existing floor height and any potential transition issues when selecting the plank thickness.
The installation method will also influence the choice of wood flooring. Options include glue-down, nail-down, and floating installations. Glue-down installations require a smooth, level surface and are best suited for engineered wood flooring. Nail-down installations are typically used for solid hardwood but are not recommended over tile unless a sufficient underlayment is installed to provide nailing purchase. Floating installations, where the planks are connected to each other but not to the subfloor, are a popular choice for engineered wood flooring and can be installed over tile with a suitable underlayment.
The choice of underlayment is just as important as the flooring itself. The underlayment provides cushioning, sound insulation, and moisture protection. A quality underlayment can also help to compensate for minor imperfections in the tile surface. Look for underlayments specifically designed for use with wood flooring and that offer a high level of moisture resistance.
With the tile prepared and the wood flooring selected, the final step involves installing the new floor. Careful attention to detail during the installation process is crucial for achieving a professional and long-lasting result.
Prior to starting the installation, allow the wood flooring to acclimate to the room's temperature and humidity for several days. This acclimation period minimizes expansion and contraction after installation, reducing the risk of warping or gapping. Follow the manufacturer's instructions for acclimation guidelines.
Begin the installation by laying down the chosen underlayment over the prepared tile surface. Ensure that the underlayment is properly aligned and secured according to the manufacturer's recommendations. Overlap the seams of the underlayment and tape them together to create a continuous moisture barrier.
The actual wood flooring installation will vary depending on the chosen method. For glue-down installations, apply the adhesive evenly to the back of each plank and then press it firmly onto the underlayment. Use a roller to ensure proper adhesion and remove any air pockets.
For floating installations, connect the planks together according to the manufacturer's instructions, typically using a tongue-and-groove system. Ensure that the planks are properly aligned and that there are no gaps between them. Use tapping blocks and a rubber mallet to gently tap the planks into place.
Regardless of the installation method, maintain a consistent expansion gap around the perimeter of the room. This gap allows the wood flooring to expand and contract without putting pressure on the walls. Cover the expansion gap with baseboards or quarter-round molding after the installation is complete.
As you install each row of wood flooring, regularly check for alignment and levelness. Use a long, straight edge to ensure that the planks are running straight and that there are no significant variations in height. Make any necessary adjustments as you go to ensure a smooth and uniform floor.
Around doorways, pipes, and other obstacles, carefully measure and cut the wood flooring to fit. Use appropriate tools, such as a jigsaw or a miter saw, to make precise cuts. A clean and professional finish around these obstacles will enhance the overall appearance of the floor.
After the installation is complete, inspect the floor carefully for any imperfections. Touch up any scratches or dents with a matching wood filler. Clean the floor thoroughly and apply a protective finish if necessary.
Installing wood flooring over tile can be a rewarding project that transforms the look and feel of a room. However, thorough planning, careful preparation, and proper installation techniques are essential for achieving a successful and long-lasting result. By following the guidelines outlined in this article, you can create a beautiful and durable wood floor that will enhance your home for years to come.

Quick Guide To Laying Hybrid And Other Hard Flooring Over A Tile Floor

Discover How To Lay Wood Floors Over Tile Discount Flooring Depotdiscount Depot Blog

Can You Install Wood Flooring Over Tiled Floors Havwoods

Can You Install Wood Flooring Over Tiled Floors Havwoods

Installing Tiles On Hardwood Flooring Expert Gui

Can You Install Wood Flooring Over Ceramic Tile

Step By Installation Guide For Wood Floor Tiles

Can You Install Wood Flooring Over Tiled Floors Havwoods

Can You Lay Hybrid Flooring Over Tiles The Guys

Wood Look Tile Flooring How To Lay That Looks Like
Related Posts