Laying Wood Flooring Over Tiles: A Guide to a Successful Installation
Installing wood flooring over existing tile can be a cost-effective and visually appealing way to transform a space. However, undertaking this project requires careful consideration and planning. This guide explores the process of laying wood flooring over tiles, addressing key considerations and offering practical advice for a successful installation.
Assessing Suitability and Preparing the Subfloor
Before embarking on the installation, it is crucial to determine the suitability of the tile subfloor for wood flooring. Firstly, assess the tile's condition. Cracked or loose tiles require repair or removal. Secondly, evaluate the levelness of the subfloor. Uneven tiles can affect the stability and appearance of the wood flooring. If the subfloor is uneven, consider leveling techniques like a self-leveling compound or a thin-set mortar leveling layer.
Once the tile surface is stable and level, prepare the subfloor for the installation. Clean the tile surface thoroughly, removing any dust, debris, or residue. An appropriate primer will enhance the adhesion of the wood flooring to the tile. Apply the primer according to the manufacturer's instructions, ensuring even coverage and allowing it to dry completely before proceeding.
Choosing the Right Wood Flooring and Installation Method
The type of wood flooring chosen for the installation significantly affects the installation process and final outcome. Solid hardwood flooring is often less suitable for installation over tile due to its thickness and potential for movement. Engineered wood flooring, engineered hardwood, or laminate flooring are more commonly preferred options. These engineered products are thinner and possess better stability and dimensional stability, making them more compatible with tile subfloors.
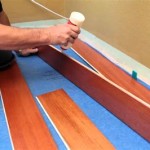
The installation method chosen for the wood flooring depends on factors such as the type of wood flooring, the subfloor condition, and personal preferences. Common installation methods include glue-down, floating, or a combination approach. Glue-down installation involves adhering the wood flooring directly to the tile subfloor, while floating installation employs an underlayment system that allows the flooring to expand and contract without direct contact with the tile subfloor. Consult with a professional flooring installer or carefully review manufacturers' recommendations to determine the most suitable method for your specific circumstances.
Essential Tools and Techniques for a Smooth Installation
To ensure a smooth and successful installation, gather the necessary tools and materials, including:
- Tape measure
- Utility knife
- Circular saw or chop saw
- Level
- Hammer
- Wood flooring installation tools (e.g., tapping block, spacers)
- Glue or underlayment (depending on the chosen installation method)
- Appropriate fasteners (if required)
When installing wood flooring over tiles, follow these techniques for optimal results:
- Start in the Center: Begin laying the first row of flooring in the middle of the room, working outwards. This helps to minimize any unevenness or gaps around the perimeter.
- Stagger Joints: Ensure that the end joints of each row are offset by at least half the length of the planks. This pattern creates a stronger and more visually appealing installation.
- Expansion Gaps: Leave expansion gaps around the perimeter of the room and between the flooring and any fixed objects (e.g., walls, cabinets). These gaps allow for natural expansion and contraction of the wood due to changes in temperature and humidity.
- Securely Install: Carefully secure the planks, whether using glue, staples, or nails, according to the chosen installation method and manufacturer's instructions.
By meticulously following these guidelines and paying close attention to detail, you can achieve a successful and aesthetically pleasing installation of wood flooring over tiles, transforming your space with a touch of warmth and elegance.

Step By Installation Guide For Wood Floor Tiles

Wood Look Tile Flooring How To Lay That Looks Like

Discover How To Lay Wood Floors Over Tile Discount Flooring Depotdiscount Depot Blog

Can You Install Wood Flooring Over Tiled Floors Havwoods

Installing Wood Look Tile Tips From A Pro Brepurposed

Installing Wood Look Tile 5 Insider Tips To Achieve Success Diytileguy

How To Install Hardwood Flooring For Beginners

Tips When Installing Wood Look Tiles

How To Make Tile Flush With Hardwood Floor

Tips When Installing Wood Look Tiles
Related Posts


