Laying Wood Flooring Around Stairs: A Comprehensive Guide
Installing wood flooring around stairs is a meticulous task that requires precision and attention to detail. Whether you're a seasoned DIY enthusiast or hiring a professional, understanding the essential aspects of this project is crucial to achieve a seamless and elegant finish.
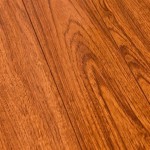
Before embarking on this endeavor, gather the necessary tools, including a circular saw, miter saw, hammer, nailer or stapler, and a square. Ensure you have an adequate amount of flooring to avoid potential shortages.
Planning the Layout
Plan the flooring layout carefully to minimize waste and ensure a visually appealing outcome. Determine the direction of the planks relative to the stairs, considering the flow of the room. Mark the locations of the stair treads and risers on the subfloor for reference.
At the base of the stairs, measure and cut a starting strip perpendicular to the stair treads. This will serve as the foundation for the flooring and ensure a clean edge.
Installing Around the Stair Treads
Using a miter saw, cut the flooring planks at a 45-degree angle to create a miter joint that fits snugly against the stair treads. Apply a thin bead of wood glue to the cut edges for additional stability.
Nail or staple the flooring planks to the subfloor, ensuring they are level and flush with the starting strip. Use a nailer or stapler specifically designed for wood flooring.
For the planks adjacent to the risers, cut them to length and secure them using nails or staples. Be sure to countersink the fasteners below the surface of the wood.
Installing Around the Stair Risers
To create a transition from the flooring to the stair risers, you can use molding or cover the gap with a thin strip of wood. Measure and cut the molding or wood strip to the desired length and attach it to the riser using nails or adhesive.
Alternatively, you can install a stair nosing, a prefabricated piece designed to cover the edge of the flooring and protect it from wear and tear.
Finishing Touches
Once the flooring is installed around the stairs, trim any excess with a circular saw and smooth the edges using a sanding block. Fill any gaps or nail holes with wood filler, and allow it to dry. Sand the filled areas to match the surrounding surface.
Apply a urethane finish or stain to the flooring to protect it and enhance its appearance. Follow the manufacturer's instructions for application and drying time. Once the finish is dry, your newly installed wood flooring around the stairs will be ready to enjoy.

Faq Installing Laminate Around Curved Staircase

Fitting Flooring Around Stair Rail Spindles

Fitting Flooring Around Stair Rail Spindles

Fitting Flooring Around Stair Rail Spindles

Fitting Flooring Around Stair Rail Spindles

Faq Installing Laminate Around Curved Staircase

Can You Laminate Stairs The Pros Cons

Fitting Flooring Around Stair Rail Spindles

How To Install Laminate Flooring On Stairs Direct Wood

How To Install Laminate Flooring On Staircase Step By Guide
Related Posts