```html
Laying Wood Flooring: A Comprehensive Guide
Wood flooring offers a timeless aesthetic and enduring appeal to any residential or commercial space. Installing wood flooring, while achievable as a do-it-yourself project, demands meticulous planning, precise execution, and a thorough understanding of the materials and techniques involved. This article provides a comprehensive guide to laying wood flooring, covering essential steps from subfloor preparation to the final finishing touches.
Subfloor Preparation: The Foundation for Success
The subfloor forms the foundation upon which the wood flooring is installed. Ensuring its stability, cleanliness, and levelness is paramount to preventing future problems such as squeaks, unevenness, and premature wear. The subfloor generally consists of either concrete or plywood. Each material requires specific preparation techniques.
For concrete subfloors, the primary concern is moisture. Concrete is porous and can wick moisture from the ground, which can damage wood flooring. A moisture test is essential. This can be performed using a calcium chloride test kit, which measures the rate of moisture vapor emission from the concrete. If the moisture levels are too high, a moisture barrier must be installed. This typically involves applying a liquid epoxy coating or laying down a polyethylene film. In addition, the concrete subfloor must be level. Low spots can be filled with a self-leveling compound, while high spots can be ground down.
Plywood subfloors should be inspected for any signs of damage, such as warping, rot, or delamination. Damaged sections must be replaced. The subfloor should also be securely fastened to the joists using screws to prevent movement. Any squeaks should be addressed by reinforcing the subfloor with additional screws or shims. Levelness is also crucial for plywood subfloors. High spots can be sanded down, and low spots can be filled with shims or plywood patches.
Regardless of the subfloor material, it must be thoroughly cleaned before installing the wood flooring. This involves sweeping, vacuuming, and potentially mopping (for concrete) to remove any dust, debris, or contaminants that could interfere with adhesion or create unevenness.
Choosing the Right Wood Flooring and Acclimation
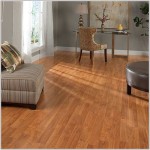
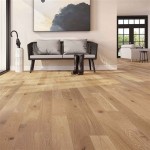
Selecting the appropriate type of wood flooring is a critical decision that depends on factors such as budget, desired aesthetic, foot traffic, and moisture levels. Wood flooring options generally fall into two categories: solid hardwood and engineered hardwood.
Solid hardwood is made from a single piece of wood. It is known for its durability, longevity, and natural beauty. Solid hardwood is typically more expensive than engineered hardwood and is more susceptible to moisture damage. It is best suited for rooms with stable humidity levels.
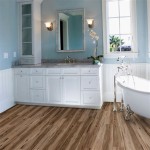
Engineered hardwood consists of multiple layers of wood veneer bonded together. The top layer is made of real hardwood, giving it the appearance of solid hardwood. Engineered hardwood is less expensive than solid hardwood and is more resistant to moisture. It is a good choice for basements, kitchens, and other areas where moisture levels may fluctuate.
Once the type of wood flooring has been chosen, acclimation is essential. Acclimation refers to the process of allowing the wood flooring to adjust to the temperature and humidity levels of the installation environment. This prevents warping, cupping, and gapping after installation. The wood flooring should be stored in the room where it will be installed for several days or even weeks, depending on the local climate and the type of wood flooring. The manufacturer's instructions should be consulted for specific acclimation recommendations.
Installation Techniques: Nailing, Gluing, and Floating
There are three primary methods for installing wood flooring: nailing, gluing, and floating. The best method depends on the type of wood flooring, the subfloor material, and the installer's preference.
Nailing: Nailing is the most common method for installing solid hardwood flooring. It involves nailing the wood flooring planks to the subfloor using a specialized flooring nailer. The nailer is designed to drive nails at an angle into the tongue of the planks, concealing the nail heads. Nailing is a fast and secure method, but it requires a wooden subfloor. It is not suitable for concrete subfloors unless a plywood underlayment is first installed.
Gluing: Gluing involves adhering the wood flooring planks directly to the subfloor using a construction adhesive. This method is suitable for both solid and engineered hardwood flooring, and it can be used over concrete or plywood subfloors. Gluing provides a strong and stable bond, reducing the risk of squeaks and movement. However, it can be messy and time-consuming, and it requires careful surface preparation to ensure proper adhesion.
Floating: Floating involves interlocking the wood flooring planks together without attaching them directly to the subfloor. The flooring "floats" over the subfloor. This method is typically used with engineered hardwood flooring that has a click-lock system. Floating is the easiest and fastest installation method, but it requires a level subfloor and the use of an underlayment to provide cushioning and sound absorption. A floating floor can sometimes feel less solid underfoot than a nailed or glued floor.
Regardless of the installation method, it is important to start with a straight and level starter row. This row will serve as a reference point for the rest of the installation. Use spacers along the walls to allow for expansion and contraction of the wood flooring. Maintain consistent spacing between the planks to create a uniform look. Stagger the end joints of the planks to avoid continuous lines that can weaken the floor. Use a tapping block and mallet to gently tap the planks together, ensuring a tight fit.
When cutting wood flooring planks, use a sharp saw and wear safety glasses. A miter saw is ideal for making precise cuts at angles. A jigsaw can be used for making curved cuts around obstacles such as pipes or doorways.
Finishing and Maintenance: Protecting Your Investment
Once the wood flooring is installed, it needs to be finished and maintained to protect it from wear and tear and to enhance its beauty. Finishing typically involves sanding, staining, and applying a protective topcoat.
Sanding removes any imperfections in the wood flooring surface and creates a smooth and even base for the stain and topcoat. Use a floor sander with progressively finer grits of sandpaper. Start with a coarse grit to remove any scratches or imperfections, and then gradually move to finer grits to achieve a smooth finish. Vacuum the floor thoroughly after each sanding pass to remove any dust.
Staining adds color and depth to the wood flooring. Choose a stain color that complements the room's decor and the wood's natural grain. Apply the stain evenly using a brush, roller, or rag. Allow the stain to dry completely before applying the topcoat.
The topcoat provides a protective layer that resists scratches, stains, and moisture. Polyurethane is a popular choice for wood flooring topcoats because it is durable and easy to apply. Apply several coats of polyurethane, allowing each coat to dry completely before applying the next. Lightly sand between coats to create a smooth finish.
Regular maintenance is essential for keeping wood flooring in good condition. Sweep or vacuum the floor regularly to remove dust and debris. Use a damp mop to clean the floor, but avoid using excessive water. Avoid using harsh chemicals or abrasive cleaners. Place rugs or mats in high-traffic areas to protect the floor from wear and tear. Consider applying a fresh coat of polyurethane every few years to maintain the floor's protective layer.
```
How To Install Hardwood Flooring The Home Depot

How To Install Laminate Flooring For Beginners

How To Install Hardwood Flooring For Beginners

How To Install A Hardwood Floor Build This Weekend

How To Install Hardwood Flooring The Home Depot

Step By Installation Guide For Wood Floor Tiles

How To Install Hardwood Flooring The Home Depot

Hardwood Floor Installations

Which Direction Should You Lay Hardwood Floors 50floor

Laying Hardwood Flooring Direction Classic Wood Floors
Related Posts