Laying Vinyl Plank Flooring In RV: An Essential Guide
Upgrading the flooring in your RV can significantly enhance its aesthetics and comfort. Vinyl plank flooring is a popular choice due to its durability, ease of maintenance, and wide range of styles. If you're considering installing vinyl plank flooring in your RV, follow this essential guide to ensure a successful and long-lasting installation.
Preparation and Planning
Before beginning the installation, it's crucial to prepare the subfloor and have a well-defined plan. The subfloor should be clean, level, and free from debris. Measure the area where the flooring will be installed, and determine the number of planks and any necessary transitions or trims.
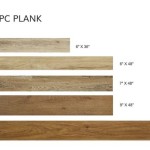
Choosing the Right Flooring
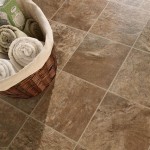
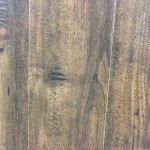
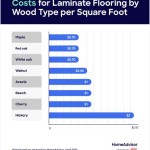
There are various types of vinyl plank flooring available, each with its unique characteristics. Consider the traffic patterns in your RV, the desired look, and your budget when selecting the flooring. Look for planks with a durable wear layer to withstand heavy foot traffic and moisture.
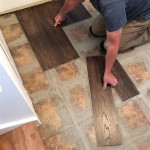
Installing the Planks
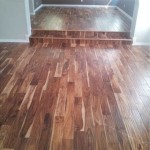
Start the installation by laying the first row of planks against a straight edge. Ensure the planks are tightly fit together and use spacers to maintain even gaps. Use a utility knife to cut the planks to size for the perimeter and around obstacles.
Adhesives and Underlayment
Depending on the type of vinyl plank you choose, you may need to use adhesives or underlayment. Adhesives provide a strong bond between the planks and the subfloor, while underlayment adds cushioning and improves sound insulation.
Transitions and Trims
To transition between different flooring materials or create a finished look around edges and doorways, use transitions and trims. These components come in various styles and colors to match the flooring and enhance the overall appearance of your RV.
Finishing Touches
After installing the planks, remove any spacers and clean the flooring thoroughly. Use a damp mop to wipe away any dust or debris. You can also apply a sealant to protect the flooring and extend its lifespan.
Maintenance and Care
Once your vinyl plank flooring is installed, regular maintenance is essential to keep it looking its best. Sweep or vacuum regularly to remove dirt and debris. Use a damp mop for occasional cleaning, and avoid using harsh chemicals or abrasive cleaners. Vinyl plank flooring is water-resistant but not waterproof, so spills should be cleaned up promptly to prevent damage.

How To Install Vinyl Plank Flooring Our Diy Camper 2 0 The Mommy

How To Install Vinyl Plank Flooring Our Diy Camper 2 0 The Mommy

Reflooring The Rv Installing Luxury Vinyl Planks Happilyrv

Diy Rv Renovation Installing Vinyl Plank Flooring Our Camper 2 The Mommy

The Cameo Camper Renovation Why How We Installed Vinyl Plank Flooring Lone Oak Design Co

Vinyl Plank Flooring Install In Our Rv

How To Install Vinyl Flooring Field Court

Reflooring The Rv Installing Luxury Vinyl Planks Happilyrv

How To Install Vinyl Plank Flooring Our Diy Camper 2 0 The Mommy

The Best Rv Flooring Ideas In 2024