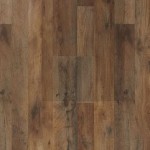
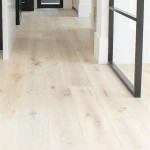
Laying Laminate Flooring on Wooden Floorboards
Laminate flooring provides a cost-effective and aesthetically pleasing alternative to solid hardwood, offering durability and ease of installation. While often laid on concrete subfloors, laminate flooring can also be successfully installed over existing wooden floorboards. This article will explore the necessary preparations, considerations, and techniques for achieving a professional and long-lasting result when laying laminate over wood.
Before embarking on the project, a thorough assessment of the existing wooden floorboards is crucial. This assessment will determine the suitability of the subfloor and identify any potential issues that need addressing prior to laminate installation. Overlooking these critical steps can lead to problems such as unevenness, squeaking, and ultimately, damage to the laminate flooring itself.
Subfloor Assessment and Preparation
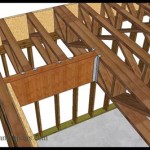
The first step in preparing wooden floorboards for laminate installation involves a detailed inspection. The primary objective is to ensure the subfloor is structurally sound, level, and clean. Any signs of rot, dampness, or insect infestation must be addressed immediately. These issues can compromise the integrity of the entire flooring system and lead to significant problems down the line. Replacing damaged floorboards is essential to provide a stable and reliable base for the laminate.
Levelness is paramount. Uneven floorboards will translate into an uneven laminate surface, which can be unsightly and potentially hazardous. A long spirit level or laser level should be used to identify any high or low spots. Minor imperfections can often be corrected with self-leveling compound, but more significant variations may require sanding down high spots or adding shims to low spots. Careful attention to detail at this stage is critical for achieving a professional-looking final result. A straight edge can be used to check for dips, and should be at least 6 feet long to span across multiple boards.
Cleaning the wooden floorboards thoroughly is equally important. Any dirt, dust, debris, or old adhesive residue must be removed. A thorough vacuuming followed by wiping with a damp cloth is generally sufficient. Ensuring a clean surface promotes proper adhesion of the underlayment and prevents the transfer of debris that could scratch or damage the laminate. If old adhesive is present, a suitable solvent may be required to remove it without damaging the wooden floor.
Squeaky floorboards can be a common issue. Before installing the laminate, it’s important to locate and eliminate any squeaks. Squeaks usually occur when floorboards rub against joists or nails. Tightening loose nails or screws, adding shims between the floorboards and joists, or applying lubricant can often resolve the problem. Ignoring squeaky floorboards will result in them becoming amplified under the laminate, creating a constant source of annoyance.
Finally, consider the direction of the existing floorboards. Generally, it is preferable to lay laminate flooring perpendicular to the direction of the wooden floorboards underneath. This adds structural strength and prevents the laminate from potentially warping or following the contours of the wood subfloor. However, room dimensions and aesthetic preferences may influence this decision. It is also useful to remove any existing baseboards or shoe molding. This provides a clean edge to work from and ensures a neat finish.
Underlayment Selection and Installation
The underlayment plays a crucial role in laying laminate flooring, particularly over wooden floorboards. It provides cushioning, sound insulation, and moisture protection. Selecting the appropriate underlayment is vital for achieving optimal performance and longevity of the laminate floor.
Several types of underlayment are available, each with its own characteristics and benefits. Foam underlayment is a common and affordable option, providing cushioning and sound absorption. Cork underlayment offers excellent thermal and acoustic insulation and is a more environmentally friendly choice. Rubber underlayment provides superior sound dampening and is often used in multi-story dwellings. The best choice will depend on the specific needs of the space and the desired level of performance. Consider factors such as foot traffic, noise levels, and moisture concerns when making your selection. The manufacturer's recommendations should also be consulted to ensure compatibility with the chosen laminate flooring.
Before installing the underlayment, ensure the prepared wooden floorboards are completely clean and dry. Roll out the underlayment across the floor, following the manufacturer's instructions. Overlap the edges slightly to create a continuous barrier. Secure the seams with appropriate tape, such as seam tape designed specifically for underlayment. This prevents moisture from seeping through the seams and damaging the subfloor or laminate. Cut the underlayment to fit around any obstacles, such as pipes or door frames. A utility knife and straight edge can be used to make precise cuts. Ensure the underlayment is properly adhered to the subfloor to prevent movement or shifting during the laminate installation.
Some laminate flooring products come with pre-attached underlayment. While these products can simplify the installation process, it’s still important to assess the quality and suitability of the integrated underlayment for the specific application. In some cases, an additional layer of underlayment may be necessary to provide enhanced sound insulation or moisture protection. It is also important to consider the overall thickness of the underlayment and laminate. Too much thickness can prevent doors from closing properly or create a tripping hazard at transitions between different floor coverings.
Laminate Flooring Installation Techniques
With the subfloor properly prepared and the underlayment in place, the next step is to install the laminate flooring. Proper installation techniques are essential for achieving a professional-looking and durable floor.
Begin by planning the layout of the laminate boards. Start in a corner of the room and work your way across, leaving an expansion gap of approximately 1/4 inch along the walls. Expansion gaps allow the laminate to expand and contract with changes in temperature and humidity, preventing buckling or warping. Use spacers to maintain a consistent gap along the walls. Consider the direction of the light source and align the laminate boards accordingly to minimize the visibility of seams. Stagger the end joints of the boards to create a more visually appealing and structurally sound floor.
Most laminate flooring products feature a click-lock system, which allows the boards to be easily snapped together without the need for glue or nails. Follow the manufacturer's instructions for engaging the click-lock mechanism. Use a tapping block and hammer to gently tap the boards together, ensuring a tight and seamless connection. Protect the edges of the boards with the tapping block to prevent damage. For boards that require cutting, use a laminate flooring cutter or a fine-tooth saw. Ensure the cut edges are clean and smooth to prevent splintering or chipping. When cutting around door frames or other obstacles, use a jigsaw for precise cuts. Be sure to measure accurately and leave the appropriate expansion gap.
As you progress across the room, continue to check the alignment of the boards and ensure the expansion gaps are maintained. Use a pull bar to tighten the last row of boards against the wall. Once the floor is complete, remove the spacers and install baseboards or shoe molding to cover the expansion gaps. This provides a finished and professional look. Properly installed laminate flooring should be durable, easy to maintain, and provide years of enjoyment.
Consider the use of transition strips where the laminate floor meets other surfaces, such as tile or carpet. Transition strips provide a smooth and seamless transition between different floor coverings and help to prevent tripping hazards. They also protect the edges of the laminate flooring from damage. Choose transition strips that complement the color and style of the laminate flooring and ensure they are properly installed according to the manufacturer's instructions. Pay attention to thresholds, often needing to remove a small portion of the door frame to accommodate the laminate's thickness. This is particularly important where laminate is running into carpet as the height difference can cause unnecessary wear to the edge of the laminate.
Finally, after completing the installation, inspect the floor for any imperfections or areas that require attention. Clean the floor with a damp cloth and appropriate laminate floor cleaner. Avoid using excessive water, as this can damage the laminate. With proper planning, preparation, and installation techniques, laying laminate flooring over wooden floorboards can be a successful and rewarding project.

How To Install Laminate Flooring For Beginners

A Guide To Fitting Wood And Laminate Flooring Expert Advice Floorsave

Laminate Floor Installation For Beginners 9 Clever Tips

Common Mistakes When Laying Laminate Leader Floors Blog

Laying Laminate On Corners Edges Transitions Parrys

Can I Lay Laminate Flooring Over Floorboards The Guys

Determining The Direction To Lay Install Hardwood Laminate Or Luxury Vinyl Plank Flooring

Installing Laminate Flooring For The First Time Home Renovation

How To Install Vinyl Flooring Over Hardwood Floors Wood Floor Fitting

How To Install Hardwood Flooring Step By Forbes Home