Kraus Laminate Flooring Installation: A Comprehensive Guide
This article provides a detailed guide to installing Kraus laminate flooring, outlining the necessary preparations, tools, and step-by-step procedures. Proper installation is crucial for achieving a visually appealing and durable floor that will provide years of satisfactory performance. Adhering to these instructions will help ensure successful installation and maintain the product's warranty.
Acclimation and Inspection of Materials
Prior to beginning the installation process, it is essential that the Kraus laminate flooring cartons are acclimated to the environment in which they will be installed. This process allows the flooring to adjust to the ambient temperature and humidity levels, minimizing expansion and contraction after installation. The unopened cartons should be placed in the room where the flooring will be installed for a minimum of 48 to 72 hours. Ideally, the room temperature should be maintained between 65°F (18°C) and 75°F (24°C), and the relative humidity should be between 30% and 60%. Deviation from these recommended environmental conditions can lead to flooring issues after installation, such as buckling or gapping.
During the acclimation period, it is also imperative to inspect the flooring cartons for any signs of damage. Carefully examine each carton for dents, tears, or water damage. Open each carton and inspect the laminate planks for defects, such as chips, scratches, or inconsistencies in color or pattern. Any damaged or defective planks should be set aside and not used during the installation process. Contact the retailer or Kraus directly to arrange for replacements of any unusable materials. Installing damaged flooring can compromise the overall appearance and performance of the finished floor, and it may also void the warranty.
Furthermore, it is necessary to calculate the square footage of the room and add an additional 5-10% for waste and cuts. This ensures that there is sufficient material to complete the project, even accounting for mistakes or complex cuts around obstacles, such as pipes or door frames. This extra material is particularly important if the flooring has a specific pattern or grain orientation, as it allows for proper matching and a more aesthetically pleasing result.
Subfloor Preparation and Underlayment Installation
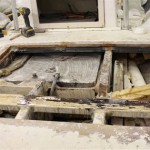
The integrity of the subfloor is paramount to the success of any laminate flooring installation. The subfloor must be clean, level, dry, and structurally sound. Any imperfections in the subfloor will telegraph through the laminate flooring, resulting in an uneven and potentially unstable surface. Addressing any subfloor issues prior to installing the laminate flooring is crucial for achieving a professional and long-lasting result.
Begin by thoroughly cleaning the subfloor to remove any debris, dust, dirt, or adhesive residue. Sweep, vacuum, and if necessary, use a damp mop to clean the subfloor thoroughly. Ensure that the subfloor is completely dry before proceeding. Any moisture present in the subfloor can lead to mold growth and damage to the laminate flooring over time.
Next, assess the levelness of the subfloor using a long, straight edge and a level. Any unevenness greater than 3/16 inch over a 10-foot span should be addressed. Small imperfections can be corrected using a self-leveling compound. Follow the manufacturer's instructions for mixing and applying the self-leveling compound. Allow the compound to dry completely before proceeding with the installation. Larger imperfections may require more extensive subfloor repairs, such as patching or replacing damaged sections of the subfloor.
Once the subfloor is clean, level, and dry, the underlayment can be installed. The underlayment serves as a moisture barrier, a sound dampener, and provides additional cushioning for the laminate flooring. It also helps to smooth out minor imperfections in the subfloor. Kraus laminate flooring typically requires the use of an approved underlayment. Refer to the manufacturer's recommendations for the appropriate type and thickness of underlayment to use with the specific laminate flooring product. Roll out the underlayment, following the manufacturer's instructions, and tape the seams securely to prevent moisture from penetrating through to the subfloor. Overlap joints should be minimized, and the underlayment should be installed perpendicular to the direction of the laminate flooring installation.
Laying the Laminate Flooring
With the subfloor properly prepared and the underlayment installed, the actual installation of the Kraus laminate flooring can begin. Careful planning and attention to detail are essential to ensure a professional and aesthetically pleasing outcome. It is recommended to dry-lay the first few rows of flooring without clicking them together to determine the best layout and minimize waste.
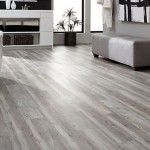
Start by determining the direction in which the flooring will be installed. Generally, it is recommended to install the flooring parallel to the longest wall in the room or towards the main source of light. This will create a more visually appealing and uniform appearance. Establish a straight starting line along the wall using a chalk line or a laser level. This will ensure that the first row of flooring is perfectly straight and aligned.
When cutting planks, use a saw appropriate for laminate flooring, such as a circular saw with a fine-tooth blade, a jigsaw, or a laminate flooring cutter. Always wear safety glasses and gloves when cutting laminate flooring. Make precise and clean cuts to ensure a tight and professional-looking fit. It is often helpful to score the surface of the laminate flooring with a utility knife before cutting to prevent chipping or splintering.
Begin installing the first row of flooring along the established starting line, leaving an expansion gap of at least 1/4 inch between the edge of the flooring and the wall. This expansion gap allows for the natural expansion and contraction of the flooring without causing buckling or damage. Use spacers to maintain the consistent expansion gap along the perimeter of the room.
The locking mechanisms of Kraus laminate flooring typically involve angling the planks together and clicking them into place. Carefully align the edges of the planks and gently tap them together using a tapping block and a hammer. Avoid using excessive force, as this can damage the locking mechanisms. Ensure that the planks are securely locked together and that there are no gaps between them. Follow the manufacturer's instructions for the specific locking mechanism of the Kraus laminate flooring product being installed.
Continue installing the flooring row by row, staggering the end joints of the planks to create a more visually appealing and structurally sound floor. Staggering the joints also helps to distribute the weight evenly across the floor and prevent the formation of long, continuous seams. Aim for a minimum stagger of 6 inches between the end joints of adjacent rows.
When installing the flooring around obstacles, such as pipes or door frames, use a jigsaw to carefully cut the flooring to fit around the obstacles. Measure accurately and make precise cuts to ensure a tight and professional-looking fit. It is often helpful to create a template of the obstacle to ensure accurate cutting.
For the final row of flooring, it may be necessary to rip the planks to the appropriate width using a table saw or a circular saw. Measure carefully and make precise cuts to ensure a tight and consistent fit along the wall. Remember to maintain the required expansion gap along the perimeter of the room.
Finishing Touches and Maintenance
Once the laminate flooring has been installed, the finishing touches can be added to complete the project. Remove the spacers from around the perimeter of the room and install baseboards or quarter-round molding to conceal the expansion gap and provide a finished look. Secure the baseboards or molding to the wall, not to the flooring, using nails or screws. Pre-drill holes to prevent splitting the wood.
Install transition moldings in doorways or where the laminate flooring meets other types of flooring. Transition moldings provide a smooth and seamless transition between different flooring materials and help to protect the edges of the laminate flooring from damage. Choose transition moldings that complement the color and style of the laminate flooring.
Clean the floor thoroughly to remove any dust, dirt, or debris. Use a soft broom, a vacuum cleaner with a soft brush attachment, or a damp mop to clean the floor. Avoid using excessive water or harsh cleaning chemicals, as these can damage the laminate flooring. Follow the manufacturer's recommendations for cleaning and maintaining the Kraus laminate flooring.
Place furniture pads under the legs of furniture to protect the flooring from scratches and dents. Avoid dragging heavy objects across the floor. Use walk-off mats at entrances to prevent dirt and debris from being tracked onto the floor. Regularly sweep or vacuum the floor to remove any loose dirt or debris. Clean up spills immediately to prevent staining or damage to the flooring.
Regular maintenance will help to keep the Kraus laminate flooring looking its best for years to come. By following these installation instructions and maintenance guidelines, a durable and aesthetically pleasing floor that will enhance the beauty and value of the home will be achieved.

Kraus Installation Guide Flooring

Kraus Laminate Flooring Review

Installing Kraus Lvt Flooring

Kraus Luxury Vinyl Flooring Installation

Kraus Laminate Flooring Review

Kraus Luxury Vinyl Flooring Installation

Kraus 4105 Urban Classics Spc Luxury Vinyl Plank 02 Botanic Commercial Floorzz

Kraus Spc Rigid Core Urban Classics Belmore

Studio Essentials Laminate Collection Vancouver Flooring

Kl8wr02 Kraus Flooring
Related Posts