Invincible H2O Vinyl Plank Flooring Installation Instructions: A Comprehensive Guide
Transforming your space with Invincible H2O vinyl plank flooring is a project that demands meticulous attention to detail. Whether you're a seasoned DIY enthusiast or a professional installer, following these comprehensive instructions will ensure a flawless and durable installation.
Pre-Installation Preparation
Before embarking on the installation process, it's imperative to ensure your subfloor is suitable. The subfloor should be flat, level, dry, and free from imperfections. If any repairs or leveling is required, address them before proceeding with the installation.
Acclimation
Allow the vinyl planks to acclimate to the installation environment for at least 48 hours. This allows the planks to adjust to the temperature and humidity of the room, preventing potential buckling or warping.
Layout Planning
Sketch a layout plan to determine the best starting point for installation. Consider the direction of natural light, flow of traffic, and furniture placement. Ensure that there is a minimum of 1/4" gap around the perimeter of the room to accommodate expansion.
Installation Techniques
Staggered Install: Place the planks in an offset pattern, resembling brickwork. This enhances stability and reduces the visibility of seams.
Floating Install: The planks are not glued or nailed to the subfloor. Instead, they are held together by the locking system and the weight of the installed floor.
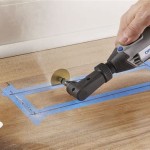
Cutting Planks
Measure and mark the planks to the desired length using a tape measure and a straight edge. Use a sharp utility knife or a flooring cutter to make precise cuts. To ensure a clean cut, score the plank several times before snapping it.
Locking System
The Invincible H2O vinyl planks feature a locking system that interlocks the planks seamlessly. Align the tongue of one plank with the groove of the adjacent plank and use a tapping block and hammer to tap the planks together.
Transitions and Moldings
Transitions and moldings are essential for creating a seamless transition between different flooring surfaces or for concealing gaps around the perimeter of the room. Use the appropriate transition pieces and moldings for your specific installation needs.
Post-Installation Care
Once the installation is complete, sweep or vacuum the floor to remove any debris. Clean the floor regularly using a damp mop and a pH-neutral cleaner. Avoid using harsh chemicals or abrasive cleaning products.
Additional Tips

Invincible H2o Flooring

Invincible H2o Luxury Vinyl Plank

Invincible H2o Luxury Vinyl Plank

Invincible H2o Modern Flooring Carpet One Floor Home In New Orleans

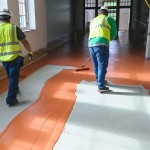
H2o Floor Installation

Invincible Brand Flooring Exclusively From Carpet One Floor Home Livermore Ca

Invincible Brand Flooring Exclusively From Carpet One Floor Home Livermore Ca

Invincible H2o Cashmere Head Office

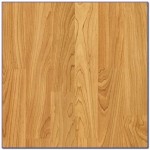
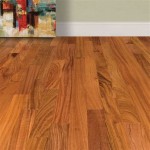
Vinyl Plank Flooring

Luxury Vinyl Installation Can S Carpet On
Related Posts