Interlocking Wood Tile Flooring Installation Instructions For Beginners
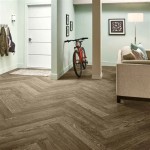
Interlocking wood tile flooring, also known as floating wood tiles, offers a convenient and aesthetically pleasing flooring solution for both indoor and outdoor spaces. This type of flooring system allows for relatively easy installation, making it a popular choice for DIY enthusiasts and beginner home improvement projects. The following instructions provide a comprehensive guide to installing interlocking wood tile flooring, covering preparation, installation steps, and essential considerations for a successful outcome.
Preparing for Installation: Assessment, Tools, and Materials
Prior to commencing the installation process, thorough preparation is crucial. This stage involves assessing the existing surface, gathering the necessary tools and materials, and acclimatizing the wood tiles to the environment. Neglecting these preliminary steps can lead to complications during installation and compromise the longevity and appearance of the finished floor.
Surface Assessment: The first step is to evaluate the existing flooring or subfloor. Interlocking wood tiles can be installed over various surfaces, including concrete, tile, and existing wood floors. The key requirement is a level, stable, and clean surface. Any existing flooring should be securely fastened and free from significant damage. If the subfloor is uneven, it may require leveling compound to create a smooth surface. Significant cracks or damage should be repaired before proceeding. Thoroughly clean the surface to remove dust, debris, and grease. A vacuum cleaner is effective for removing loose particles, while a damp mop can address surface dirt. Allow the surface to dry completely before starting the installation.
Tool and Material Acquisition: Gathering the necessary tools and materials beforehand ensures a smooth and efficient installation process. Essential tools include: * Measuring tape: For accurate measurements of the installation area. * Utility knife or saw: For cutting tiles to fit around edges and obstacles. * Rubber mallet: For gently locking the tiles together. * Level: To ensure the tiles are installed on a level surface. * Spacers (optional): To maintain consistent spacing between tiles, especially when installing on uneven surfaces. * Pencil: For marking cutting lines. * Safety glasses: To protect eyes from debris. * Gloves: To protect hands.
In addition to the tools, the required materials include the interlocking wood tiles themselves and potentially an underlayment, depending on the subfloor and desired performance. Determine the square footage of the area to be covered and purchase approximately 5-10% extra tiles to account for cuts and potential waste. Consider the type of wood and finish of the tiles, ensuring they are suitable for the intended environment (indoor or outdoor). An underlayment can provide added cushioning, sound insulation, and moisture protection. Research and select an underlayment appropriate for the chosen tiles and subfloor conditions.
Acclimatization: Wood is a natural material that expands and contracts with changes in temperature and humidity. Therefore, it is essential to acclimatize the interlocking wood tiles to the environment in which they will be installed. This process involves storing the tiles in the room where they will be installed for at least 48 to 72 hours prior to installation. This allows the wood to adjust to the temperature and humidity levels, minimizing the risk of warping or gapping after installation. Stack the tiles loosely, allowing air to circulate around them. Avoid placing them directly against walls or in direct sunlight.
Installation Procedures: Laying the Foundation for Success
The installation process involves carefully interlocking the wood tiles, ensuring a secure and visually appealing result. Attention to detail and adherence to the following steps are critical for a successful installation.
Planning the Layout: Before starting the actual installation, it is beneficial to plan the layout of the tiles. This involves determining the starting point, considering the direction of the tiles, and planning for cuts around edges and obstacles. The starting point should ideally be a straight edge, such as a wall, and the tiles should be laid out in a way that minimizes the number of cuts required. Often, aligning the tiles with the longest wall creates the most visually pleasing aesthetic. Use a measuring tape and pencil to map out the layout, marking any areas where cuts will be necessary. Consider the placement of transitions between different flooring types, such as doorways or thresholds. Transitions can be achieved using transition strips or by carefully cutting and fitting the tiles to meet the existing flooring.
Interlocking the Tiles: Begin the installation by placing the first tile in the designated starting point. Ensure that the tile is properly aligned and level. Most interlocking wood tiles feature a tongue-and-groove or similar locking mechanism. Align the tongue of the second tile with the groove of the first tile and gently press them together. Use a rubber mallet to tap the tiles together, ensuring a secure and tight fit. Avoid using excessive force, as this can damage the tiles. Continue this process, laying out rows of tiles and interlocking them securely. Periodically check the alignment and level of the tiles, making adjustments as needed. Use spacers, if desired, to maintain consistent spacing between tiles. As you approach walls or obstacles, measure and cut the tiles to fit. Use a utility knife or saw to make the cuts. It is often helpful to use a template or guide to ensure accurate cuts. When cutting tiles, always wear safety glasses to protect your eyes from debris. After cutting, carefully fit the tiles into place, ensuring a snug fit. If necessary, use a rubber mallet to tap them into position.
Addressing Obstacles and Edges: Obstacles such as pipes, doorways, and corners require special attention during installation. For pipes, measure the diameter of the pipe and cut a hole in the tile that is slightly larger than the pipe diameter. Use a jigsaw or other appropriate tool to make the cut. After fitting the tile around the pipe, consider using a caulk or sealant to fill the gap and prevent water from seeping underneath. For doorways, you may need to undercut the door jamb to allow the tiles to slide underneath. Use a jamb saw or oscillating multi-tool to make the undercut. For corners, carefully measure and cut the tiles to fit snugly into the corner. Consider using a miter saw to create precise angle cuts. Edges of the flooring installation often require edge pieces or transition strips to provide a finished look and protect the cut edges of the tiles. These pieces are available in various materials and styles to match the wood tiles. Install the edge pieces or transition strips according to the manufacturer's instructions. These pieces typically attach using adhesive or screws.
Post-Installation Care and Maintenance
Proper care and maintenance are essential for preserving the appearance and longevity of interlocking wood tile flooring. Establishing a regular cleaning routine and taking preventative measures can help to protect the floor from damage and maintain its aesthetic appeal.
Cleaning and Maintenance: Regular cleaning is essential for removing dirt, dust, and debris that can accumulate on the surface of the tiles. Sweep or vacuum the floor regularly to remove loose particles. Use a damp mop to clean the floor, using a mild detergent specifically designed for wood floors. Avoid using excessive water, as this can damage the wood. Always wring out the mop thoroughly before mopping the floor. Avoid using harsh chemicals or abrasive cleaners, as these can strip the finish and damage the wood. For outdoor installations, consider using a pressure washer to remove stubborn dirt and grime. However, use caution and avoid using excessive pressure, as this can damage the wood.
Protection and Prevention: Taking preventative measures can help to protect the floor from scratches, dents, and other damage. Place mats or rugs at entrances to trap dirt and debris before they can be tracked onto the floor. Use furniture pads under the legs of chairs and tables to prevent scratches. Avoid dragging heavy objects across the floor. Clean up spills immediately to prevent staining. For outdoor installations, consider applying a sealant or stain to protect the wood from the elements. This can help to prevent fading, warping, and cracking. Regularly inspect the floor for any signs of damage, such as loose tiles or cracks. Repair any damage promptly to prevent it from worsening.
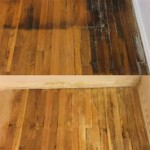
Addressing Common Issues: While interlocking wood tile flooring is relatively easy to install and maintain, certain issues may arise over time. Gapping between tiles can occur due to changes in temperature and humidity. To address this, consider using wood filler or sealant to fill the gaps. Loose tiles can be re-secured by applying adhesive to the interlocking edges. Scratches and dents can be repaired using wood filler or touch-up paint. For more significant damage, it may be necessary to replace the affected tiles. It is advisable to retain some spare tiles from the original installation for future repairs.

How To Install Wooden Flooring Over Tiles Floors Lamiwood Designer

How To Install Patio Deck Tiles Installing Interlocking

Step By Installation Guide For Wood Floor Tiles

A Beginner S Guide To Installing Vinyl Plank Flooring Dumpsters Com

How To Install Vinyl Plank Flooring As A Beginner Home Renovation

Yaheetech Patio Deck Tiles 27pcs

How To Install Lock Engineered Hardwood Flooring

How To Install Laminate Flooring For Beginners

Renwick Fir Wood Outdoor Interlocking Flooring Tiles For Balcony Patio Garden 12 X Brown Pack Of 27 Com

27 Piece Interlocking Solid Wood Floor Deck Tiles Brown Coopers Of Stortford
Related Posts