Installing Vinyl Wood Flooring Over Tile: A Comprehensive Guide
Vinyl wood flooring offers a practical and aesthetically pleasing solution for homeowners seeking to update their interiors without the extensive demolition and reconstruction often associated with traditional flooring replacements. Installing vinyl wood flooring directly over existing tile can be a viable and cost-effective option, provided that certain conditions are met and proper installation techniques are followed. This article provides a detailed guide to the process, encompassing assessment, preparation, installation, and essential considerations.
Assessing the Suitability of Existing Tile
The crucial first step involves a thorough assessment of the existing tile floor. Not all tile floors are suitable for overlayment with vinyl wood flooring. Several factors must be carefully evaluated to determine the feasibility of direct installation. If these conditions aren't met, the longevity and appearance of the vinyl wood flooring can be compromised.
Tile Condition: Existing tiles must be in good condition. The presence of cracked, loose, or uneven tiles is a significant concern. Loose tiles will create voids underneath the newly installed vinyl, leading to flexing and potential damage over time. Cracked tiles may propagate fractures through the vinyl layer, diminishing its structural integrity and visual appeal. Uneven tiles will create an uneven surface, resulting in an aesthetically displeasing and potentially hazardous floor.
Tile Smoothness: The surface of the existing tile must be relatively smooth. Highly textured tiles, such as those with deep grout lines or pronounced patterns, can telegraph through the vinyl flooring, creating an undesirable visual effect. Furthermore, these textures can create air pockets, preventing proper adhesion and potentially compromising the longevity of the installation.
Tile Levelness: The floor must be reasonably level. Significant variations in height across the floor surface can result in an uneven finish and potential tripping hazards. Leveling compounds may be necessary to address any substantial height discrepancies.
Moisture Content: Excessive moisture beneath the tile is a major concern. Moisture can lead to mold growth, adhesive failure, and warping of the vinyl flooring. Before commencing installation, it's essential to test the moisture content of the subfloor using a moisture meter. If moisture levels exceed acceptable limits, remediation measures, such as addressing leaks or installing a moisture barrier, must be taken before proceeding.
Grout Lines: The depth and width of the grout lines between the tiles play a crucial role. Deep or wide grout lines can telegraph through the vinyl, creating an undesirable texture. In such cases, filling the grout lines with a leveling compound is often necessary to create a smooth, even surface.
If the existing tile floor fails to meet these criteria, alternative solutions, such as removing the tile or installing a new subfloor, may be more appropriate.
Preparing the Tile Surface
Proper preparation is paramount for a successful vinyl wood flooring installation over tile. Thorough cleaning and surface preparation are essential to ensure adequate adhesion and prevent future problems.
Cleaning: The first step involves a thorough cleaning of the tile surface. Use a heavy-duty cleaner designed to remove dirt, grease, and any existing waxes or sealants. Pay particular attention to grout lines, as these areas tend to accumulate dirt and grime. Rinse the floor thoroughly with clean water and allow it to dry completely before proceeding.
Repairing Cracks and Chips: Any cracks or chips in the tile must be repaired. Use a tile repair compound to fill the damaged areas, ensuring that the surface is flush with the surrounding tile. Allow the repair compound to dry completely before sanding it smooth.
Leveling Uneven Tiles: If there are individual tiles that are significantly higher or lower than the surrounding tiles, they must be leveled. This can be accomplished using a self-leveling compound specifically designed for floor repair. Apply the compound according to the manufacturer's instructions and allow it to dry and cure completely.
Filling Grout Lines: As previously mentioned, deep or wide grout lines must be filled to prevent telegraphing. Use a cement-based grout filler or a self-leveling compound to fill the grout lines, ensuring that the surface is flush with the surrounding tile. Allow the filler to dry completely and then sand it smooth to create a seamless surface.
Sanding: Lightly sanding the tile surface can improve adhesion. Use a fine-grit sandpaper to roughen the surface slightly, creating a better bond for the adhesive. Be careful not to sand too aggressively, as this can damage the tile.
Priming: Applying a primer specifically designed for vinyl flooring installation can further enhance adhesion. The primer creates a uniform surface and helps the adhesive bond properly to the tile. Choose a primer recommended by the vinyl flooring manufacturer and apply it according to the instructions provided.
Following these preparation steps diligently will significantly increase the likelihood of a successful and long-lasting vinyl flooring installation.
Installing the Vinyl Wood Flooring
Once the tile surface has been properly prepared, the vinyl wood flooring can be installed. The installation process varies depending on the type of vinyl flooring being used (e.g., glue-down, click-lock, or loose-lay). Below are general guidelines applicable to most vinyl flooring installations, but always refer to the manufacturer's instructions for specific recommendations.
Acclimation: Allow the vinyl flooring to acclimate to the room temperature for at least 48 hours before installation. This allows the material to expand or contract, minimizing the risk of buckling or gapping after installation. Store the flooring in the room where it will be installed, away from direct sunlight or drafts.
Planning the Layout: Before starting the installation, plan the layout of the vinyl planks or tiles. Consider the direction of the planks and strive for a balanced and aesthetically pleasing pattern. Minimize the number of small cuts needed at the edges of the room by adjusting the starting point.
Glue-Down Installation: For glue-down vinyl flooring, apply the adhesive recommended by the manufacturer to the prepared tile surface using a trowel with the appropriate notch size. Apply the adhesive in manageable sections, working in small areas to prevent it from drying out. Carefully position the vinyl planks or tiles onto the adhesive, pressing firmly to ensure full contact. Use a roller to further secure the flooring and remove any air pockets.
Click-Lock Installation: Click-lock vinyl flooring features interlocking edges that allow the planks or tiles to be easily joined together without adhesive. Start by laying the first row of planks along a straight edge, such as a wall. Align the interlocking edges of each plank and click them together, following the manufacturer's instructions. Use a tapping block and a hammer to gently tap the planks together, ensuring a tight and seamless fit. Continue laying the planks row by row, staggering the end joints for a more natural look.
Loose-Lay Installation: Loose-lay vinyl flooring relies on its weight and friction to stay in place. While often requiring less preparation, it's critical the subfloor is very even. Some loose-lay products may require adhesive around the perimeter of the room and in high-traffic areas. Follow the manufacturer's guidance regarding perimeter fastening.
Cutting: Use a utility knife or a vinyl flooring cutter to cut the planks or tiles to size. Make accurate cuts, especially around doorways, pipes, and other obstacles. When cutting, always use a straight edge to ensure clean and precise cuts.
Seaming: For glue-down installations, roll the seams with a seam roller to ensure a strong bond. For click-lock installations, ensure that the seams are tightly locked together.
Finishing: Once the flooring is installed, install baseboards and shoe molding to cover the perimeter gaps and create a finished look. Install transition strips where the vinyl flooring meets other flooring types to provide a smooth and safe transition.
Essential Considerations and Best Practices
Several additional factors warrant careful consideration to ensure a successful and durable vinyl wood flooring installation over tile.
Subfloor Preparation: The importance of adequate subfloor preparation cannot be overstated. A poorly prepared subfloor will lead to problems down the road, including adhesive failure, unevenness, and premature wear.
Adhesive Selection: Choosing the right adhesive is crucial for glue-down installations. Use an adhesive specifically designed for vinyl flooring and recommended by the flooring manufacturer. Applying the correct amount as specified by the manufacturer is also vital.
Expansion Gaps: Leave an expansion gap of approximately ¼ inch around the perimeter of the room. This allows the vinyl flooring to expand and contract with temperature and humidity changes without buckling or warping.
Rolling: Rolling the flooring after installation is essential to ensure proper adhesion. Use a heavy floor roller to press the vinyl flooring firmly into the adhesive, removing any air pockets and creating a strong bond.
Protection: Protect the newly installed vinyl flooring from heavy traffic and furniture for at least 24 hours after installation. This allows the adhesive to fully cure and the flooring to stabilize.
Maintenance: Regular cleaning and maintenance are essential to keep your vinyl wood flooring looking its best. Use a damp mop and a mild detergent to clean the floor regularly. Avoid using harsh chemicals or abrasive cleaners, as these can damage the surface of the vinyl.
By adhering to these guidelines and best practices, homeowners can successfully install vinyl wood flooring over existing tile, creating a beautiful and durable floor that will last for years to come.

New Vinyl Plank Flooring Over Tile Table And Hearth

New Vinyl Plank Flooring Over Tile Table And Hearth

Can You Put Vinyl Flooring Over Tile Igloo Surfaces

New Vinyl Plank Flooring Over Tile Table And Hearth

Vinyl Plank Wood Directly Over Tile

New Vinyl Plank Flooring Over Tile Table And Hearth

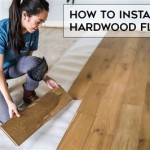
How To Install Vinyl Plank Flooring As A Beginner Home Renovation

Can You Install Vinyl Plank Over Tile Flooring America

How To Install Vinyl Plank Flooring As A Beginner Home Renovation

Can You Put Laminate Or Vinyl Plank Flooring Over Tile
Related Posts