Installing Vinyl Plank Flooring Over Tile: A Comprehensive Guide
Vinyl plank flooring has emerged as a popular choice for homeowners seeking a durable, aesthetically pleasing, and relatively easy-to-install flooring option. One of its significant advantages is its adaptability, allowing for installation over existing surfaces, including tile. This eliminates the messy and time-consuming task of removing the old tile, making it an attractive proposition for renovation projects. This article provides a comprehensive guide to installing vinyl plank flooring over tile, outlining essential preparations, selecting appropriate materials, and detailing the installation process.
Before embarking on this project, a thorough assessment of the existing tile floor is crucial. Identifying and addressing any potential problems early on will ensure a successful and long-lasting installation. This assessment should focus on several key areas, including the stability of the tile, the flatness of the surface, and the presence of any moisture issues.
The stability of the existing tile is paramount. Loose, cracked, or uneven tiles must be addressed before proceeding. Loose tiles should be removed and replaced with new tiles or filled with a suitable patching compound. Cracked tiles can sometimes be repaired with epoxy-based fillers, but severely cracked tiles are best replaced. Uneven tiles can create an uneven subfloor, which can compromise the integrity and appearance of the vinyl plank flooring. This may require the use of self-leveling compound to create a flat and even surface.
The flatness of the surface is another critical factor. Vinyl plank flooring requires a relatively flat and smooth subfloor to prevent telegraphing, which is when imperfections in the subfloor become visible through the vinyl plank. A straightedge or level can be used to identify any significant dips or humps in the existing tile floor. These imperfections must be addressed with self-leveling compound or patching compound to create a smooth and even surface.
Moisture testing is an essential step in preparing the existing tile floor. Excessive moisture can lead to mold growth and undermine the adhesive bond between the vinyl plank flooring and the subfloor. A moisture meter can be used to measure the moisture content of the tile and subfloor. If excessive moisture is detected, the source of the moisture must be identified and addressed before proceeding. This may involve repairing leaks, improving ventilation, or applying a moisture barrier.
Preparing the Tile Surface for Vinyl Plank Installation
Once the initial assessment is complete and any necessary repairs have been made, the next step is to thoroughly clean and prepare the tile surface. This involves removing any dirt, debris, and residue that could interfere with the adhesion of the vinyl plank flooring. Start by sweeping or vacuuming the entire area to remove loose dirt and debris. Then, use a damp mop and a mild detergent to clean the tile surface. Avoid using harsh chemicals or abrasive cleaners, as these can damage the tile or leave behind a residue that could interfere with adhesion.
After cleaning, it is often recommended to etch the tile surface to improve adhesion. Etching involves creating a slightly rough surface that provides a better grip for the adhesive. This can be achieved using a chemical etching solution or by lightly sanding the tile surface with a fine-grit sandpaper. If using a chemical etching solution, follow the manufacturer's instructions carefully and wear appropriate protective gear, such as gloves and eye protection. If sanding, be sure to thoroughly clean the surface afterward to remove any sanding dust.
Another important consideration is the grout lines in the existing tile floor. Grout lines can create an uneven surface that can telegraph through the vinyl plank flooring. To address this, it is often necessary to fill the grout lines with a patching compound. Apply the patching compound to the grout lines using a putty knife, ensuring that the compound is flush with the surrounding tile surface. Allow the patching compound to dry completely according to the manufacturer's instructions, and then sand it smooth to create a seamless transition between the tile and the grout lines.
Selecting the Right Vinyl Plank Flooring and Underlayment
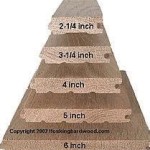
Choosing the appropriate vinyl plank flooring is critical for both the aesthetic appeal and the long-term performance of the installation. Consider factors such as the thickness of the plank, the wear layer, the core material, and the installation method. Thicker planks generally offer greater durability and stability, while a thicker wear layer provides better resistance to scratches and dents. The core material can be either rigid or flexible, depending on the desired level of comfort and sound insulation. The installation method can be either click-lock or glue-down, with click-lock being generally easier for DIY installations.
When installing vinyl plank flooring over tile, it is often recommended to use an underlayment. Underlayment provides additional cushioning, sound insulation, and moisture protection. Choose an underlayment specifically designed for use with vinyl plank flooring. Some vinyl plank flooring products come with a pre-attached underlayment, which can simplify the installation process. If using a separate underlayment, install it according to the manufacturer's instructions before installing the vinyl plank flooring.
Consider the intended use of the room when selecting the vinyl plank flooring. For high-traffic areas, such as kitchens and hallways, choose a thicker plank with a thicker wear layer. For bathrooms and other areas prone to moisture, choose a waterproof vinyl plank flooring product. Also, consider the aesthetic style of the room and choose a vinyl plank flooring that complements the existing décor. Vinyl plank flooring is available in a wide range of colors, patterns, and textures, so you can easily find a product that suits your taste.
Installing the Vinyl Plank Flooring
Once the tile surface is prepared and the appropriate materials have been selected, the actual installation of the vinyl plank flooring can begin. Before starting, acclimate the vinyl plank flooring to the room's temperature and humidity for at least 48 hours. This will allow the planks to expand or contract, minimizing the risk of warping or buckling after installation.
Start by laying out the first row of planks along a straight edge, such as a wall or a chalk line. Maintain a consistent expansion gap between the planks and the wall. This expansion gap allows the planks to expand and contract without putting pressure on the surrounding walls. Use spacers to maintain the expansion gap.
If using a click-lock vinyl plank flooring, simply align the edges of the planks and snap them together. Use a tapping block and a hammer to gently tap the planks into place, ensuring a tight and seamless connection. If using a glue-down vinyl plank flooring, apply adhesive to the subfloor using a trowel, following the manufacturer's instructions. Then, carefully position the planks on the adhesive and press them firmly into place. Use a roller to ensure good contact between the planks and the adhesive.
Continue installing the planks row by row, staggering the end joints to create a more visually appealing and structurally sound floor. Use a utility knife or a saw to cut the planks to fit around obstacles, such as pipes or doorways. Remember to maintain the expansion gap around all obstacles.
Once the entire floor is installed, remove the spacers and install baseboards or quarter round molding to cover the expansion gap. This will give the floor a finished and professional look. Clean the floor with a damp mop and mild detergent to remove any dirt or debris. Avoid using harsh chemicals or abrasive cleaners.
For glue-down installations, it is important to allow the adhesive to fully cure before walking on the floor or placing furniture on it. Follow the manufacturer's instructions for curing time. This will ensure that the adhesive has fully bonded the planks to the subfloor.
Installing vinyl plank flooring over tile can be a cost-effective and time-saving way to renovate a room. By carefully preparing the tile surface, selecting the right materials, and following the installation instructions, you can achieve a beautiful and durable floor that will last for years to come. Remember to always consult the manufacturer's instructions for specific product recommendations and installation guidelines.

New Vinyl Plank Flooring Over Tile Table And Hearth

New Vinyl Plank Flooring Over Tile Table And Hearth

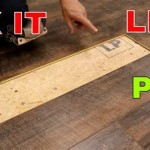
How To Install Vinyl Plank Flooring As A Beginner Home Renovation

How To Install Vinyl Plank Flooring As A Beginner Home Renovation

Can You Put Vinyl Plank Flooring Over Ceramic Tile Floors Blvd

Can You Put Laminate Or Vinyl Plank Flooring Over Tile

Can You Install Vinyl Plank Over Tile Flooring America

Laying Vinyl Planks Over Tiles Flooring Kitchen

Installing Vinyl Plank Flooring How To Fixthisbuildthat

How To Install L And Stick Vinyl Plank Flooring The Nifty Nester
Related Posts