Installing Vinyl Plank Flooring Over Hardwood Floor: A Comprehensive Guide
Enhancing your home's aesthetics and functionality with vinyl plank flooring is an excellent choice. However, navigating the installation process can be challenging, especially when working over an existing hardwood floor. To ensure a successful outcome, careful planning and execution are key. This comprehensive guide will provide you with all the essential steps and considerations for installing vinyl plank flooring over a hardwood floor.
1. Preparation:
Begin by thoroughly cleaning the hardwood floor to remove dirt, dust, and any surface residue. Ensure the floor is completely dry before proceeding. Next, inspect the hardwood floor for any imperfections, such as gaps, cracks, or unevenness. Fill these imperfections with a suitable wood filler or underlayment to create a smooth and level surface.
2. Underlayment:
Installing an underlayment is crucial for enhancing the vinyl plank flooring's performance and longevity. Opt for an underlayment that is designed specifically for use with vinyl plank flooring. It should provide cushioning, soundproofing, and moisture resistance. Roll out the underlayment over the prepared hardwood floor, ensuring it is taut and overlapping at the seams.
3. Vinyl Plank Installation:
Start the vinyl plank installation by determining the direction of the planks. Consider the room's layout and natural light to achieve the desired effect. Begin installing the first row of planks along the longest wall, using spacers to maintain consistent gaps around the perimeter. Interlock the planks together by angling them and pressing them down firmly. Continue installing subsequent rows, staggering the joints for stability.
4. Cutting and Fitting:
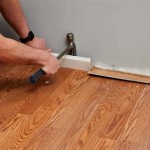
As you progress, you may encounter areas where the planks need to be cut to fit. Use a sharp utility knife and a straight edge to make precise cuts. For irregular shapes, create templates from cardboard or use a contour gauge to ensure a perfect fit. Tap the cut planks into place using a tapping block and hammer to avoid damaging the vinyl.
5. Expansion Gap:
Allowing for an expansion gap is crucial to prevent buckling and warping of the vinyl plank flooring. Maintain a gap of approximately 1/4 inch around the perimeter of the room and any fixed objects, such as cabinets or appliances. Use spacers or expansion strips to achieve the desired gap.
6. Finishing Touches:
Once the vinyl plank flooring is installed, remove the spacers and install baseboards or quarter rounds to conceal the expansion gap and enhance the finished look. Use a caulk gun to seal any gaps between the baseboards and the flooring, and clean the surface to remove any excess adhesive or debris.
Additional Tips:
- Acclimate the vinyl planks to the room temperature for at least 24 hours before installation.
- Use a flooring roller to secure the planks and ensure proper adhesion.
- Avoid installing vinyl plank flooring in areas with excessive moisture or direct sunlight.
- Regularly clean and maintain the vinyl plank flooring to preserve its appearance and longevity.

Installing Luxury Vinyl Floors Over Engineered Hardwood Honey Built Home

How To Install Vinyl Flooring Over Hardwood Floors Wood Floor Fitting

How To Install Vinyl Flooring Over Hardwood Floors Wood Floor Fitting

Installing Luxury Vinyl Floors Over Engineered Hardwood Honey Built Home

Can I Install Luxury Vinyl Plank Over Hardwood Floors

How To Install Laminate Or Vinyl Plank Flooring Over Old Hardwood

A Beginner S Guide To Installing Vinyl Plank Flooring Dumpsters Com

Installation Of Vinyl Flooring Over Hardwood Guide Options

Installing Luxury Vinyl Floors Over Engineered Hardwood Honey Built Home

How To Install Lvp Over Hardwood Flooring
Related Posts

