Installing Vinyl Plank Flooring On Bathroom Walls: A Comprehensive Guide
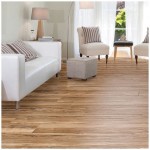
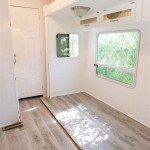
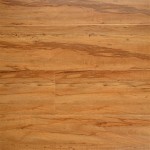
Vinyl plank flooring is a versatile and durable option for bathroom walls, offering a waterproof and easy-to-clean surface that mimics the look of natural wood. Installing vinyl plank flooring on bathroom walls is a relatively straightforward project that can be completed in a few hours, even by DIY beginners.
Before you begin, gather the following materials: vinyl plank flooring, a utility knife, a straight edge, a level, a measuring tape, a hammer or nail gun, finishing nails, and a caulk gun with caulk.
Step 1: Prepare the Walls
Remove any existing wall coverings or fixtures. Clean the walls thoroughly to remove any dirt or debris. Patch any holes or cracks with spackling paste and allow it to dry completely.
Step 2: Plan the Layout
Determine the starting point for your installation. Typically, you will start in a corner and work your way out. Measure and mark the center of the wall and snap a chalk line perpendicular to the starting point.
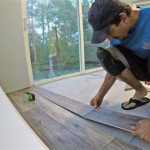
Step 3: Install the Starter Course
Cut the first plank to fit the starting point and secure it to the wall using finishing nails or a nail gun. Space the nails approximately 6 inches apart. Ensure that the plank is level using a level.
Step 4: Continue Installing Planks
Interlock the next plank with the starter course and secure it to the wall. Continue installing planks in rows, alternating the direction of the staggered joints for a more natural look.
Step 5: Trim and Fit Planks
As you reach the end of a row, measure and cut the last plank to fit. Use a utility knife and a straight edge to ensure a clean cut. Tap the plank into place using a hammer or nail gun.
Step 6: Install Around Obstacles
For areas around outlets, switches, or pipes, measure and cut the planks to fit around the obstacles. Use a utility knife to cut notches or holes as needed.
Step 7: Seal the Edges
Once all the planks are installed, apply a bead of caulk along the edges of the flooring and around any seams or gaps. Smooth out the caulk using a wet finger or a caulk tool.
Tips for Installing Vinyl Plank Flooring on Bathroom Walls:
- Use a sharp utility knife and a straight edge for precise cuts.
- Check the level of each plank as you install it to ensure a level surface.
- Trim the planks slightly shorter than necessary to allow for expansion and contraction.
- Use a nail gun for faster installation, but be careful not to over-nail the planks.
- Allow the caulk to dry completely before using the bathroom.

How To Install Vinyl Plank Flooring In A Bathroom Fixthisbuildthat

Installed Vinyl Plank Flooring On My Bathroom Wall Love The Texture Color Walls

Vinyl Planks In Bathrooms Residential Inspiration Flooring

Installing Lvt On A Wall

Installing Vinyl Plank Flooring Lifeproof Waterproof Rigid Core Sustain My Craft Habit

Can Vinyl Flooring Be Used On Walls And Shower In Singapore Property

How To Install Vinyl Plank Flooring In A Bathroom As Beginner Home Renovation

How To Install Vinyl Plank Flooring In A Bathroom Fixthisbuildthat

Dos And Don Ts For Installing Vinyl Plank Floors In The Bathroom Advice Homeowners

Achieve High End Hardwood Looks For Your Dream Bath In Lvt
Related Posts