Essential Aspects of Installing Vinyl Plank Flooring In Basement
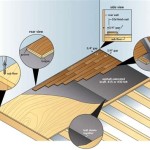
Transforming your basement with vinyl plank flooring can elevate its ambiance and functionality. This durable and versatile flooring option offers waterproof protection, enhanced comfort, and a stylish aesthetic. To ensure a seamless and successful installation, meticulous attention to essential aspects is paramount.
1. Preparation and Acclimation:
Before commencing the installation, thoroughly clean the subfloor to remove any debris or unevenness. Ensure the subfloor is level, smooth, and free from moisture. Vinyl planks require acclimation to the basement's temperature and humidity for 24-48 hours before installation. This allows the planks to adjust to the environment, minimizing potential expansion or contraction.
2. Vapor Barrier:
A vapor barrier is crucial in basements to prevent moisture vapor from penetrating the flooring. Install a polyethylene vapor barrier over the subfloor, overlapping the edges by at least 6 inches and sealing the seams with tape. This barrier will protect the vinyl flooring from damage caused by moisture and mold.
3. Underlayment:
An underlayment provides additional cushioning and sound insulation. Choose an underlayment specifically designed for vinyl plank flooring, as it will enhance the floor's comfort and reduce noise transmission. Roll out the underlayment over the vapor barrier, ensuring no gaps or overlaps.
4. Installation Pattern:
Determine the desired installation pattern for your vinyl planks, whether it's straight, staggered, or herringbone. Start installing the planks along one wall, leaving a small expansion gap around the perimeter for movement. Use spacers or a tapping block to ensure consistent spacing between the planks.
5. Cutting and Seaming:
For irregular shapes or corners, use a utility knife to cut the vinyl planks to the desired size. Ensure the cuts are clean and precise for a seamless appearance. When connecting multiple planks, use a flooring adhesive or locking system to secure them together. Wipe away any excess adhesive immediately to prevent it from affecting the floor's finish.
6. Expansion Gaps:
Expansion gaps are essential to accommodate the expansion and contraction of vinyl flooring due to temperature and humidity fluctuations. Maintain a gap of approximately 1/4 inch around the perimeter of the room and around any fixed objects, such as pipes or pillars.
7. Finishing Touches:
Once the vinyl planks are installed, install baseboards or quarter rounds along the edges to conceal the expansion gaps and enhance the floor's finished look. Secure the moldings with nails or screws, ensuring a snug fit against the wall.
By adhering to these essential aspects, you can successfully install vinyl plank flooring in your basement. This durable and stylish flooring option will provide years of comfort, functionality, and aesthetic appeal in your subterranean space.

Vinyl Plank Flooring On Concrete Basement Pros Cons

Vinyl Plank Flooring Installation Basement Remodel Before And After

Best How To Install Vinyl Plank Flooring Four Generations One Roof

Tips For Installing Vinyl Plank Over Concrete Floors Lemon Thistle

Ep5 Finishing A Basement How To Install Vinyl Plank Flooring Diy

Installing Luxury Vinyl Plank Flooring In Our Basement Week 5 Of The One Room Challenge Willow Bloom Home

Vinyl Plank Flooring Installation Basement Remodel Before And After

Vinyl Flooring Bedminster Basement Installation Floors Direct

How To Install Vinyl Plank Flooring On Concrete Step By Guide

Ep5 Finishing A Basement How To Install Vinyl Plank Flooring Diy
Related Posts


