Installing Trafficmaster Resilient Tile Flooring
Installing Trafficmaster Resilient Tile Flooring is a great way to get a beautiful, durable, and easy-to-clean floor. These tiles are made of a durable PVC material, which makes them resistant to wear, moisture, and stains. They are also easy to install, so you can do it yourself in a weekend.
Here are the essential steps for installing Trafficmaster Resilient Tile Flooring:
1. Prepare the subfloor
The first step is to prepare the subfloor. The subfloor must be smooth, level, and free of any debris. If the subfloor is not level, use a self-leveling cement to make it level. If the subfloor is not smooth, use a sander to smooth it out. And if the subfloor is not clean, use a vacuum cleaner or broom to remove any debris.
2. Install the underlayment
The next step is to install the underlayment. The underlayment is a thin foam material that helps to cushion the tiles and reduce noise. Roll out the underlayment over the subfloor and tape the seams together with duct tape. The underlayment should be flat and wrinkle-free.
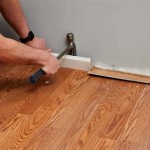
3. Install the tiles
Now it's time to install the tiles. Start by measuring and marking the center of the floor. Then, place a tile in the center of the floor and press it into place. Continue installing tiles around the center tile, working your way outward. Use a rubber mallet to tap the tiles into place and make sure they are securely bonded together.
4. Trim the tiles
Once the tiles are installed, you may need to trim some of the tiles around the edges of the floor. Use a utility knife to score the tiles and then snap them off. You can also use a jigsaw to cut the tiles.
5. Seal the tiles
The final step is to seal the tiles. This will help to protect the tiles from moisture and stains. Apply a sealer to the tiles and allow it to dry according to the manufacturer's instructions.
Tips:
- Make sure the subfloor is completely dry before installing the tiles.
- Use a level to ensure that the tiles are level.
- Use a rubber mallet to tap the tiles into place and make sure they are securely bonded together.
- Trim the tiles around the edges of the floor using a utility knife or jigsaw.
- Seal the tiles to protect them from moisture and stains.
By following these steps, you can install Trafficmaster Resilient Tile Flooring in your home and enjoy a beautiful, durable, and easy-to-clean floor for years to come.

Trafficmaster Ceramica 12 X 24 Vinyl Tile Floor Installation

Trafficmaster Floor Installation Budget Friendly Home Remodeling

Diy Kitchen Floor Using Trafficmaster L And Stick Groutable Vinyl Tile From Hd

Trafficmaster White Maple 4 Mil X 6 In W 36 L Grip Strip Water Resistant Luxury Vinyl Plank Flooring 24 Sqft Case 97011 The Home Depot

How To Install Vinyl Flooring Traffic Master Moonstone Rigid Core Plank Diy

Trafficmaster Flooring The Home Depot

Diy Kitchen Floor Using Trafficmaster L And Stick Groutable Vinyl Tile From Hd

Tips For Installing A Kitchen Vinyl Tile Floor Merrypad

Trafficmaster Beach Sand 3 Mil X 12 In W 25 L And Stick Water Resistant Vinyl Tile Flooring 30 2 Sqft Case A4269451 The Home Depot

How To Install Your Own Floating Vinyl Plank Flooring In Home Interior Design Wonderhowto
Related Posts