Installing Tongue and Groove Flooring on Concrete
Installing tongue and groove flooring on concrete is an excellent and durable flooring option. While it requires more preparation than installing flooring over subflooring, it is still a relatively straightforward project. This article will guide you through the essential steps involved in preparing the concrete and installing tongue and groove flooring.
Preparing the Concrete
Before installing tongue and groove flooring, the concrete subfloor must be smooth, level, and free of moisture. Here are the steps to prepare the concrete:
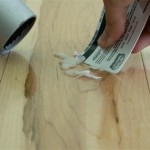
- Clean the concrete thoroughly using a degreaser and a stiff brush.
- Check the level of the concrete using a level. If the concrete is uneven, use a self-leveling compound to fill in any depressions or gaps.
- Test the concrete for moisture using a moisture meter. The moisture content should be less than 12% before installing the flooring.
- Install a vapor barrier, such as a polyethylene film, over the concrete to prevent moisture from seeping up into the flooring.
Installing the Tongue and Groove Flooring
Once the concrete is properly prepared, you can begin installing the tongue and groove flooring. Follow these steps:
- Measure the area where you will be installing the flooring and purchase an appropriate amount of tongue and groove planks.
- Start by installing a row of planks along one wall. Make sure the tongues of the planks are facing the wall.
- Tap the end of each plank into place using a rubber mallet and a tapping block.
- Continue installing rows of planks, alternating the direction of the tongues and grooves.
- When you reach the end of a row, cut a plank to fit and install it.
- Once the entire floor is installed, tap down any loose planks and secure the perimeter of the flooring with baseboards or quarter-round molding.
Finishing the Floor
Once the flooring is installed, you can finish it with a sealant or stain. Here are a few tips:
- Wait at least 24 hours after installing the flooring before applying any sealant or stain.
- Choose a sealant or stain that is specifically designed for tongue and groove flooring.
- Apply the sealant or stain according to the manufacturer's instructions.
Conclusion
Installing tongue and groove flooring on concrete is a great way to add durability and style to your home. By following the steps outlined in this article, you can ensure a successful installation.

Installing Wood Flooring Over Concrete Diy

Installing Hardwood Floors On Concrete Subfloors

Hardwood Over Concrete Auten Wideplank Flooring

Installing Engineered Hardwood On Concrete Twenty Oak

Q A Solid Wood Floors Over Concrete Slabs Jlc

Installing Engineered Hardwood On Concrete Twenty Oak

5 Essential Tips For Tongue And Groove Flooring District Floor Depot

Tongue Groove Flooring Installation On Underlay Start To Finish

How To Install Tongue And Groove Flooring Blog

Installing Wood Subfloors Over Concrete Hardwood Floors
Related Posts