Installing Tongue and Groove Floating Engineered Flooring: A Guide to Essential Aspects
Installing tongue and groove floating engineered flooring can be a cost-effective and aesthetically pleasing way to update your home's interior. Unlike traditional hardwood flooring, engineered flooring consists of a top layer of hardwood veneer bonded to a core of plywood or high-density fiberboard. This construction makes it more stable and durable, while the tongue and groove design allows for easy installation.
Before you begin, it's important to gather the necessary tools and materials. You will need a measuring tape, a saw, a hammer, a rubber mallet, a tapping block, and spacers. You will also need an underlayment, which will provide a cushioning layer between the flooring and the subfloor, and flooring adhesive.
Once you have gathered your materials, you can begin the installation process. Start by preparing the subfloor. This involves leveling the subfloor and removing any debris that could prevent the flooring from laying flat. You can use a self-leveling compound to smooth out any imperfections, and you should make sure that the subfloor is completely dry before installing the flooring.
Next, install the underlayment. This can be done by rolling out the underlayment over the subfloor and taping the seams together. The underlayment should be cut to fit the room, and you should leave a gap of about 1/4 inch around the perimeter of the room for expansion.
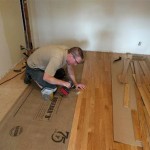
Now you can begin installing the flooring. Start by cutting the first plank to fit the width of the room. Leave a gap of about 1/4 inch between the plank and the wall to allow for expansion. Apply flooring adhesive to the tongue of the plank and insert it into the groove of the previous plank. Tap the plank into place using a rubber mallet and a tapping block.
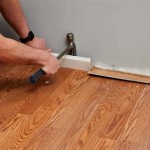
Repeat this process for the remaining planks, working your way across the room. When you reach the end of a row, cut the last plank to fit and tap it into place. Use spacers to maintain an even gap between the planks and the walls. Once the flooring is installed, you can trim any excess flooring around the perimeter of the room and install baseboards to complete the installation.
Installing tongue and groove floating engineered flooring is a relatively straightforward process that can be completed by most do-it-yourselfers. By following these steps and working carefully, you can achieve a professional-looking installation that will enhance the beauty and value of your home.

Floating A Wood Floor Hardwood Floors

All You Need To Know About Tongue And Groove Flooring Installation Reallyfloors America S Est Hardwood

Installing Laminate Engineered Wood Floating Floors Home Improvement Stack Exchange Blog

How To Install Lock Engineered Hardwood Flooring

5 Essential Tips For Tongue And Groove Flooring District Floor Depot

Which Method Should I Use To Install My Engineered Wood Floor Tesoro Woods

Engineered Hardwood Floors Installation Floor Refinishing New Jersey Repair Sanding

Floating Floor Vs Nail Down Slaughterbeck Floors Inc

How To Install A Hardwood Floor Build This Weekend

Engineered Hardwood Floors Installation Floor Refinishing New Jersey Repair Sanding
Related Posts

