Essential Steps for Installing Plank Flooring
Plank flooring is a popular choice for homeowners due to its durability, versatility, and ease of installation. Whether you're considering installing it yourself or hiring a professional, understanding the essential steps involved is crucial for a successful outcome.
1. Preparation
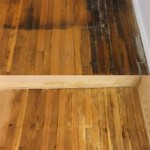
Before starting, it's essential to prepare the subfloor. Ensure it is level, dry, and free of any debris or imperfections. Leveling compound or plywood underlayment can be used to rectify any unevenness. Acclimate the flooring planks to the room's temperature and humidity for at least 48 hours before installation to prevent expansion or contraction issues.
2. Underlayment Installation
An underlayment is a layer of material installed between the subfloor and the flooring. It provides cushioning, sound absorption, and moisture protection. Choose an underlayment suitable for your flooring and subfloor type and follow the manufacturer's instructions for installation.
3. Starting Point and Expansion Gap
Determine the starting point for your flooring installation, typically in the center of the room. Ensure a gap of approximately 1/4 inch around the perimeter of the room to allow for expansion and contraction. This gap will be covered by baseboards or other trim.
4. Plank Installation
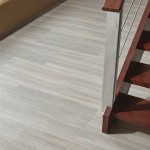
Starting from the starting point, begin installing the planks. Most plank flooring systems utilize a locking mechanism that allows planks to be joined together without adhesive or nails. Angle the planks slightly and press them together until the lock engages. Ensure the planks are aligned and level as you progress.
5. Staggering Seams
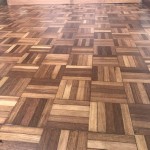
To achieve a more natural and stable floor, stagger the ends of adjacent rows of planks. This means avoiding aligning the seams of the planks directly above or below each other. Follow the manufacturer's recommended staggering pattern.
6. Cutting Planks
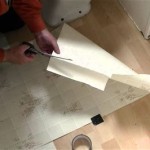
As you approach walls or other obstructions, you will need to cut planks to fit. Use a circular saw or miter saw to make clean, straight cuts. Measure the required length carefully and use a straight edge to guide your saw.
7. Finishing Touches
Once all the planks are installed, you can add finishing touches such as baseboards, quarter-round molding, or transition strips. These will cover the expansion gaps and provide a polished look to your flooring. Vacuum or sweep the floor regularly to maintain its beauty and longevity.

Installing Vinyl Plank Flooring How To Fixthisbuildthat

Laying Vinyl Planks The Right Way Expert Guide By Fantastic Handyman

Installing Vinyl Plank Flooring For Beginners Anika S Diy Life

A Beginner S Guide To Installing Vinyl Plank Flooring Dumpsters Com

How To Install Floating Vinyl Plank Flooring In 5 Easy Steps Riverbend Interiors

How To Install Vinyl Plank Flooring In A Bathroom Fixthisbuildthat

Installing Vinyl Floors A Do It Yourself Guide The Honeycomb Home

How To Install Luxury Vinyl Plank Flooring Wood

How To Install Vinyl Plank Flooring As A Beginner Home Renovation

How To Install Luxury Vinyl Plank Flooring Quick And Simple Casa Watkins Living
Related Posts