Installing Parquet Flooring: A Comprehensive Guide
Parquet flooring adds timeless elegance and warmth to any home. With its durable construction and intricate patterns, it elevates the aesthetic appeal of living spaces. However, installing parquet flooring requires meticulous attention to detail and a clear understanding of the process. This guide will provide you with a step-by-step approach to ensure a flawless installation.
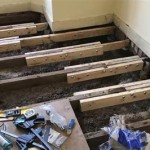
1. Preparation is Key
Before embarking on the installation process, it is crucial to prepare both the subfloor and the parquet tiles. The subfloor must be level and free from moisture to avoid any future issues with the flooring. Ensure that the subfloor is dry, structurally sound, and has a moisture barrier installed. Additionally, acclimate the parquet tiles to the room's temperature and humidity for several days before installation to prevent expansion or contraction during the process.
2. Choosing the Right Adhesive
The type of adhesive used to install parquet flooring is critical for its longevity. A recommended option is a high-quality parquet adhesive specifically designed for wooden floors. Follow the manufacturer's instructions carefully when mixing and applying the adhesive to ensure proper coverage and sufficient bonding strength. Using the correct adhesive will contribute significantly to the stability and durability of your parquet flooring.
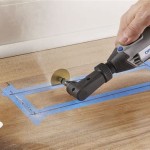
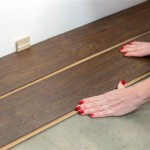
3. Laying the Tiles
When laying the parquet tiles, begin by establishing a straight reference line along the longest wall of the room. This reference line will guide the placement of the tiles and ensure a straight alignment. Use spacers to maintain uniform gaps between the tiles. Each tile should be placed firmly into the adhesive, and excess adhesive should be cleaned off immediately. Allow the adhesive to dry completely before grouting or sanding the floor.
4. Grouting and Sanding
Once the parquet tiles are laid and the adhesive has dried, the next step is grouting. A grout specifically designed for wooden floors should be used, and it should be applied following the manufacturer's instructions. Allow the grout to dry completely, then proceed with sanding the parquet flooring. Use a fine-grit sandpaper and sand in the direction of the wood grain to achieve a smooth and even surface.
5. Finishing Touches
The final step in installing parquet flooring is applying a protective finish. This could be a polyurethane sealant, wax, or oil, depending on the type of parquet flooring you have installed. A polyurethane sealant provides a durable finish that resists wear and tear, while wax and oil add a natural glow and enhance the wood's natural beauty. Follow the manufacturer's instructions for the application and drying time of the protective finish.
Congratulations! You have successfully installed your parquet flooring. With proper maintenance and care, your parquet flooring will continue to bring beauty and sophistication to your home for many years to come.

How To Install Parquet Tile The Home Depot

How To Install Parquet Tile The Home Depot

How To Lay Parquet Flooring Leader Floors Blog

Installation Methods For Wooden Floor Craftedforlife

How To Install Parquet Tile The Home Depot

Diy Laying Engineered Oak Parquet Flooring Swoon Worthy

Nail Or Glue Wood Flooring Installation Method

5 Easy S To Use When Installing Parquet Flooring

Worker Installing Parquet Flooring Stock Photo By Wirestock Photodune

Parquet Flooring The 2024 Guide Floorings
Related Posts