Installing Laminate Wood Flooring in Multiple Rooms: A Guide to Achieving a Seamless Finish
Laminate wood flooring is an excellent choice for homes and businesses due to its durability, affordability, and ease of installation. When installing laminate flooring in multiple rooms, it's crucial to follow the proper steps to ensure a professional-looking and long-lasting finish.
1. Subfloor Preparation:
Before installing laminate flooring, it's essential to prepare the subfloor. It should be level, dry, and free of bumps or debris. If the subfloor is uneven, use a leveler to smooth it out. If the subfloor is not dry, it can warp the flooring and cause it to fail prematurely.
2. Moisture Barrier:
Install a moisture barrier between the subfloor and the laminate flooring. This will prevent moisture from seeping into the flooring and causing damage. Use a moisture barrier specifically designed for laminate flooring and overlap the seams by at least 6 inches.
3. Underlayment:
An underlayment provides support and sound insulation for the laminate flooring. It also helps to level the subfloor and ensure a smooth surface for the flooring. Choose an underlayment that is compatible with your laminate flooring and install it according to the manufacturer's instructions.
4. Laminate Flooring Installation:
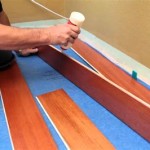
Start by installing the first row of laminate flooring along the longest wall. Use spacers to maintain a consistent gap between the flooring and the walls. Tap the planks together firmly using a tapping block and hammer. Stagger the end joints of the planks in each row to create a stronger bond.
5. Doorways and Transitions:
When transitioning to other areas or into doorways, use transition strips or moldings. These will provide a smooth and professional finish between different flooring types or when transitioning to other rooms.
6. Expansion Gaps:
Laminate flooring expands and contracts with changes in temperature and humidity. It's crucial to leave small expansion gaps around the perimeter of the room and around any fixed objects, such as pipes or door frames. These gaps will prevent the flooring from buckling or warping.
7. Finishing Touches:
Once the laminate flooring is installed, remove the spacers and install baseboards or moldings. These will cover the expansion gaps and give the room a finished look. Vacuum or sweep the floor regularly to remove dirt and debris.
By following these steps and using proper tools and materials, you can successfully install laminate wood flooring in multiple rooms, achieving a beautiful and durable finish that will enhance the aesthetics and functionality of your property.

How To Install Laminate Flooring Without Room Transitions

Which Direction To Lay Vinyl Plank Flooring In Multiple Rooms Step By Guide 2024

Installing Laminate Down Hallways From Another Room

How To Install Vinyl Plank Flooring In Multiple Rooms Or Whole Floor

The Same Floor Across Multiple Rooms

Installing Planks Into Multiple Rooms Laminate And Vinyl Plank Installation Part 2

Installing Laminate Flooring In Hallways Do It Yourself

The Same Floor Across Multiple Rooms

Installing Laminate Flooring In Hallways Do It Yourself

Determining The Direction To Lay Install Hardwood Laminate Or Luxury Vinyl Plank Flooring
Related Posts


