Installing Laminate Flooring On a Curved Wall
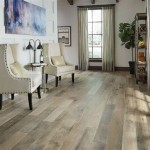
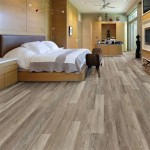
Installing laminate flooring is a popular do-it-yourself project that can significantly enhance the aesthetic appeal and value of a home. While straightforward in rectangular or square rooms, the task presents a unique set of challenges when encountering curved walls. Adapting laminate flooring to a curved wall requires careful planning, precise measurements, and specialized cutting techniques to achieve a professional and seamless look. This article provides a comprehensive guide to navigating the complexities of installing laminate flooring on a curved wall.
Before commencing any installation, a thorough assessment of the project is crucial. This involves evaluating the type of curve, the thickness and locking mechanism of the selected laminate flooring, and the existing subfloor. Different types of curves demand varying approaches. A gentle curve might allow for flexible transition pieces or creative cutting of individual planks, while a more pronounced curve necessitates more elaborate strategies.
The thickness and locking system of the laminate flooring play a significant role in its workability around curves. Thicker planks are generally more rigid and challenging to manipulate, while certain locking mechanisms might restrict the angles at which planks can be joined. The subfloor must be level, clean, and dry to ensure proper adhesion and prevent future issues like buckling or squeaking. Any imperfections in the subfloor should be addressed before installation begins.
Preparing the Area and Gathering Necessary Tools
Proper preparation is paramount for a successful laminate flooring installation. The area should be completely clear of furniture, appliances, and any existing flooring materials. The subfloor needs to be thoroughly cleaned and inspected for any irregularities. Minor imperfections can be addressed with patching compound, while larger issues might require more extensive repairs.
Essential tools for installing laminate flooring around a curved wall include a measuring tape, pencil, jigsaw, circular saw (optional), safety glasses, dust mask, tapping block, pull bar, spacers, and a contour gauge or flexible ruler. The measuring tape is used for accurate measurements, while the pencil is used for marking cut lines. A jigsaw is indispensable for making intricate cuts along the curved edge of the laminate plank. A circular saw can be helpful for making straight cuts more quickly. Safety glasses and a dust mask are crucial for protecting the eyes and respiratory system from dust and debris generated during cutting. A tapping block and pull bar are used to securely lock the laminate planks together without damaging the edges. Spacers maintain a consistent expansion gap around the perimeter of the room. A contour gauge or flexible ruler is used to precisely trace the curve of the wall onto the laminate planks.
In addition to these basic tools, specialized tools like a router with a template following bit can be used to create perfectly curved edges on the laminate planks. These tools are typically used by experienced installers and require a higher level of skill.
Accurately Measuring and Transferring the Curve
The most critical aspect of installing laminate flooring on a curved wall is accurately measuring and transferring the curve onto the laminate planks. Several methods can be used to achieve this, depending on the complexity of the curve and the available tools.
One common method involves using a contour gauge. This tool consists of a series of thin, movable pins that conform to the shape of the curve when pressed against the wall. The contour gauge can then be placed on the laminate plank, and the outline of the curve can be traced with a pencil. This method is particularly useful for complex curves that are difficult to measure directly.
Another method involves using a flexible ruler or strip of wood. The flexible ruler is bent to match the curve of the wall, and its shape is then traced onto a piece of paper or cardboard. This template can then be transferred to the laminate plank and used as a guide for cutting. This method is suitable for simple curves that are relatively easy to duplicate. A simpler approach involves using a series of small, incremental measurements taken along the wall. This involves placing the laminate plank against the wall and measuring the distance between the plank and the wall at various points along the curve. These measurements can then be used to create a series of points on the laminate plank, which can be connected to form the curve.
Regardless of the method used, it is essential to ensure that the measurements are as accurate as possible. Even small errors can accumulate and result in a gap between the flooring and the wall.
Cutting and Installing the Laminate Planks
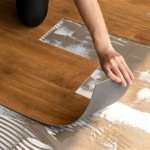
Once the curve has been accurately transferred to the laminate planks, the next step is to cut the planks to the desired shape. A jigsaw is typically the best tool for this task, as it allows for precise cuts along the curved line. When cutting laminate planks, it is important to use a fine-toothed blade and to cut slowly and carefully to avoid chipping or splintering the laminate.
Before cutting, it is advisable to practice on a scrap piece of laminate to get a feel for the jigsaw and the cutting technique. It is also helpful to use a straightedge or guide to ensure that the cuts are straight and consistent. When cutting along a curved line, it is important to keep the jigsaw blade perpendicular to the surface of the laminate and to follow the line as closely as possible.
After cutting the laminate planks, it is important to test-fit them against the wall to ensure that they fit properly. If necessary, minor adjustments can be made with a sander or file. Once the planks fit properly, they can be installed according to the manufacturer's instructions. Typically, this involves clicking the planks together using the locking mechanism and tapping them into place with a tapping block and pull bar.
It is crucial to maintain a consistent expansion gap around the perimeter of the room, including the curved wall. This gap allows the laminate flooring to expand and contract with changes in temperature and humidity without buckling or warping.
Dealing with Complex Curves and Transitions
Some curved walls may present more complex challenges than others. For example, a wall with multiple curves or a wall with a tight radius may require more elaborate cutting techniques and installation strategies. In these cases, it may be necessary to use smaller pieces of laminate flooring to conform to the shape of the wall.
One approach is to create a series of wedge-shaped pieces that fit together to form the curve. This technique requires careful planning and precise cutting, but it can produce a seamless and professional-looking result. Another approach is to use a flexible transition piece to cover the gap between the flooring and the wall. These transition pieces are typically made of rubber or plastic and can be bent to conform to the shape of the wall.
When using a flexible transition piece, it is important to choose one that matches the color and texture of the laminate flooring. It is also important to install the transition piece securely using adhesive or screws.
Another strategy involves creating a custom-made trim piece from wood or other materials. This trim piece can be shaped to match the curve of the wall and then attached to the wall with nails or screws. This approach requires more skill and effort, but it can produce a very attractive and durable result.
When dealing with complex curves and transitions, it is important to take your time and to be patient. It is also helpful to consult with a professional flooring installer if you are unsure about any aspect of the installation.
Addressing Potential Problems and Ensuring a Professional Finish
Even with careful planning and execution, problems can arise during the installation of laminate flooring around a curved wall. One common problem is gapping between the laminate planks and the wall. This can be caused by inaccurate measurements, improper cutting, or movement of the subfloor.
If gapping occurs, it can be addressed by using a filler or caulk to fill the gap. It is important to choose a filler or caulk that matches the color and texture of the laminate flooring. Another common problem is buckling or warping of the laminate flooring. This can be caused by excessive moisture, improper installation, or inadequate expansion gaps.
To prevent buckling or warping, it is important to ensure that the subfloor is dry and level before installation. It is also important to maintain adequate expansion gaps around the perimeter of the room and to avoid exposing the laminate flooring to excessive moisture.
To achieve a professional finish, it is important to pay attention to detail. This includes cleaning up any dust or debris after each step of the installation and carefully inspecting the finished flooring for any imperfections. It is also important to use the appropriate tools and materials and to follow the manufacturer's instructions carefully.
By following these steps and taking the necessary precautions, it is possible to successfully install laminate flooring on a curved wall and achieve a beautiful and long-lasting result.

Easy Trick How To Install Hardwood Or Laminate Flooring Around Curved Walls Mryoucandoityourself

Faq Installing Laminate Around Curved Staircase

How To Cut Laminate Wood Flooring Curved Wall Diy Howto Shorts

How To Scribe Vinyl Plank Flooring Fit Any Curved Wall

Faq Installing Laminate Around Curved Staircase

Installing Hardwood Floor Around Curved Nosing Wall Sharp Angle Scribe Fireplace

How To Cut Vinyl Plank Flooring Around A Curve

We Fitted This Oak Parquet Wood Flooring To Fit Around Curved Wall In A Kitchen Area Stairs Cladding Floor Installation

How To Cut Laminate Wood Flooring Around Curved Wall Lpro Carpet Tiktok

How To Cut Laminate Wood Flooring Around Curved Wall Lpro Carpet Tiktok
Related Posts