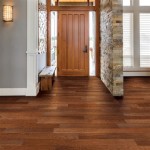
Installing Hardwood Flooring Over Plywood
Hardwood flooring is a popular choice for homeowners due to its durability, beauty, and longevity. Installing hardwood flooring over plywood subfloors is a common practice, offering a solid and stable foundation for the flooring. However, it requires careful planning and execution to ensure a successful installation. This article will guide you through the process, providing insights into the key steps involved in installing hardwood flooring over plywood.
Assessing the Plywood Subfloor
The first step is to assess the condition of the existing plywood subfloor. This involves inspecting for any signs of damage, such as warping, sagging, or rot. The subfloor should be level and solid, as any imperfections will be reflected in the finished hardwood floor. If the plywood is damaged or uneven, it should be repaired or replaced before proceeding with the installation. Use a level to check for evenness, and address any issues with shims, replacing damaged sections or reinforcing the subfloor with additional plywood.
Preparing the Plywood Subfloor
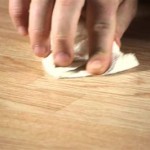
Once the subfloor is assessed and repaired, it needs to be prepared for the hardwood flooring installation. This involves cleaning the surface thoroughly to remove any debris or dust. It's also essential to ensure that the plywood subfloor is adequately sealed. This will help prevent moisture from penetrating the wood, which can lead to warping and damage. A moisture barrier, such as a polyethylene sheet, can be applied to the subfloor, followed by a primer to create a smooth surface for the hardwood flooring. Allow the primer to dry thoroughly before proceeding.
Installing Hardwood Flooring Over Plywood
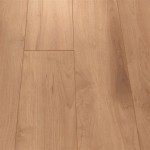
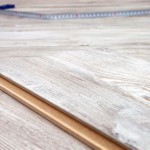
There are two primary methods for installing hardwood flooring over plywood: nailing and floating. Nailing involves attaching the hardwood planks directly to the plywood subfloor using nails or staples. This method is typically used for solid hardwood flooring. Floating installation, on the other hand, involves installing the hardwood flooring without attaching it directly to the subfloor. This method is commonly used for engineered hardwood flooring.
Nailing Hardwood Flooring
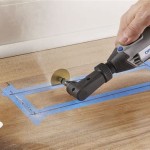
Nailing hardwood flooring is a traditional method that requires specialized tools and techniques. Start by laying out the first row of hardwood planks, ensuring they are parallel to the longest wall in the room. Use a nail gun or hammer and nails to secure the planks to the plywood subfloor. The nails should be driven at an angle to prevent the planks from popping up. Continue laying and securing the planks in rows, working your way across the room. Ensure proper spacing between planks to allow for expansion and contraction.
Floating Hardwood Flooring
Floating hardwood flooring involves installing the planks on a layer of underlayment, which is typically a foam or cork material. The underlayment provides cushioning and sound insulation. Begin by installing the underlayment over the plywood subfloor, ensuring a tight fit. Then, lay out the first row of hardwood planks, using a tapping block to gently join the planks. Secure the planks to each other using tongue-and-groove connections. Continue laying and securing the planks in rows, working your way across the room.
Finishing Touches
Once the hardwood flooring is installed, it's time to apply finishing touches. This may involve sanding the floor to create a smooth surface and applying a sealant to protect the wood. The sealant can be a polyurethane or wax finish, depending on the desired look and level of protection. After the sealant has dried, you can sweep or vacuum the floor to remove any dust or debris. Finally, install the moldings and baseboards around the perimeter of the room to complete the installation.
Remember to consult with a professional if you are unsure about any aspect of the installation process. They can provide expert advice and guidance to ensure a successful and aesthetically pleasing outcome.

How To Install Hardwood Flooring The Home Depot
:strip_icc()/101206833-2e499ef612434b6b8ab6e5b62422a78f.jpg?strip=all "How To Install Hardwood Floors")
How To Install Hardwood Floors

How To Install Hardwood Flooring For Beginners

How To Install Hardwood Flooring The Home Depot

How To Install Hardwood Flooring Step By Forbes Home

How To Install Oak Hardwood Floors Young House Love

How To Install Hardwood Flooring The Home Depot

How To Install Lock Engineered Hardwood Flooring

Installing Hardwood Floors Over Existing Diy Mryoucandoityourself

How To Install A Hardwood Floor Build This Weekend
Related Posts