Installing Hardwood Floor Parallel To Joists: Considerations and Techniques
Installing hardwood flooring adds warmth, beauty, and value to any home. While traditionally, hardwood flooring is installed perpendicular to the floor joists for optimal structural support, situations often arise where installing parallel to the joists becomes a necessary or desirable option. This article delves into the considerations, challenges, and techniques involved in installing hardwood flooring parallel to the joists, providing a comprehensive guide for homeowners and professionals alike.
The primary role of floor joists is to provide support and stability for the subfloor and any flooring material installed above it. When hardwood flooring is laid perpendicular to the joists, each plank spans multiple joists, distributing weight evenly and minimizing deflection (the bending or sagging of the floor under load). This perpendicular installation creates a strong and rigid floor system. However, architectural layouts, aesthetic preferences, and existing subfloor conditions may necessitate a parallel installation. Before proceeding with such an installation, a thorough assessment of the existing structure and a careful selection of appropriate methods are crucial.
Installing hardwood flooring parallel to the joists places a heavier load on the subfloor between the joists, increasing the potential for deflection and bounce. Consequently, specific mitigation strategies must be employed to ensure the structural integrity and long-term performance of the floor. These strategies primarily focus on reinforcing the subfloor and providing adequate support to prevent excessive movement and potential damage to the hardwood flooring.
Evaluating Subfloor Adequacy and Reinforcement Needs
The first critical step in installing hardwood flooring parallel to the joists is a comprehensive evaluation of the existing subfloor. This evaluation should include checking for signs of water damage, rot, or insect infestation. Any compromised sections must be repaired or replaced before proceeding with the installation. The subfloor's thickness and material composition are also crucial factors to consider. A thinner or less rigid subfloor will require more extensive reinforcement compared to a thicker, more robust one. Ideal subfloor materials for hardwood flooring include plywood or oriented strand board (OSB), with minimum thickness requirements varying based on joist spacing and the type of hardwood flooring being installed.
If the existing subfloor is deemed inadequate, reinforcement measures are essential. One common method is adding a second layer of subfloor. This layer, typically plywood, is screwed and glued to the existing subfloor, effectively increasing its thickness and rigidity. When selecting the thickness of the additional subfloor layer, consult local building codes and hardwood flooring manufacturer specifications. Thicker is often better, but considerations must be made for doorway thresholds, transitions to other flooring types, and the overall height of the finished floor.
Another reinforcement option involves installing bridging or blocking between the joists. Bridging consists of diagonal supports installed between the joists at specific intervals, while blocking involves solid pieces of lumber placed between the joists. Both methods help distribute weight across multiple joists, reducing deflection and improving the overall stability of the floor system. The spacing and dimensions of the bridging or blocking should be determined based on the joist spacing and the anticipated load on the floor. Consult with a structural engineer or experienced contractor to determine the appropriate level of reinforcement for a specific project.
In some cases, particularly with wider joist spacing or heavier hardwood flooring, it may be necessary to sister the joists. Sistering involves attaching new joists alongside the existing ones to provide additional support. This method significantly increases the load-bearing capacity of the floor system but can be a more complex and costly undertaking. It is typically reserved for situations where other reinforcement methods are insufficient or where significant structural deficiencies exist in the existing joists.
Choosing the Right Hardwood Flooring and Installation Method
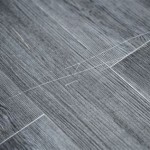
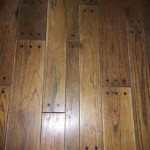
The type of hardwood flooring selected also plays a crucial role in a parallel-to-joists installation. Solid hardwood flooring, while offering a classic and durable option, can be more susceptible to movement and expansion/contraction due to changes in humidity. This is especially important when installed parallel to the joists, as any cupping or crowning can be more pronounced. Engineered hardwood flooring, on the other hand, offers greater dimensional stability due to its multi-layered construction. The core layers are designed to resist warping and twisting, making it a more suitable option for installations where perpendicularity to the joists is not possible.
The choice between nailing, gluing, or floating the hardwood flooring also influences the installation's success. Nailing down hardwood flooring provides a secure and traditional installation method. However, when installing parallel to the joists, careful attention must be paid to the nailing pattern to avoid splitting or damaging the hardwood planks. Gluing down hardwood flooring provides a more uniform bond between the flooring and the subfloor, reducing the potential for movement and squeaking. This method is particularly beneficial when installing engineered hardwood flooring over concrete subfloors. Floating hardwood flooring, where the planks are interlocked and not directly attached to the subfloor, is generally not recommended for parallel-to-joists installations, as it relies on the subfloor's stability and can be more prone to deflection and movement.
Acclimation of the hardwood flooring is paramount, regardless of the installation method. Allowing the flooring to adjust to the room's temperature and humidity for several days before installation minimizes expansion and contraction issues after installation. Follow the manufacturer's recommendations for acclimation procedures, and ensure that the room's temperature and humidity levels are consistent with the expected living conditions.
When nailing hardwood flooring parallel to the joists, use an appropriate nailer and follow a consistent nailing pattern. Typically, nails are driven at a 45-degree angle through the tongue of the plank into the subfloor. The spacing between nails should be determined based on the width of the planks and the manufacturer's recommendations. Over-nailing can lead to splitting, while under-nailing can result in loose planks and squeaking. Using a pneumatic nailer with adjustable pressure settings can help ensure consistent and proper nail penetration.
When gluing down hardwood flooring, use a high-quality adhesive specifically designed for hardwood flooring installations. Apply the adhesive evenly to the subfloor using a notched trowel, following the manufacturer's instructions for the appropriate trowel notch size and adhesive coverage. Ensure that the adhesive is adequately transferred to the back of the hardwood planks for a strong and lasting bond. Work in small sections to prevent the adhesive from drying out before the planks are installed. Weigh down the installed planks with sandbags or other heavy objects to ensure proper adhesion during the curing process.
Addressing Potential Problems and Mitigating Risks
Even with careful preparation and proper installation techniques, certain problems can arise when installing hardwood flooring parallel to the joists. One common issue is excessive deflection, which can lead to uneven flooring, gaps between planks, and squeaking. Addressing this issue requires identifying the source of the deflection and implementing corrective measures. This may involve reinforcing the subfloor further, sistering the joists, or adding additional supports under the floor system.
Another potential problem is moisture-related issues. Hardwood flooring is susceptible to damage from moisture, and excessive moisture can cause cupping, crowning, or warping. To mitigate this risk, ensure that the subfloor is dry and free from moisture before installation. Install a moisture barrier between the subfloor and the hardwood flooring, especially in areas prone to dampness. Maintain consistent temperature and humidity levels in the room to minimize expansion and contraction of the wood.
Squeaking is another common complaint associated with hardwood flooring installations. Squeaks are typically caused by friction between the hardwood planks and the subfloor or between the subfloor and the joists. To prevent squeaking, ensure that the subfloor is securely fastened to the joists and that the hardwood flooring is properly nailed or glued to the subfloor. Use shims to fill any gaps between the subfloor and the joists, and apply a squeak-reducing compound between the planks before installation.
Transition strips are essential for creating smooth and aesthetically pleasing transitions between hardwood flooring and other flooring types, such as tile, carpet, or laminate. Choose transition strips that are appropriate for the thickness and height difference between the flooring materials. Securely fasten the transition strips to the subfloor to prevent tripping hazards and ensure a durable and lasting finish.
Installing hardwood flooring parallel to the joists requires careful planning, meticulous execution, and a thorough understanding of the structural considerations involved. By properly evaluating the subfloor, reinforcing it as needed, selecting the appropriate hardwood flooring and installation method, and addressing potential problems proactively, homeowners and professionals can achieve a beautiful and durable hardwood floor that will last for years to come.

Fitting Wood Flooring Straight To Joists And Beyond Blog

How To Install Hardwood Floors Directly Over Joists Wood Floor Fitting

Laying Hardwood Flooring On Second Story With No Subfloor

Install Faq The Hardwood Flooring Experts Petes Floors

Better Floor Performance Starts With A Solid Subfloor System Hardwood Floors

How To Install Wood Floors Advice Pete S

Open Seams In Hardwood Flooring Concord Carpenter

Direction To Install Hardwood Floors Ceramic Tile Advice Forums John Bridge

Stiffening Up A Wood Floor

Does Solid Wood Flooring Need Underlay Quora
Related Posts