Installing Wide Pine Plank Flooring: A Comprehensive Guide
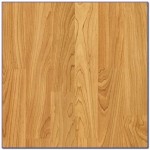
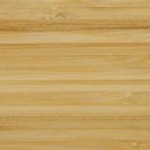
Wide pine plank flooring, with its charming rustic aesthetic and timeless appeal, has become increasingly popular in both residential and commercial settings. Installing wide pine plank flooring requires proper planning and execution to ensure longevity and enhance its natural beauty. This comprehensive guide will provide you with the essential steps and considerations for a successful wide pine plank flooring installation.
1. Preparation and Acclimation
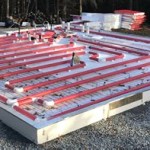
Before installation begins, the subfloor must be properly prepared. Ensure a flat and level surface by addressing any unevenness or defects. Additionally, the subfloor should be dry and clean to prevent moisture-related issues. The wide pine planks should be acclimated to the installation environment for several days before installation. This allows the wood to adjust to the specific temperature and humidity levels, minimizing expansion or contraction after installation.
2. Underlayment and Moisture Barrier
An underlayment is crucial for providing a stable base for the flooring and reducing noise transmission. Choose an underlayment specifically designed for wide pine plank flooring, considering factors such as thickness and moisture resistance. A moisture barrier, such as a polyethylene film, should also be installed to protect the flooring from subfloor moisture.
3. Installation Methods
Wide pine plank flooring can be installed using various methods, including nailing, stapling, or gluing. The most common method is nailing, which involves securing the planks to the subfloor using nails driven at an angle. Stapling is another option, especially for installations over concrete subfloors. Gluing, while less common, provides a more secure bond but requires additional time and effort.
4. Planking Pattern and Alignment
The planking pattern and alignment significantly impact the overall appearance of the flooring. Planks can be installed parallel to one another, perpendicular to the walls, or in a herringbone pattern. Proper alignment is essential to ensure a seamless and visually appealing installation. Use spacers to maintain consistent gaps between planks and to prevent buckling due to expansion.
5. Finishing and Maintenance
Once the wide pine plank flooring is installed, it should be finished to protect and enhance its appearance. Urethane or oil-based finishes are popular options, providing durability and resistance to wear and tear. Regular maintenance is crucial to preserve the beauty of the flooring. Sweep or vacuum regularly to remove dirt and debris, and clean with appropriate cleaning products to avoid damaging the finish.
Conclusion
Installing wide pine plank flooring involves careful planning, proper preparation, and attention to detail. By following the steps outlined in this guide, you can achieve a stunning and durable wide pine plank floor that will enhance the character and elegance of any space. Remember to consider professional assistance for complex installations or if you lack the necessary tools and experience.

Diy Wide Plank Pine Floors Part 1 Installation The Roots Of Home

Installing Wide Plank Pine Flooring Newlywoodwards

Diy Wide Plank Pine Floors Part 1 Installation Wood Flooring

Installing Wide Plank Pine Flooring Newlywoodwards

Pine Hard How To Install Wide Flooring Angie S Roost

Pine Hard How To Install Wide Flooring Angie S Roost

Make Your Own Plank Flooring Using 1 X 12 Lumber Hallstrom Home

Wide Pine Plank Floors Shiplap Stonewoods Com

Diy Wide Plank Pine Floors Part 1 Installation The Roots Of Home

Installing A Southern Pine Floor