Installing Vinyl Plank Flooring Without Removing Baseboards
Vinyl plank flooring has become a popular choice for homeowners due to its durability, affordability, and ease of installation. However, the prospect of removing baseboards can be daunting, especially for DIY enthusiasts. Fortunately, installing vinyl plank flooring without removing baseboards is a feasible option, offering a less invasive and more time-efficient approach. This article will guide you through the process, outlining key considerations and steps to achieve a professional-looking finish.
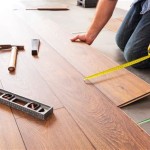
1. Preparing the Subfloor and Measuring
Before installing the vinyl plank flooring, it is crucial to ensure the subfloor is smooth and level. Any unevenness or imperfections will be reflected in the final installation. Patch any cracks or holes, and sand down any bumps or dips. Once the subfloor is properly prepared, measure the area to be covered, making sure to account for any obstacles, such as doorways, cabinets, and existing appliances. This will help you determine the required amount of vinyl plank flooring and ensure you have enough for the project.
Next, determine the direction of the planks. For a traditional look, run the planks parallel to the longest wall in the room. For a more contemporary feel, consider running them perpendicular to the longest wall. Once you have decided on the direction, mark the starting point on the wall. You can use a chalk line or a pencil to create a straight line that will serve as a guide for the first row of planks.
2. Cutting and Installing the First Row of Planks
The first row of planks will be the most challenging, as it requires precise cutting to fit against the baseboards. Carefully measure the distance between the baseboard and the starting point on the wall, and cut the first plank accordingly. Use a utility knife or a circular saw with a fine-tooth blade to ensure a clean and accurate cut. It is best to cut the plank slightly longer than the measured distance and gradually trim it down to size until it fits snugly against the baseboard.
Lay the cut plank along the wall, ensuring it is aligned with the chalk line or pencil mark. Use a tapping block and rubber mallet to gently tap the plank into place. Ensure the planks are tightly fitted together, leaving no gaps or unevenness. Any gaps that may occur can be filled with a vinyl plank flooring caulk, matching the color of the floor.
3. Installing Subsequent Rows of Planks
Once the first row is installed, the subsequent rows will be easier. Each plank should be staggered, with the end of each plank aligning with the middle of the plank in the previous row. This pattern creates a strong and visually appealing floor. Use the same tapping block and mallet to secure each plank, ensuring it fits tightly against the previous plank and the wall.
If necessary, use a utility knife to trim the planks to fit around obstacles such as doorways, cabinets, and appliances. Take extra care to ensure accurate measurements to avoid gaps or unevenness. The process continues in this manner, row by row, until the entire area is covered. Remember to leave a small gap between the planks and the wall to allow for expansion and contraction due to temperature changes. This gap will be covered by the baseboards.
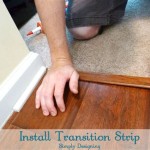
4. Finishing Touches: Trim and Gaps
Once all the planks are installed, it is time to address any remaining gaps. As previously mentioned, a vinyl plank flooring caulk can be used to fill any gaps between the planks and the wall. This will create a seamless look and prevent dirt and debris from accumulating in the gaps. The caulk should be applied sparingly and smoothed out with a damp finger or a caulking tool. Allow the caulk to dry completely before proceeding to the final step.
Finally, install trim around the edges of the floor to cover the expansion gap between the planks and the wall. This trim seamlessly complements the baseboards, creating a cohesive and polished look. The trim can be installed using a nail gun or adhesive, depending on the type of trim and the material of the baseboard.
Installing vinyl plank flooring without removing baseboards requires careful planning, precise measurements, and meticulous execution. By following these steps and taking the time to ensure a proper fit, you can achieve a professional-looking finish that enhances the beauty and functionality of your space.

Easy Vinyl Plank Flooring Without Removing The Baseboards Making Things Is Awesome

Easy Vinyl Plank Flooring Without Removing The Baseboards Making Things Is Awesome

How To Install Laminate Flooring On Your Own Diy Hq Longwood Fl

How To Install A Hardwood Floor Without Removing The Existing Baseboard

How To Install Vinyl Flooring Without Removing The Baseboard

How To Install Laminate Flooring Without Removing Baseboards Just Needs Paint

Is It Okay To Not Remove Baseboards When Installing Vinyl Flooring Quora

How To Install Laminate Flooring Without Removing Baseboards Just Needs Paint

How To Install Vinyl Plank Flooring Without Removing Baseboards Avoid 1 Mistake

Is It Okay To Not Remove Baseboards When Installing Vinyl Flooring Quora
Related Posts