Installing Laminate Flooring Against Crooked Walls: A Comprehensive Guide
Installing laminate flooring can significantly enhance the aesthetic appeal and functionality of a living space. However, achieving a professional finish when dealing with crooked walls presents a unique set of challenges. A wall that deviates from a perfect 90-degree angle requires meticulous planning, precise measurements, and careful cutting to avoid unsightly gaps or uneven edges. This article provides a comprehensive guide to effectively installing laminate flooring against crooked walls, ensuring a seamless and visually pleasing outcome.
Before commencing the installation process, it is crucial to understand the underlying causes of a crooked wall. Walls may deviate from a true right angle due to original construction imperfections, settling of the building's foundation over time, or previous renovations that were not executed with precision. Identifying the nature and extent of the crookedness is the first step towards a successful installation.
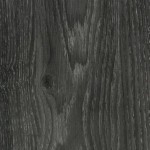
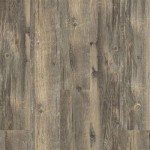
Preparation is key. Gather all the necessary tools, including a measuring tape, pencil, speed square, circular saw or jigsaw, tapping block, pull bar, spacers, and safety glasses. Selecting the appropriate laminate flooring is also crucial. Consider the thickness, durability, and color of the laminate panels, ensuring they complement the existing décor and can withstand the expected foot traffic.
Accurate Measurement and Planning
The first critical step is accurately measuring the crooked wall. Instead of relying on a single measurement, take multiple readings along the length of the wall, noting the variations. Use a measuring tape to determine the distance from the wall to a consistent reference point, such as a parallel wall or a straight chalk line. This process will reveal the extent of the deviation and allow for the creation of a precise cutting template.
Next, transfer the measurements onto the laminate planks. Utilize a speed square to establish a series of perpendicular lines from the edge of the plank, reflecting the varying distances recorded from the wall. Connecting these points will create a line that mirrors the crookedness of the wall. It is recommended to use a flexible measuring tool to replicate the exact curve of the wall onto the laminate. This can be a profile gauge or even a piece of cardboard that can be traced along the wall and then transferred to the plank.
It is vital to account for expansion gaps. Laminate flooring expands and contracts with changes in temperature and humidity. Leaving a gap of approximately ¼ to ⅜ inch between the flooring and the wall is essential to prevent buckling or warping. This gap will be concealed later by baseboards or quarter-round moldings.
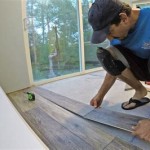
Dry-fitting the first row of planks along the crooked wall is a crucial step that allows for adjustments before committing to permanent installation. Lay the planks out without adhesive or click-lock engagement to verify the fit and visualize the final result. Make any necessary adjustments to the cut lines at this stage.
Precise Cutting Techniques
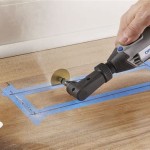
Cutting laminate flooring to match the contour of a crooked wall requires precision and the appropriate tools. A circular saw or jigsaw is commonly used for making these cuts. When using a circular saw, ensure the blade is sharp and designed for cutting laminate to minimize chipping. A jigsaw, equipped with a fine-tooth blade, is particularly useful for intricate curves and tight corners.
When cutting along the traced line, exercise caution. It is preferable to err on the side of cutting slightly longer than necessary, as it is easier to remove excess material than to add it back. After making the initial cut, carefully test-fit the plank against the wall. Use a block plane or sandpaper to fine-tune the edge, gradually removing material until the plank sits flush against the wall while maintaining the required expansion gap.
For particularly challenging curves or angles, consider using a coping saw. This hand tool allows for more precise and controlled cuts, especially in tight spaces. Take your time and follow the traced line meticulously.
Dust collection is important during the cutting process. Laminate flooring dust can be harmful if inhaled, so wear a dust mask and consider using a vacuum cleaner to remove dust particles as they are generated. Ensure adequate ventilation in the work area.
Seamless Transitions and Finishing
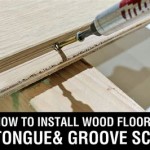
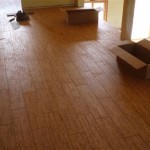
Once the first row of planks is accurately cut and installed along the crooked wall, continue laying the remaining flooring according to the manufacturer's instructions. Maintaining proper alignment and ensuring tight seams between planks is crucial for a professional-looking floor. Utilize tapping blocks and a pull bar to engage the locking mechanisms of the laminate planks securely.
When installing subsequent rows, take into account the potential for additional variations in the wall’s crookedness. Periodically check the alignment of the flooring against the wall and adjust the cuts as needed. Small discrepancies can be addressed by slightly angling the planks or using shims to maintain a consistent expansion gap.
The finishing touches are essential for concealing the expansion gaps and creating a polished aesthetic. Install baseboards or quarter-round moldings along the perimeter of the room. These moldings should cover the expansion gap without restricting the flooring's ability to expand and contract. Choose moldings that complement the flooring and the overall style of the room.
Miter the corners of the moldings to create seamless transitions. Use a miter saw to cut precise angles, ensuring a tight and professional fit. Secure the moldings to the wall using finishing nails or construction adhesive. Fill any nail holes or gaps with wood filler and sand smooth before painting or staining to match the moldings.
Inspect the installed flooring for any imperfections or inconsistencies. Address any loose planks, gaps, or uneven edges. Clean the flooring thoroughly to remove any dust or debris. Applying a laminate floor cleaner will help maintain the floor's appearance and protect it from damage.
Dealing with door frames presents another challenge. Undercutting the door jambs allows the laminate flooring to slide underneath, creating a clean and professional finish. Use a jamb saw to carefully cut away a small portion of the door jamb, ensuring enough clearance for the flooring and expansion gap.
In areas where the laminate flooring transitions to another type of flooring, such as tile or carpet, use transition strips. These strips cover the gap between the two flooring types and create a smooth and safe transition. Choose transition strips that are appropriate for the height difference between the two floors and secure them according to the manufacturer's instructions.
Throughout the installation process, prioritization of safety is paramount. Wear safety glasses to protect your eyes from flying debris. Use earplugs to minimize noise exposure. Keep the work area clean and free of clutter to prevent accidents. Follow the manufacturer's instructions for the tools and materials being used.
When dealing with intricate or exceptionally crooked walls, consider seeking professional assistance. A flooring installer has the experience and expertise to tackle complex installations and ensure a flawless finish. The cost of professional installation may be offset by the time and effort saved, as well as the guarantee of a high-quality result.
The successful installation of laminate flooring against crooked walls hinges on meticulous planning, accurate measurements, precise cutting techniques, and attention to detail. By following the guidelines outlined in this article, homeowners and DIY enthusiasts can achieve a professional-looking floor that enhances the beauty and value of their homes.

Step 2 Scribing The Wall

How To Start The First Row On Laminate Floor If Wall Is Not Straight Hunker

Slick Trick To Measure The Last Row Of Flooring On An Uneven Wall Laminate Hardwood Tile

How To Cut Laminate Flooring Fit An Uneven Rock Wall

How To Install Laminate Flooring The Home Depot

Plan Your Floor Figuring Out Starting Lines For Installation Wood Business

How To Close Gaps In Laminate Flooring 3 Easy Methods

How To Fix A Gap Between Laminate Flooring And The Wall Quora

A Beginner S Guide To Installing Vinyl Plank Flooring Dumpsters Com

How To Install Baseboard Trim Over Uneven Wall Doityourself Com Community Forums
Related Posts