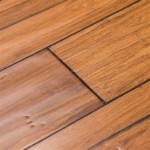
How to Replace Vinyl Flooring Planks
Vinyl flooring is a popular choice for homes and businesses because it is durable, affordable, and easy to maintain. However, even the best vinyl flooring can eventually become damaged or worn, and when this happens, you may need to replace one or more planks.
Replacing vinyl flooring planks is a relatively easy DIY project that can be completed in a few hours. With the right tools and materials, you can have your floor looking its best again in no time.
Tools and Materials You'll Need
- New vinyl flooring planks
- Utility knife
- Pry bar
- Hammer
- Tape measure
- Level
- Adhesive (optional)
Step-by-Step Instructions
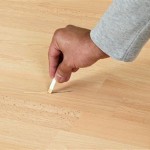
1.Remove the damaged plank
Using a utility knife, score the damaged plank along the seam where it meets the adjacent planks. Then, use a pry bar to carefully pry up the damaged plank. Be careful not to damage the surrounding planks.
2.Clean the subfloor
Once the damaged plank is removed, clean the subfloor thoroughly. Remove any debris or old adhesive. If the subfloor is uneven, you may need to level it using a self-leveling compound.
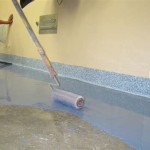
3.Apply adhesive (optional)
If you are installing the new plank on a concrete subfloor, you may need to apply a layer of adhesive. Follow the manufacturer's instructions for applying the adhesive.
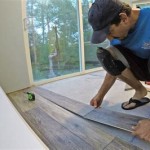
4.Install the new plank
Place the new plank in the space where the damaged plank was removed. Align the plank with the adjacent planks and tap it into place using a hammer. Use a level to make sure the plank is level.
5.Lock the plank into place
Most vinyl flooring planks have a locking system that allows them to be locked together. To lock the plank into place, simply push down on the long side of the plank until you hear a click.
6.Repeat steps 1-5 for any additional planks that need to be replaced
Once you have replaced the damaged plank, repeat steps 1-5 for any additional planks that need to be replaced.
Tips
- If you are replacing a plank in the middle of a row, you may need to cut the new plank to fit. To do this, measure the space where the new plank will go and then use a utility knife to cut the plank to the correct size.
- When tapping the new plank into place, be careful not to hit it too hard. If you hit it too hard, you could damage the plank or the surrounding planks.
- Once you have replaced all of the damaged planks, clean the floor thoroughly to remove any debris or adhesive residue.
Conclusion
Replacing vinyl flooring planks is a relatively easy DIY project that can be completed in a few hours. With the right tools and materials, you can have your floor looking its best again in no time.

Installing Vinyl Plank Flooring How To Fixthisbuildthat

How To Install Vinyl Plank Flooring As A Beginner Home Renovation

Installing Vinyl Floors A Do It Yourself Guide The Honeycomb Home

How To Install Vinyl Plank Flooring The Home Depot

How To Install Floating Vinyl Plank Flooring In 5 Easy Steps Riverbend Interiors

A Beginner S Guide To Installing Vinyl Plank Flooring Dumpsters Com

Installing Vinyl Plank Flooring For Beginners Anika S Diy Life

How To Install Vinyl Plank Flooring In A Bathroom Fixthisbuildthat

How To Repair Luxury Vinyl Plank Flooring The Palette Muse

How To Install L And Stick Vinyl Flooring Over Existing
Related Posts