How to Replace Laminate Flooring with Tile
Replacing laminate flooring with tile is a significant home improvement project that can dramatically alter the look and feel of a space. Tile offers durability, water resistance, and a timeless aesthetic, making it a popular choice for kitchens, bathrooms, and entryways. However, the process involves careful planning, preparation, and execution. This article provides a step-by-step guide to help you successfully replace your laminate flooring with tile.
1. Preparation and Planning
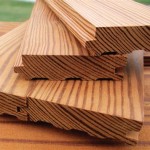
Before embarking on the installation, it is crucial to gather the necessary tools and materials. This includes tile, grout, mortar, spacers, a tile cutter, a trowel, a rubber mallet, a level, and a measuring tape. Determining the type of tile, grout, and mortar needed for your project requires careful consideration. For instance, porcelain tiles are highly durable and resistant to moisture, making them suitable for high-traffic areas.
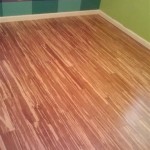
Next, remove the existing laminate flooring. This may require prying up the planks with a crowbar or pry bar, and removing any staples or nails. Carefully assess the subfloor for any unevenness or damage. If necessary, level the subfloor using plywood or self-leveling compound to ensure a solid foundation for the tile installation.
2. Installation Process
After prepping the subfloor, you can begin laying the tile. Start by marking the center of the room with a pencil and chalk line. Installing the tile from the center outwards will ensure that any cuts or adjustments will be less noticeable. Spread a thin layer of mortar using a trowel, ensuring an even distribution.
Position the first tile on the mortar bed, using a level to ensure it is perfectly straight. Continue placing tiles, ensuring they are spaced evenly using tile spacers. Use a rubber mallet to gently tap the tiles into place, ensuring they are firmly secured to the mortar.
When you reach the edges of the room, you'll need to cut the tiles to fit. Using a tile cutter, carefully score the tile along the desired line and then snap it into place. Alternatively, you can use a wet saw for larger or more complex cuts. Once all the tiles are in place, allow the mortar to cure for the recommended time before moving on to the next step.
3. Grouting and Finishing Touches
After the mortar has dried, apply grout to fill the gaps between the tiles. Use a rubber trowel to spread the grout evenly, pushing it into the spaces between the tiles. Once the grout has set, wipe away any excess grout with a damp sponge. Allow the grout to fully cure before sealing it, which will enhance its durability and water resistance.
Finally, add any necessary trim pieces or transition strips. These pieces can be used to cover gaps between the tile and other flooring materials, such as wood or carpet. It's important to select trim pieces that complement the chosen tile and match the style of the room.
Replacing laminate flooring with tile can be a rewarding experience, transforming a space from drab to dazzling. However, it's essential to approach this project with care, planning, and attention to detail. By following these steps, you can enjoy the beauty and durability of tile flooring for years to come.

Installing Laminate Tile Over Ceramic Diy Floors Wonderhowto

Installing Laminate Tile Over Ceramic Diy Floors Wonderhowto

Can You Lay Laminate Flooring Over Tile

Transition From Tile To Laminate Howtospecialist How Build Step By Diy Plans

Installing Laminate Tile Flooring Diy Instructions

Installing Laminate Tile Over Ceramic Diy Floors Wonderhowto

Can You Put Laminate Flooring Over Tile Twenty Oak

How To Install A T Mold Transition Between Laminate Ceramic Tile Construction Repair Wonderhowto

Install Laminate Flooring Over Ceramic Tile

How To Install T Molding In Laminate Flooring Working On
Related Posts