How to Replace Flooring in a Mobile Home: A Step-by-Step Guide
Replacing flooring in a mobile home requires a different approach compared to traditional homes due to its unique construction. However, with the right materials, tools, and a bit of planning, it's a project that can be tackled by most DIY enthusiasts. Here's a comprehensive guide to help you through the process:
Step 1: Gather Materials and Tools
Before you begin, gather the necessary materials and tools:
- New flooring material (e.g., laminate, vinyl, carpet)
- Underlayment (if required by flooring type)
- Adhesive (for glue-down flooring)
- Hammer or flooring nailer
- Pry bar or flooring puller
- Tape measure and chalk line
- Level
- Safety glasses and gloves
Step 2: Remove Existing Flooring
Start by removing any existing baseboards or trim. Then, use a pry bar or flooring puller to carefully detach the existing flooring from the subfloor. Work in small sections to prevent damage to the subfloor.
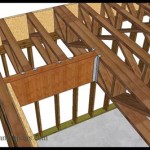
Step 3: Inspect Subfloor
Once the old flooring is removed, inspect the subfloor for any damage or unevenness. Repair any holes or cracks using appropriate materials. If there are significant dips or bumps, leveling compound may be necessary.
Step 4: Install Underlayment (Optional)
Some flooring types, such as laminate and vinyl, require an underlayment to provide added support, reduce noise transmission, and moisture protection. If required, cut the underlayment to fit the room and lay it over the subfloor.
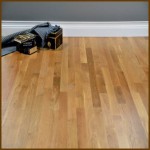
Step 5: Lay New Flooring
Depending on the type of flooring material, the installation process may vary. For glue-down flooring, apply adhesive to the subfloor and carefully place the new flooring in sections. For floating floorings, simply interlock the planks or tiles.
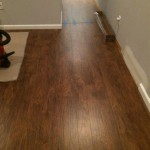
Step 6: Secure Flooring
Once the flooring is laid, use a hammer or flooring nailer to secure it to the subfloor. Start from one corner and work your way towards the opposite end. Ensure the flooring is firmly attached without any gaps.
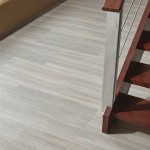
Step 7: Install Baseboards and Trim
Once the flooring is secured, re-install the baseboards and any other trim. This will hide the expansion gap between the flooring and the wall and give the room a finished look.
Tips for Success
- Plan the layout beforehand to minimize waste.
- Use spacers to ensure even gaps between flooring planks.
- Follow the manufacturer's instructions carefully for proper adhesive application and flooring care.
- Allow the flooring to acclimate to the room temperature for several days before installation.
- Wear appropriate safety gear and work in a well-ventilated area.

How To Replace Flooring In A Mobile Home Star Supply Usa

How To Replace Flooring In A Mobile Home Star Supply Usa

Floor Removal How To Patch A Mobile Home Bedroom Renovation

How To Replace Subflooring In A Mobile Home Step By Guide Living

Installing Laminate Flooring In Mobile Homes

Mobile Homes Removing Vinyl Flooring Floor Prep For

Floor Removal How To Patch A Mobile Home Bedroom Renovation

The Right Floors For A Manufactured Home Ub Hardwoods Blog

Mobile Home Makeover New Floors L And Stick Vinyl With Grout Complete Project

How To Fix A Sagging Subfloor In Your Tucson Mobile Home
Related Posts