How to Repair Subflooring in a Mobile Home
Subflooring in mobile homes plays a crucial role in providing structural support and a level surface for the flooring. Over time, subflooring can suffer from wear and tear, leading to sagging, creaking, and even structural instability. Repairing subflooring in a mobile home is an essential maintenance task to ensure the longevity and safety of the home. This article provides a comprehensive guide on how to repair subflooring in a mobile home, covering the essential steps and considerations.
1. Identifying Subflooring Issues
Before embarking on subflooring repair, it is essential to accurately identify the extent of the damage and its underlying causes. This step involves a thorough inspection of the subflooring and surrounding areas.
Here are some common signs that indicate subflooring problems:
- Sagging or uneven floors: This is a clear indication of subflooring weakness. The floor may dip or buckle under weight.
- Creaking or groaning noises: These sounds often occur when subfloor joists are loose or failing to support the weight.
- Visible cracks or gaps in the flooring: Cracks or gaps in the flooring may indicate underlying subfloor issues.
- Water damage: Moisture exposure can weaken subfloor materials, leading to rot and decay.
- Signs of pests: Termites or other insects can damage subfloors, causing structural instability.
Once you have identified the subflooring issues, you can determine the best repair strategy. For instance, if the subfloor is sagging due to loose or cracked joists, you may need to reinforce or replace the joists. If the subfloor is damaged by water, you may need to remove and replace the affected sections.
2. Gathering Materials and Tools
To repair subflooring effectively, you need the right materials and tools. Here is a list of essential materials and tools:
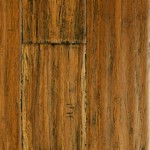
- Subfloor sheathing: This is the material that forms the subfloor surface. Common choices include plywood, OSB (oriented strand board), or tongue-and-groove planks.
- Joist hangers: These metal brackets provide support for joists and help prevent sagging.
- Shims: Used to level the subfloor and ensure a smooth surface.
- Screws or nails: For attaching subfloor sheathing to joists and securing joist hangers.
- Construction adhesive: Helps to reinforce the bond between subfloor sheathing and joists.
- Circular saw or jigsaw: For cutting subfloor sheathing to size.
- Drill with driver bits: For drilling pilot holes and driving screws.
- Hammer: For driving nails.
- Level: To ensure the subfloor is level and even.
- Tape measure: For accurate measurements.
- Safety gear: Including gloves, safety glasses, and dust mask.
Before starting the repair, ensure you have enough of each material and that the tools are in good working condition.
3. Repairing Subflooring
The specific repair methods will vary depending on the extent of the damage and the type of subfloor. However, there are general steps that apply to most subfloor repairs.
1. Accessing the Subfloor: This may require removing existing flooring, cabinets, or other items. If the issue is in a crawl space, you will need to access the crawl space.
2. Removing Damaged Subfloor: Use a circular saw or jigsaw to cut out the damaged portion of the subfloor. Remove the old subfloor material carefully, ensuring that you are not damaging the surrounding joists.
3. Replacing Damaged Joists: If the joists are damaged, they need to be replaced with new ones. If the joists are simply loose, you can use joist hangers to secure them.
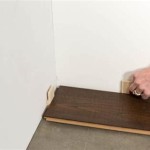
4. Installing New Subfloor Sheathing: Cut the new subfloor sheathing to size and attach it to the joists with screws, nails, or construction adhesive. Avoid using nails unless they are ring-shank nails to help prevent the subfloor from squeaking. Ensure that the sheathing is installed flush with the surrounding subfloor and that the edges are properly supported to prevent sagging.
5. Leveling the Subfloor: After installing the new subfloor sheathing, use shims and a level to ensure that the subfloor is level and even. This will help to prevent sagging and ensure a smooth flooring surface.
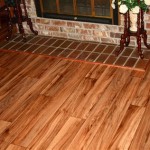
6. Replacing Flooring and Finishing: Once the subfloor is repaired and level, you can replace the flooring and any other items that were removed.
Important Considerations for Subfloor Repair in a Mobile Home
- Structural Integrity: It is essential to ensure that any subfloor repair does not compromise the structural integrity of the home. Consult with a professional if you are unsure about the proper repair techniques.
- Building Codes: Mobile homes have specific building codes that may affect subfloor repairs. Check with your local building department for information on the requirements in your area.
- Moisture Control: Be sure to address the source of any moisture problems that may have led to the subfloor damage. Make sure that the area is well-ventilated. This will help minimize the risk of future damage.
- Pest Control: If insect damage is a concern, treat the subfloor and surrounding areas with an appropriate insecticide.

Floor Removal How To Patch A Mobile Home Bedroom Renovation

Mobile Home Floors Sub Floor Repair

Mobile Home Subfloor Repair Guide The Dealer

How To Repair A Rotted Mobile Home Floor Single Wide 1

How To Replace Flooring In A Mobile Home Star Supply Usa

How To Repair A Mobile Home Floor

Mobile Home Subfloor Repair Guide The Dealer

Manual For Mobile Manufactured Home Repair Upgrade Repairs

Mobile Home Soft Spots Repair Tips Gone

Mobile Home Floors Sub Floor Repair
Related Posts