How To Remove Tongue And Groove Laminate Flooring
Removing tongue and groove laminate flooring is a common task for homeowners undertaking renovations or repairs. While designed for easy installation, removing laminate flooring requires a methodical approach to prevent damage to the flooring and the subfloor beneath. This guide provides a comprehensive overview of the tools, techniques, and considerations necessary for a successful laminate flooring removal project.
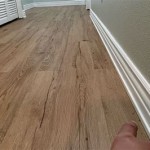
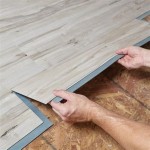
Before initiating the removal process, it's crucial to understand the construction of tongue and groove laminate flooring. Each plank features a tongue on one edge and a groove on the opposite edge. These interlocking features allow the planks to connect tightly, creating a seamless and stable floor surface. The removal process involves carefully disengaging these interlocking joints without causing damage.
Proper preparation is essential for a smooth and efficient removal. This includes gathering the necessary tools, assessing the layout of the flooring, and taking safety precautions to protect yourself and the surrounding area.
Gathering the Necessary Tools and Materials
The success of your laminate flooring removal project hinges on having the right tools. The following list outlines essential tools and materials:
- Pry Bar and Hammer: These tools are fundamental for lifting and disengaging the laminate planks. A sturdy pry bar provides leverage, while a hammer helps to gently tap the pry bar into position.
- Utility Knife: A utility knife is invaluable for scoring the edges of the flooring near walls and doorways. This helps to prevent damage to the wall and trim during removal.
- Chisel: A chisel, particularly a flat-head chisel, is useful for working in tight spaces and separating stubborn planks.
- Tapping Block and Rubber Mallet: While primarily used for installation, a tapping block and rubber mallet can be helpful in disengaging the tongue and groove joints by gently tapping planks apart.
- Safety Glasses: Eye protection is paramount to prevent debris from entering your eyes during the removal process.
- Work Gloves: Gloves protect your hands from splinters and provide a better grip on the tools.
- Knee Pads: Removing flooring often requires working on your knees, so knee pads are essential for comfort and protection.
- Dust Mask: Working with flooring can generate dust and debris, so a dust mask is recommended to protect your respiratory system.
- Plastic Sheeting and Tape: Covering doorways and furniture with plastic sheeting can help contain the dust and debris generated during the removal process.
- Garbage Bags or Trash Bins: Having a readily available disposal method for the removed flooring is crucial for maintaining a clean and organized workspace.
Having these tools readily available will significantly streamline the removal process and minimize potential delays. Consider organizing them in a toolbox or designated area to ensure easy access.
Identifying the Flooring Layout and Starting Point
Before commencing the removal, carefully assess the layout of the laminate flooring. This involves identifying the direction of the planks and determining the best starting point. Typically, it's easiest to start at a wall or doorway where the planks are exposed.
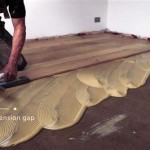
In most cases, the laminate flooring is installed with the tongue facing the wall. This means you'll need to start removing planks from the opposite side. Look for an area where you can easily access the edge of the plank and insert a pry bar. If the flooring is installed tightly against the wall, you might need to use a utility knife to score along the edge to create a small gap for inserting the pry bar.
Consider the presence of baseboards or molding. These may need to be removed or carefully scored along the top edge with a utility knife to prevent damage during the flooring removal. If removing baseboards, use a pry bar and hammer to gently detach them from the wall, being careful not to damage the drywall.
If you encounter areas where the flooring is glued down, you may need to use a heat gun or adhesive remover to loosen the glue before attempting to remove the planks. Exercise caution when using heat guns and follow the manufacturer's instructions carefully.
The Removal Process: Step-by-Step Guide
The actual removal process requires patience and a methodical approach. It's important to avoid excessive force, which can damage the planks and the subfloor. Here's a step-by-step guide to removing tongue and groove laminate flooring:
- Prepare the Area: Clear the area of any furniture or obstacles. Cover doorways and furniture with plastic sheeting to contain dust and debris. Wear safety glasses, work gloves, knee pads, and a dust mask.
- Score Along Walls and Doorways: Use a utility knife to score along the edges of the flooring where it meets the walls, doorways, and other fixed objects. This will prevent damage to these surfaces during the removal process.
- Start at the Edge: Choose a starting point along a wall or doorway where you can easily access the edge of the plank.
- Insert the Pry Bar: Gently insert the pry bar between the laminate flooring and the subfloor. Be careful not to damage the subfloor.
- Lift and Disengage: Use the pry bar to gently lift the plank, disengaging the tongue and groove joint from the adjacent plank. Use a hammer to tap the pry bar if needed, but avoid excessive force.
- Work Along the Plank: Continue lifting and disengaging the plank along its entire length. If the plank is particularly long or stubborn, you may need to use multiple pry bars.
- Remove the Plank: Once the plank is fully disengaged, carefully remove it from the floor.
- Repeat the Process: Repeat steps 4-7 for each subsequent plank, working your way across the floor.
- Address Glued-Down Sections: If you encounter sections where the flooring is glued down, use a heat gun or adhesive remover to loosen the glue before attempting to remove the planks. Follow the manufacturer's instructions carefully.
- Remove Fasteners: Some laminate flooring installations use staples or nails to secure the planks to the subfloor. Use pliers or a staple remover to remove these fasteners.
- Inspect the Subfloor: After removing the laminate flooring, inspect the subfloor for any damage or imperfections. Repair any cracks or unevenness before installing new flooring.
- Clean Up: Thoroughly sweep and vacuum the subfloor to remove any remaining debris.
- Dispose of the Flooring: Dispose of the removed laminate flooring in accordance with local regulations.
Throughout the removal process, exercise caution and avoid using excessive force. Take breaks as needed to prevent fatigue. If you encounter any difficulties, consult a professional flooring installer.
Removing laminate flooring that has been glued down presents a greater challenge. The adhesive bonds the flooring directly to the subfloor, making it much more difficult to lift and disengage the planks. Special techniques and tools are often required to effectively remove glued-down laminate flooring without damaging the subfloor.
Consider using a floor scraper with a long handle. This tool allows you to apply leverage and scrape the flooring away from the subfloor. Work in small sections, and be prepared to use considerable force. A heat gun can also be used to soften the adhesive, making it easier to scrape away the flooring. However, be cautious when using a heat gun, as it can damage the subfloor if overheated.
After removing the flooring, you'll likely be left with adhesive residue on the subfloor. There are several adhesive removers available that can help dissolve and remove this residue. Follow the manufacturer's instructions carefully when using these products, and ensure adequate ventilation in the work area.
In some cases, it may be necessary to use a floor grinder to remove stubborn adhesive residue. However, this should only be done by experienced professionals, as improper use of a floor grinder can damage the subfloor.
Pay close attention to transitions between different flooring types. For example, a transition strip is often used where laminate flooring meets tile or carpet. Carefully remove the transition strip, and then proceed with removing the laminate flooring. Be mindful of the potential for damage to the adjacent flooring material.
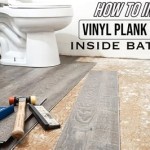
If the laminate flooring is installed in a bathroom or kitchen, be extra cautious around water pipes and appliances. Avoid using excessive force near these areas, and consider turning off the water supply to prevent accidental leaks.

How To Remove Tongue And Groove Flooring Without Causing Any Damage

How To Replace A Floorboard Fine Homebuilding

How To Remove A Single Piece Of Hardwood Flooring The Art Doing Stuff

How To Remove Laminate Flooring Bob Vila

Diy Tounge And Groove Floor Board Replacement Creative Cain Cabin

How To Remove A Single Piece Of Hardwood Flooring The Art Doing Stuff

Diy Tounge And Groove Floor Board Replacement Creative Cain Cabin

How To Remove A Single Piece Of Hardwood Flooring The Art Doing Stuff

Diy Laminate Flooring Removal How To Remove Pergo And Of Trim Without Damaging

How To Repair Laminate Flooring Forbes Home
Related Posts