How To Put Wooden Flooring On Stairs
Installing wooden flooring on stairs requires precision and attention to detail. This process transforms a staircase, enhancing both its aesthetic appeal and value. Proper preparation and execution are crucial for a successful and long-lasting result.
The first step involves assessing the current state of the stairs. One must determine whether the existing staircase structure is sound and capable of supporting the added weight of the wooden flooring. Any necessary repairs, such as fixing loose treads or risers, should be completed before proceeding. Accurate measurements of each stair tread and riser are essential for calculating the required amount of flooring material.
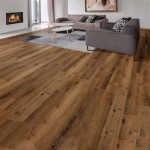
Material selection is a critical factor. Solid hardwood, engineered wood, and laminate are common choices for stair flooring. Solid hardwood offers durability and a classic look, while engineered wood provides stability and is suitable for areas prone to moisture fluctuations. Laminate is a cost-effective alternative, offering ease of installation and a variety of styles. The chosen material should complement the existing flooring in the home and withstand the heavy traffic stairs typically endure.
Once the materials are acquired, preparation of the stair treads and risers begins. Existing carpeting or other flooring materials must be removed completely. Any adhesive residue should be scraped off, and the surfaces should be cleaned thoroughly. A smooth and level surface is necessary for proper adhesion of the new flooring.
The next stage involves cutting the wooden flooring to the appropriate dimensions for each tread and riser. Precise measurements and careful cutting are essential for a professional finish. A miter saw is recommended for accurate angle cuts, particularly for stair nosings, which are the protruding edges of the treads. Using a template can ensure consistency across all treads and risers.
Installation typically begins at the bottom of the staircase. Construction adhesive is applied to the back of each piece of flooring before it is positioned on the stair tread or riser. A rubber mallet can be used to gently tap the flooring into place, ensuring a secure bond. Finish nails or brad nails are then used to further secure the flooring to the stairs. Countersinking the nails and filling the holes with wood putty creates a seamless and professional look.
Stair nosings require special attention. They can be pre-finished or finished on-site. Pre-finished nosings offer convenience, while finishing them on-site allows for a more customized look. Nosing options include bullnose, rounded, and square profiles. The chosen nosing profile should complement the overall style of the staircase and the flooring material.
Risers are installed similarly to treads. They are cut to size, adhesive is applied, and they are secured with nails. Ensuring a snug fit between the treads and risers is essential for a clean and finished appearance. Gaps should be avoided, as they can compromise the structural integrity and aesthetic appeal of the staircase.
Throughout the installation process, regular checks for level and alignment should be conducted. A level can be used to ensure the treads are even, and a straight edge can be used to confirm alignment. Addressing any discrepancies immediately prevents compounding issues later in the process.
Once all the treads and risers are installed, finishing touches are applied. These may include sanding any uneven edges or filling any remaining nail holes with wood putty. The wood putty should be allowed to dry completely before sanding smooth. This ensures a smooth and uniform surface for the final finish application.
The final step involves applying a protective finish to the wooden flooring. This can include staining and sealing or applying a clear coat. The choice of finish depends on the type of wood and the desired aesthetic. The finish protects the wood from wear and tear, moisture, and stains, ensuring the longevity of the staircase flooring.
Following these steps will result in a beautifully finished staircase with durable and attractive wooden flooring. However, complex staircase designs or challenging situations may necessitate the expertise of a professional flooring installer. Consulting a professional can ensure the project is completed to the highest standards and minimizes the risk of errors.

How To Install Laminate Flooring On Staircase Step By Guide

How To Install Laminate Flooring On Stairs 13 Steps

How To Install Wood Flooring On Stairs Esb

How To Install Laminate Flooring On Stairs Direct Wood

How To Install Laminate On Stairs Step By For Beginners

How To Install Laminate Flooring On Stairs Direct Wood

How To Install Vinyl Plank Flooring On Stairs In 6 Steps

How To Install Laminate Flooring On Stairs 13 Steps

How To Install Laminate Flooring On Floating Stairs

You Want To Install Hardwood On Stairs Reallyfloors America S Est Flooring
Related Posts