How To Measure A Room for Hardwood Flooring: A Comprehensive Guide
Accurate measurement is crucial when planning a hardwood flooring installation project. The amount of flooring required directly impacts the budget, minimizes waste, and ensures sufficient material for the entire room. Incorrect measurements can lead to material shortages, costly delays, and potentially a mismatched aesthetic if additional materials need to be ordered from a different batch. This guide provides a detailed, step-by-step approach to accurately measuring a room for hardwood flooring, addressing common challenges and offering valuable tips to avoid errors.
1. Gather the Necessary Tools and Materials
Before beginning the measurement process, assembling the appropriate tools is essential. The following items are required for obtaining accurate measurements:
- Measuring Tape: A high-quality measuring tape, preferably at least 25 feet in length, is the primary tool for this task. Ensure the tape is in good condition and retracts smoothly. A wider tape is often easier to handle, especially when measuring larger areas.
- Graph Paper or Measuring App: Graph paper or a room measuring app on a tablet or smartphone aids in sketching the room's layout accurately. Graph paper provides a visual representation of the room's dimensions, while a measuring app often allows for digital storage and easy calculation.
- Pencil or Pen: A pencil or pen is needed to record the measurements on the graph paper or within the measuring app. Using a pencil allows for easy corrections.
- Straight Edge or Ruler: A straight edge or ruler is helpful for drawing straight lines on the graph paper, enhancing the clarity of the room's layout.
- Calculator: A calculator is required to perform the necessary calculations for determining the total square footage. A scientific calculator can be useful if the room has complex shapes or angles.
- Laser Distance Measurer (Optional): A laser distance measurer can significantly speed up the measurement process, especially for larger rooms. This tool uses a laser beam to accurately measure distances, reducing the potential for errors associated with manual tape measurements.
2. Sketching the Room's Layout
The first step in the measurement process is to create a rough sketch of the room's layout. This sketch doesn't need to be perfectly to scale, but it should accurately represent the shape of the room and the locations of any permanent fixtures that might affect the flooring installation.
Begin by drawing the basic outline of the room's walls. If the room is a simple rectangle or square, this is straightforward. However, if the room has alcoves, closets, or other irregular shapes, ensure these are included in the sketch. Note the locations of doorways, windows, fireplaces, and any built-in cabinets or other features that will not be covered by the flooring.
Pay particular attention to any angles that are not perfectly square. These anomalies can significantly impact the amount of flooring material required and should be carefully documented. Consider using a protractor or angle finder to measure these angles accurately. Add these measurements to your sketch.
3. Measuring the Room's Dimensions
Once the rough sketch is complete, begin measuring the room's dimensions. It is critical to take precise measurements to ensure an accurate flooring estimate.
Start by measuring the length and width of the main section of the room. Hold the measuring tape taut and run it along the base of the wall, ensuring it is straight. Record the measurements in feet and inches, being as precise as possible. If the room is not perfectly square, take multiple measurements along each wall and record the longest measurement.
For alcoves, closets, or other irregular sections, measure the length and width of each section separately. If a section is curved, measure the longest straight lines that can be drawn within that section. These measurements will allow for a more accurate estimate of the total area.
When measuring around doorways or other openings, measure to the inside of the door frame or opening. This will ensure that the flooring is installed correctly up to the edge of the opening.
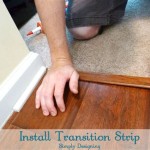
Measure the width of any doorways or openings as well. This measurement is important for determining the amount of transition strips or other edge treatments that will be needed.
If using a laser distance measurer, follow the manufacturer's instructions carefully. Ensure the laser is properly calibrated and aimed at the correct target. Take multiple measurements to verify accuracy.
4. Calculating the Square Footage
After accurately measuring the entire room and its features, the next step is to calculate the total square footage of the area to be covered. The method for calculating square footage depends on the shape of the room.
Rectangular or Square Rooms: For rectangular or square rooms, the square footage is calculated by multiplying the length by the width (Area = Length x Width). For example, if a room is 12 feet long and 10 feet wide, the square footage is 120 square feet.
Rooms with Irregular Shapes: For rooms with irregular shapes, divide the room into smaller, more manageable shapes, such as rectangles, squares, and triangles. Calculate the area of each shape separately and then add the areas together to get the total square footage.
For triangles, use the formula: Area = (1/2) x Base x Height. The base is the length of one side of the triangle, and the height is the perpendicular distance from that side to the opposite vertex.
For circles, the formula for area is: Area= πr², where r is the radius (the distance from the center of the circle to its edge). If dealing with a semi-circle, divide the calculated area by 2.
Accounting for Obstacles: While it is generally not necessary to subtract the area of small obstacles such as door thresholds or small fixtures, larger obstacles such as built-in cabinets or islands should be subtracted from the total square footage. Measure the area of these obstacles and subtract them from the total area calculation.
5. Adding Waste Factor
Once the total square footage has been calculated, it is essential to add a waste factor to account for cuts, mistakes, and variations in the flooring material. A waste factor is a percentage added to the total square footage to ensure that there is enough material to complete the project without running short. This waste factor is crucial for projects requiring specific matching of wood grains, patterns, and for rooms that are not simple rectangles.
The appropriate waste factor depends on the complexity of the installation and the type of flooring material being used. For simple installations with rectangular rooms and consistent flooring patterns, a waste factor of 5% to 7% is typically sufficient.
For more complex installations with irregular shapes, angled cuts, or intricate patterns, a waste factor of 10% to 15% is recommended. This higher waste factor will provide extra material to accommodate the more challenging cuts and minimize the risk of running short.
For diagonal installations, a higher waste factor of 15% to 20% may be necessary. Diagonal installations require more cuts and result in more waste than straight installations.
To calculate the amount of extra material needed, multiply the total square footage by the waste factor (expressed as a decimal). For example, if the total square footage is 200 square feet and the waste factor is 10%, the amount of extra material needed is 200 x 0.10 = 20 square feet. Add this number to the total square footage to get the final amount of flooring material to order (200 + 20 = 220 square feet).
It's always better to overestimate slightly than to underestimate, as running short on flooring material can cause significant delays and increase the overall cost of the project.
6. Consider Specific Flooring Considerations
The type of hardwood flooring being used can influence the amount of material needed. Certain types of flooring might require a larger waste factor due to specific installation requirements or pattern matching.
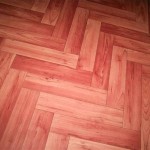
Patterned or Herringbone Flooring: Flooring with intricate patterns, such as herringbone or chevron, often requires a larger waste factor than standard plank flooring. These patterns involve more cuts and require careful matching of the individual pieces, resulting in more waste.
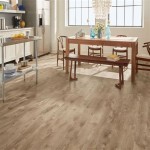
Wide Plank Flooring: Wide plank flooring can also require a higher waste factor. The wider planks may have more variations in color or grain, requiring more careful selection and cutting to achieve a consistent look.
Engineered vs. Solid Hardwood: Both engineered and solid hardwood flooring can be measured using the same principles. However, consider the intended use of the space when selecting flooring. Engineered hardwood is often more stable in areas with higher humidity. Accurate square footage measurement is equally important regardless of the hardwood type.
7. Double-Check and Verify
After completing the measurements and calculations, it is crucial to double-check and verify the accuracy of the results. Errors in measurement can lead to significant problems and added expenses.
Review the Sketch: Review the sketch of the room's layout to ensure that all dimensions and details have been accurately recorded. Check for any missing measurements or inconsistencies in the sketch.
Redo Calculations: Redo the calculations to ensure that the square footage has been calculated correctly. Use a calculator to verify the results and avoid any mathematical errors.
Re-measure Key Areas: Re-measure key areas of the room to ensure that the original measurements were accurate. Pay particular attention to areas with irregular shapes or angled cuts.
Consult with a Professional: If unsure about the accuracy of the measurements or calculations, consider consulting with a professional flooring installer. An experienced installer can review the measurements and provide valuable advice and guidance.
By following these steps carefully and taking the time to double-check the results, it is possible to accurately measure a room for hardwood flooring and ensure that you have enough material to complete the project successfully.

Measuring Guide For Wood Flooring Natural Floor Co

How To Measure A Room Imperial Wood Floors

How To Measure A Room For Flooring

How To Determine Square Footage For Flooring Vermont Hardwoods

How To Measure Your Room Hardwood Floor Depot

Measuring Guide For Wood Flooring Natural Floor Co

How To Measure Rooms For New Hardwood Flooring Carlisle Wide Plank Floors

How To Measure A Room For Flooring Panel Town Floors

How To Measure A Room For Wood Flooring Laminate And Luxury Vinyl Tiles

Square Footage Calculator Carpet One Floor Home
Related Posts