Laying Solid Hardwood Flooring on Concrete: A Comprehensive Guide
Installing solid hardwood flooring on concrete requires careful preparation and meticulous execution to achieve a durable and aesthetically pleasing result. This guide will provide you with essential steps and considerations to ensure a successful installation.
Materials Needed
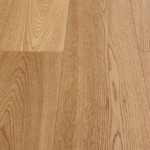
- Solid hardwood flooring
- Moisture barrier (polyethylene sheeting)
- Underlayment (foam or cork)
- Concrete screws
- Concrete adhesive
- Pry bar or nail puller
- Circular saw or miter saw
- Nail gun or hammer and nails
- Tape measure and marking tool
- Caulk gun
Step 1: Prepare the Concrete
Begin by cleaning the concrete surface thoroughly to remove any dirt or debris. Ensure the surface is flat, level, and free of cracks or gaps. If necessary, use a concrete patch or leveling compound to repair any imperfections.
Step 2: Install the Moisture Barrier
Spread a layer of moisture barrier over the entire concrete surface to prevent moisture from damaging the hardwood flooring. Overlap the seams by at least 6 inches and tape them together.
Step 3: Lay the Underlayment
Cover the moisture barrier with the underlayment. Choose a material that provides sound insulation, moisture resistance, and a smooth surface for the flooring. Roll out the underlayment and cut it to size using a utility knife. Tape the seams together.
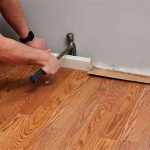
Step 4: Screw Down the Flooring
Start installing the hardwood flooring from one corner of the room. Place the first plank in place, ensuring the tongue and groove edges are aligned. Use concrete screws to secure it to the underlayment. Continue installing the planks by tapping them together and securing them with screws. Leave approximately 1/4-inch expansion gap around the perimeter of the room.
Step 5: Glue Down the Flooring (Optional)
For added strength, apply a thin layer of concrete adhesive to the underside of each plank before screwing it down. This will help prevent the flooring from shifting or squeaking over time.
Step 6: Trim and Fit
Use a circular saw or miter saw to cut the last row of planks to fit the space. Tap the planks into place and secure them with screws or adhesive.
Step 7: Caulk the Gaps
Apply a thin bead of caulk around the perimeter of the room, where the flooring meets the walls or baseboards. This will seal any gaps and prevent moisture or insects from entering.
Tips for Success
- Allow the hardwood flooring to acclimate to the room's temperature and humidity for several days before installation.
- Use a chalk line to guide your cuts and ensure the planks are straight.
- Countersink the screws slightly below the surface of the flooring and fill the holes with wood putty.
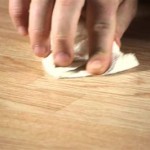
- Sand and finish the flooring according to the manufacturer's instructions.

Installing Wood Flooring Over Concrete Diy

How To Lay Solid Wood Flooring Over Concrete

How To Install Solid Wood Flooring On Concrete And Oak Specialists Suppliers Nexus

How To Install Hardwood Flooring For Beginners

Is It Possible To Put Hardwood Over A Concrete Subfloor Quora

How To Install Hardwood Flooring The Home Depot

Installing A Hardwood Floor Over Concrete Slab American Information Center

Wood Flooring Blog How To Lay Oak On Concrete Peak

How To Install Hardwood Flooring The Home Depot

How To Install Engineered Wood Flooring On Concrete
Related Posts