Essential Aspects of Laying Prefinished Hardwood Flooring
Upgrading your home's flooring with prefinished hardwood can add a touch of sophistication and warmth to any space. Prefinished hardwood flooring comes with a factory-applied finish, making installation a less time-consuming process compared to unfinished hardwood. Here are some crucial aspects to consider when embarking on this project:
Planning and Preparation
Proper planning is key to a successful installation. Determine the square footage of the area you need to cover and calculate the number of planks required, allowing for some extra planks for cuts and waste. Check if your subfloor is level and dry; any unevenness or moisture can compromise the integrity of the flooring. Underlayment padding can be used to smooth out minor imperfections and provide additional soundproofing.
Acclimation
Before installation, allow the prefinished hardwood planks to acclimate to the temperature and humidity conditions of the room where they will be installed. This typically takes around 24-48 hours and helps prevent buckling or warping due to moisture absorption or expansion.
Installation Methods
There are two main installation methods for prefinished hardwood flooring: floating and nail-down. Floating floors are installed over an underlayment and are held together by a locking system on the edges of the planks. Nail-down floors are fastened directly to the subfloor using nails or staples. The choice of method depends on the type of subfloor and personal preference.
Floating Installation
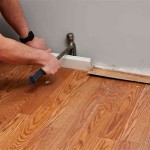
Start by laying out the first row of planks along the longest wall, ensuring that the tongue side faces the wall. Insert the first plank at a 45-degree angle into the opposite wall and lock it into place. Continue laying the planks, tapping them together with a tapping block and hammer. Use spacers to maintain a consistent gap between the planks and the walls.
Nail-Down Installation
For nail-down installation, use a nail gun or hammer and nails to secure the planks to the subfloor. Countersink the nails slightly below the surface of the planks using a nail set. Leave a small expansion gap around the perimeter of the room to accommodate movement.
Finishing Touches
Once the flooring is installed, apply baseboards, quarter rounds, or shoe molding to cover the expansion gap and provide a finished look. Use a broom or vacuum to clean up any debris, and enjoy the beauty of your new prefinished hardwood flooring.

How To Install Prefinished Hardwood Floors Ll Flooring

How To Install Prefinished Hardwood Floor Glue Down Technique Diy Mryoucandoityourself

5 Common Hardwood Flooring Installation Mistakes And How To Avoid Them

3 Facts You Didn T Know About Prefinished Hardwood Flooring Installation Reallyfloors America S Est

Installing Prefinished Hardwood Floors Extreme How To

Prefinished Vs Unfinished Hardwood Floors Svb Wood

How To Install Prefinished Hardwood Flooring

The Benefits Of Pre Finished Hardwood Flooring From Forest Llc

Hardwood Floor Installations

Can You Refurbish Pre Finished Hardwood Flooring Floor Refinishing
Related Posts

