How To Lay Glue Down Vinyl Plank Flooring
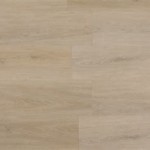
Glue-down vinyl plank flooring is a durable and attractive flooring option that can be installed in any room of your home. It is available in a variety of styles and colors, so you can find the perfect match for your décor. Glue-down vinyl plank flooring is also easy to install, so you can save money by doing it yourself.
### Materials You Will NeedBefore you begin, you will need to gather the following materials:
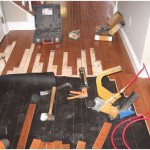
* Glue-down vinyl plank flooring * Measuring tape * Utility knife * Straight edge * Chalk line * Trowel * Notched trowel * Flooring roller * Knee pads ### Step 1: Prepare the SubfloorThe first step is to prepare the subfloor. The subfloor must be smooth, level, and dry. If the subfloor is not level, you will need to level it using a self-leveling compound. Once the subfloor is level, you will need to clean it thoroughly to remove any dirt or debris.
### Step 2: Lay Out the Vinyl PlanksOnce the subfloor is prepared, you can begin laying out the vinyl planks. Start by measuring the room and determining the center point. Then, snap a chalk line down the center of the room. This will help you to keep the planks straight as you install them.
### Step 3: Apply the AdhesiveOnce the planks are laid out, you can begin applying the adhesive. Use a notched trowel to apply the adhesive to the subfloor. Be sure to apply the adhesive evenly and in a thin layer. Do not apply too much adhesive, or it will squeeze out between the planks.
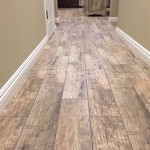
### Step 4: Install the Vinyl PlanksOnce the adhesive is applied, you can begin installing the vinyl planks. Start by placing the first plank in the center of the room. Then, continue to install the planks, working your way out from the center. Be sure to stagger the joints between the planks for a more natural look.
### Step 5: Roll the Vinyl PlanksOnce the vinyl planks are installed, you need to roll them to remove any air bubbles. Use a flooring roller to roll over the planks, applying even pressure. This will help to ensure that the planks are securely adhered to the subfloor.
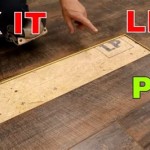
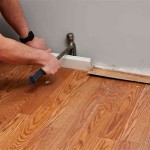
### Step 6: Trim the Excess VinylOnce the vinyl planks are rolled, you need to trim the excess vinyl around the edges of the room. Use a utility knife to score the vinyl, then snap it off. Be careful not to cut too deeply, or you will damage the subfloor.
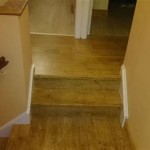
### Step 7: Finish the InstallationOnce the excess vinyl is trimmed, you can finish the installation by adding baseboards and moldings. This will give your floor a finished look and protect the edges of the vinyl planks.
## Tips for Laying Glue Down Vinyl Plank FlooringHere are a few tips for laying glue down vinyl plank flooring:
* Use a sharp utility knife to cut the vinyl planks. A dull knife will tear the vinyl and make it difficult to install. * Be sure to apply the adhesive evenly and in a thin layer. Too much adhesive will squeeze out between the planks and make it difficult to clean up. * Roll the vinyl planks thoroughly to remove any air bubbles. This will help to ensure that the planks are securely adhered to the subfloor. * Trim the excess vinyl carefully using a utility knife. Be careful not to cut too deeply, or you will damage the subfloor. * Add baseboards and moldings to finish the installation and protect the edges of the vinyl planks.
Post Nbl Express Eco Flooring

Deal Floors Step By Glue Down Vinyl Plank Installation Guide Flooring Blog Ideal In Dallas Fort Worth

Ivc Lvt Igrip Glue Down Installation With Trowel Full

How To Install Glue Down Vinyl Plank

How To Install Glue Down Vinyl Floor

How To Install Vinyl Plank Flooring In A Bathroom Fixthisbuildthat

Diy How To Install Glue Down Vinyl Plank Flooring

Floating Vinyl Plank Flooring Vs Glue Down 99cent Floor

Laying Vinyl Planks The Right Way Expert Guide By Fantastic Handyman

The Pro Guide To Glue Down Vinyl Flooring Craving Some Creativity
Related Posts