How To Lay Down Laminate Flooring On Stairs
Laminate flooring is an excellent option for stairs due to its durability, ease of cleaning, and affordable price. Laminate flooring is also relatively easy to install, even on stairs. With a little preparation and some patience, you can have your new laminate flooring installed on your stairs in no time.
Here are the essential steps on how to lay down laminate flooring on stairs:
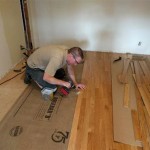
1. Prepare the stairs
The first step is to prepare the stairs for the laminate flooring. This involves removing any existing flooring, such as carpet or tile. You will also need to level the stairs and make sure that they are structurally sound. If the stairs are not level, you will need to use a leveler to make them so.
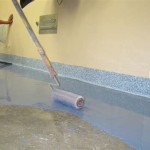
2. Install the underlayment
Once the stairs are prepared, you need to install the underlayment. Underlayment is a thin layer of material that goes between the subfloor and the laminate flooring. It helps to cushion the flooring and reduce noise. There are many different types of underlayment available, so be sure to choose one that is appropriate for your needs.
3. Install the first row of laminate flooring
The first row of laminate flooring is the most important, as it will set the tone for the rest of the installation. Start by measuring the width of the stair tread and cutting the first plank of laminate flooring to size. Then, apply a bead of construction adhesive to the back of the plank and place it on the stair tread. Use a level to make sure that the plank is level, and then tap it into place with a hammer.
4. Continue installing the laminate flooring
Once the first row of laminate flooring is installed, you can continue installing the remaining rows. Work your way up the stairs, one row at a time. Be sure to stagger the joints between the planks, and to use a spacer to ensure that the planks are evenly spaced. As you install each row, check to make sure that the flooring is still level.
5. Trim the laminate flooring
Once the laminate flooring is installed, you will need to trim it around the edges of the stairs. Use a jigsaw or a circular saw to cut the flooring to size. Be sure to wear safety glasses when using a power saw.
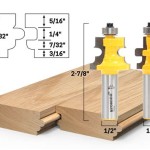
6. Install the nose molding
The nose molding is the finishing touch on your laminate flooring installation. It covers the edge of the flooring and helps to protect it from damage. Apply a bead of construction adhesive to the back of the nose molding and place it on the edge of the flooring. Use a hammer to tap it into place.
Your laminate flooring is now installed and ready to enjoy! Laminate flooring is a great way to update the look of your stairs and add value to your home.

How To Install Laminate Flooring On Staircase Step By Guide

How To Install Laminate Flooring On Stairs 13 Steps

How To Install Laminate Flooring On Stairs Direct Wood

How To Install Laminate On Stairs Follow Our Essential Guide Laying And Costing For

How To Install Laminate Flooring On Stairs Direct Wood

How To Install Vinyl Plank Flooring On Stairs In 6 Steps Inc

How To Install Laminate Flooring On Stairs 13 Steps

Value Carpets Flooring Installing Laminate On Stairs

Laminate On Stairs With Bad Installation

How To Install Laminate On Stairs Step By For Beginners
Related Posts