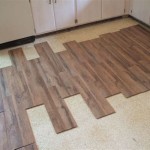
How to Install Wooden Flooring on Concrete
Installing wooden flooring on concrete can elevate your home's aesthetic appeal and enhance its warmth and comfort. While it may seem like a daunting task, with the right preparation and guidance, you can achieve a stunning and durable floor.
Before you begin, ensure that your concrete subfloor is clean, level, and free from moisture. Use a moisture meter to check for moisture levels below 12%. If necessary, consider installing a vapor barrier to prevent moisture from seeping through the concrete.
Materials Required:
- Wooden flooring planks
- Vapor barrier (if needed)
- Underlayment (for added cushioning and sound absorption)
- Saw or flooring cutter
- Adhesive or nails
- Hammer or flooring nailer
- Tapping block
- Trim molding
- Quarter-round molding
Step 1: Prepare the Concrete Surface
Ensure your concrete subfloor is properly prepared by cleaning it with a degreaser or concrete cleaner. Remove any existing flooring, leveling compounds, or debris. If necessary, use a sander or grinder to level the concrete and remove any imperfections.
Step 2: Install the Vapor Barrier (Optional)
If your concrete subfloor has moisture concerns, install a vapor barrier. Overlap the barrier by 6 inches and seal the seams with vapor barrier tape to prevent moisture penetration.
Step 3: Install the Underlayment
Roll out the underlayment over the vapor barrier, ensuring it is cut to fit the dimensions of the room. Tape the seams of the underlayment to create a smooth and even surface.
Step 4: Install the First Row of Flooring
Start by placing a spacer against the wall to create a consistent expansion gap. Lay the first row of planks along the spacer and secure them to the underlayment using adhesive or nails. Ensure the planks are tightly fitted and level.
Step 5: Install Subsequent Rows
Continue installing rows of flooring, using a tapping block and hammer or flooring nailer to secure them tightly. Ensure the planks are interlocked at the ends and staggered for strength.
Step 6: Cut and Fit Planks
Use a saw or flooring cutter to trim planks for the last row or around obstacles. Measure and mark the planks precisely to ensure a seamless fit.
Step 7: Install Trim Molding
Install trim molding around the perimeter of the floor to cover the expansion gap and enhance the finished look. Secure the trim with nails or adhesive.
Step 8: Install Quarter-Round Molding (Optional)
To create a more decorative and finished appearance, install quarter-round molding around the base of the trim molding. This molding helps to hide any unevenness between the floor and the wall.
Maintenance and Care
To preserve the beauty and longevity of your wooden flooring, regular maintenance is essential.

Installing Wood Flooring Over Concrete Diy

Installing Hardwood Floors On Concrete Subfloors

Ask Fred How Do I Install Wood Floor Below Grade Schedule

Installing Engineered Hardwood On Concrete Twenty Oak
Can You Put Wood Flooring Over A Concrete Slab Instead Of Using Cement Board Quora

How Do I Install A Hardwood Floor On Concrete Slab The Carpet Guys

How To Install Vinyl Or Laminate Floors In A Basement Over Concrete Slab

Installing Laminate Flooring Over Concrete The Ultimate Guide Aa Floors

How To Install Solid Wood Flooring On Concrete And Oak Specialists Suppliers Nexus

Installing A Hardwood Floor Over Concrete Slab American Information Center
Related Posts

