How to Effortlessly Install Vinyl Wood Flooring: A Comprehensive Guide
Installing vinyl wood flooring is a rewarding home improvement project that can elevate any room with warmth, style, and durability. By following these essential steps, you can achieve a professional-looking result that will enhance your space for years to come.
1. Preparation and Planning
Before starting the installation, it's crucial to prepare the subfloor. Ensure it's clean, dry, level, and free from any protrusions or imperfections. Next, determine the layout of your vinyl planks and create a plan to minimize waste and ensure a seamless appearance.
2. Acclimation
To prevent buckling and gaps, allow the vinyl planks to acclimate to the room temperature for 24-48 hours before installation. This process allows the material to adjust to the moisture and temperature of its surroundings.
3. Underlayment Installation
An underlayment acts as a cushion and moisture barrier beneath the vinyl flooring. Roll out the underlayment evenly, ensuring it's smooth and fits snugly against the subfloor. Use tape to secure the seams.
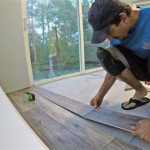
4. Starting the Installation
Begin installing the vinyl planks from the longest wall of the room. Place the first plank in one corner, keeping a small gap (usually 3-5 mm) from the wall to allow for expansion. Secure the plank with clips or nails, depending on the type of vinyl flooring you're using.
5. Continue Laying the Planks
Continue laying the vinyl planks row by row, interlocking them securely with the previous row. Alternate the starting plank in each row to create a staggered pattern. Use a tapping block and mallet to ensure the planks fit tightly together.
6. Cutting and Shaping
When you reach obstacles such as doorways or corners, use a sharp utility knife or circular saw to cut the planks to the required size. Measure carefully and take your time to achieve precise cuts.
7. Finishing Touches
Once all the vinyl planks are installed, check for loose edges or gaps and secure them if necessary. Use a trim kit to finish around walls, baseboards, and other areas to create a clean and polished look.
Tips for Success

How To Install Vinyl Flooring Planks

Installing Vinyl Plank Flooring How To Fixthisbuildthat

Installing Vinyl Floors A Do It Yourself Guide The Honeycomb Home

How To Install Vinyl Plank Flooring As A Beginner Home Renovation

A Beginner S Guide To Installing Vinyl Plank Flooring Dumpsters Com

Installing Vinyl Plank Flooring For Beginners Anika S Diy Life

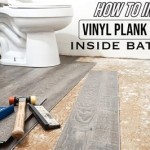
How To Install Vinyl Plank Flooring In A Bathroom Fixthisbuildthat

10 Beginner Mistakes Installing Vinyl Plank Flooring

How To Install Luxury Vinyl Plank Flooring Quick And Simple Casa Watkins Living

How To Install Vinyl Plank Flooring The Home Depot
Related Posts