How to Install Vinyl Sheet Flooring Around a Toilet
Installing vinyl sheet flooring around a toilet requires meticulous planning and careful execution. This durable and water-resistant flooring option is popular in bathrooms and kitchens, offering both aesthetic appeal and practicality. Mastering the installation process around a toilet, however, requires specific techniques to ensure a seamless and professional finish.
Preparing for Installation
Before embarking on the installation process, it's crucial to properly prepare the subfloor and gather the necessary tools and materials. This includes:
-
Clear the area:
Remove all fixtures, including the toilet, from the bathroom. Ensure the toilet is disconnected from the water supply and drainage system. -
Prepare the subfloor:
The subfloor should be clean, level, and dry. If necessary, repair any cracks or unevenness. -
Measure the area:
Accurately measure the bathroom floor area, taking into account the toilet footprint. This will determine the size of the vinyl sheet required. -
Gather tools and materials:
Ensure you have the right tools, including a utility knife, tape measure, level, pencil, flooring adhesive, and a roller.
Installing the Vinyl Sheet Flooring
Once the subfloor is prepared, the installation of the vinyl sheet flooring can begin. This involves:
-
Roll out the sheet:
Unroll the vinyl sheet flooring and position it in the bathroom, ensuring that the edges run parallel to the walls and that the pattern matches. -
Cut the sheet:
Using a utility knife, carefully cut the sheet around the toilet base following the measured dimensions. -
Apply adhesive:
Spread a thin, even layer of flooring adhesive onto the subfloor, using a notched trowel. Avoid applying adhesive directly to the vinyl sheet. -
Position the sheet:
Carefully position the vinyl sheet on the adhesive, ensuring it is level and centered. Smooth out any air bubbles and ensure the sheet is securely adhered to the subfloor. -
Trim the edges:
Trim any excess vinyl sheet around the toilet base using the utility knife. Ensure that the trim is flush with the floor surface.
Finishing Touches
Once the vinyl sheet flooring is installed, it's crucial to finish the installation with meticulous care. This involves:
-
Seal the edges:
Apply a sealant around the edges of the vinyl sheet to prevent moisture from seeping in. -
Replace the toilet:
Carefully reinstall the toilet, ensuring it is properly connected to the water supply and drainage system. -
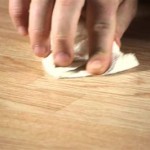
Clean the floor:
Clean the vinyl sheet flooring with a damp cloth to remove any adhesive residue or debris.
When installing vinyl sheet flooring around a toilet, it's crucial to pay attention to detail. Proper planning, preparation, and execution are key to achieving a professional-looking finish. Remember to wear safety glasses and gloves when handling sharp tools and adhesive.

How To Install Vinyl Plank Flooring In A Bathroom Fixthisbuildthat

How To Install Sheet Vinyl Around A Toilet

How To Cut Sheet Vinyl Around Toilet

How To Easily Install Vinyl Flooring Around A Toilet

How To Install Vinyl Plank Flooring In A Bathroom Fixthisbuildthat

How To Install Vinyl Plank Flooring In A Bathroom Fixthisbuildthat

How To Install Vinyl Sheet Flooring A Erfly House

How To Install Vinyl Sheet Flooring A Erfly House

How To Install Sheet Vinyl Floor Decor Adventures

How To Cut Flooring Around A Toilet Luxury Vinyl Plank Bathroom Installation Calibamboo
Related Posts