How To Install Vinyl Plank Flooring On Stair Landing Wall
Vinyl plank flooring is a popular choice for homeowners because of its durability, affordability, and ease of installation. While typically used on floors, it can also be applied to walls, including those on stair landings. This article will explore the process of installing vinyl plank flooring on a stair landing wall, covering the necessary materials, preparation steps, and installation techniques.
Materials Needed
Before beginning the project, ensure you have all the necessary materials. They include:
- Vinyl Plank Flooring: Choose a waterproof vinyl plank flooring specifically designed for wall application.
- Underlayment: This provides insulation and a smooth surface for the planks.
- Wall Adhesive: A strong adhesive specifically formulated for vinyl plank flooring on walls.
- Caulk: Used to seal gaps and joints between planks.
- Measuring Tape: For accurate measurements of the wall space.
- Level: To ensure the planks are installed level.
- Utility Knife: For cutting planks to size.
- Safety Glasses: To protect your eyes during cutting.
- Gloves: For protection while working with adhesive.
- Pencil: To mark cutting lines on the planks.
- Trowel: For applying adhesive to the wall.
- Roller: To smooth out the planks and remove air bubbles.
- Finishing Touches: Molding or trim to create a clean and finished look.
Preparing the Wall
Proper preparation is crucial for a successful vinyl plank flooring installation on the stair landing wall. This involves ensuring the wall is smooth, clean, and free of any imperfections.
- Remove Existing Wall Covering: If the stair landing wall has existing wallpaper or trim, remove it carefully.
- Repair Wall Defects: Fill in any holes, cracks, or dents with patching compound. Allow it to dry completely before proceeding.
- Sand the Wall: Sand the wall surface to create a smooth, even base for the underlayment. Use a fine-grit sandpaper and wear a dust mask for protection.
- Clean the Wall: Thoroughly clean the wall to remove dust and debris. Use a damp cloth and mild detergent. Allow the wall to dry completely.
Installing the Vinyl Plank Flooring
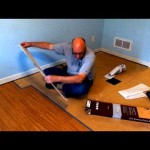
With the wall prepared, you can begin installing the vinyl plank flooring. This process requires careful measurements, accurate cutting, and proper application of adhesive:
- Layout the Planks: Begin by laying out the planks on the floor to visualize the final arrangement. Consider the direction of the planks and any patterns or designs you may want to create. Make sure the planks are level and flush – this helps to avoid gaps or unevenness in the finished installation.
- Apply Adhesive: Use a trowel to apply a thin layer of adhesive to the wall, following the manufacturer's instructions. Work in small sections to avoid adhesive drying too quickly.
- Install the First Plank: Starting at the bottom of the wall, press the first plank firmly onto the adhesive. Ensure it is level using a level and adjust as needed. Use a roller to smooth out the plank and remove any air bubbles. The first plank can be attached to the wall in multiple ways, such as using a starting clip or a liquid nail adhesive. Consult the manufacturer's instructions for the recommended method.
- Install Subsequent Planks: Attach the next planks, ensuring they fit tightly against the first plank and are level. Use a utility knife to cut the planks to fit around corners or obstructions. Remember to maintain consistent spacing between planks, and if possible, stagger the joints. Use a rubber mallet to tap the planks into place, but avoid hammering directly on the planks to prevent damage.
- Seal Gaps and Joints: Use caulk to seal any gaps or joints between the planks. This will provide a seamless and water-resistant finish. Be sure to choose a caulk that is compatible with the vinyl plank flooring.
- Install Trim: Once the vinyl plank flooring is installed, use molding or trim to create a clean and finished look. This will also help to protect the edges of the flooring.
Remember to install in a well-ventilated space and allow the adhesive to dry completely before applying any weight or pressure to the finished installation.

How To Install Vinyl Plank Flooring On Stairs In 6 Steps

How To Install Luxury Vinyl Plank Flooring On Stairs Landing

How To Install Vinyl Plank Flooring On Stairs In 6 Steps

Steps To Install Lvp On Stairs Flooring Insights

Installing Vinyl Plank Flooring On Stairs Easy Diy Guide

Installing Vinyl On A Stair Landing Howto Diy Stepup Vinylflooring

Installing Laminate Flooring On Stairs Diy

How To Install Vinyl Plank Flooring On Stairs In 6 Steps

Vinyl Plank Flooring On Stairs For Beginners

Which Direction Should I Install Plank Flooring Jenkins The People
Related Posts