How To Install Vinyl Plank Flooring in a Mobile Home
Installing vinyl plank flooring in a mobile home can significantly enhance its aesthetics and functionality. It's a durable and relatively easy-to-install option, offering a modern and stylish look. However, the process requires careful preparation and attention to detail to ensure a successful outcome. This article will guide you through the essential steps of installing vinyl plank flooring in a mobile home, providing clear instructions and helpful tips.
1. Preparation: Laying the Foundation for Success
Before embarking on the installation, proper preparation is essential for a smooth process and a lasting result. This includes:
- Clear the Area: Remove all furniture, appliances, and belongings from the room where you will install the flooring. This not only ensures a clear workspace but also protects your belongings from potential damage.
- Prepare the Subfloor: The subfloor must be clean, dry, and level. Any irregularities or gaps should be addressed with patching compound or leveling shims. If your mobile home has a plywood subfloor, ensure it's in good condition, free from warping or soft spots.
- Moisture Barrier: Install a moisture barrier, such as a 6-mil polyethylene sheet, over the subfloor to prevent moisture from seeping through the vinyl planks. Secure the edges of the barrier with tape to create a continuous seal.
- Underlayment: Use an appropriate underlayment beneath the vinyl planks. This layer provides cushioning, soundproofing, and a smoother surface for installation. Options include foam, cork, or rubber underlayment.
By taking these preparatory steps, you ensure a stable and even foundation for your vinyl plank flooring, contributing to a successful installation.
2. Installation: A Step-by-Step Guide
The installation process involves carefully laying the vinyl planks, starting from a designated point in the room. Follow these steps:
- Start in a Corner: Choose a corner of the room as your starting point. This provides a reference point for aligning the first row of planks.
- Lay the First Row: Lay the first plank against the wall, ensuring a gap of ⅛ inch between the plank and the wall. This gap allows for expansion and contraction of the flooring. Secure the plank with a tap of a rubber mallet, ensuring it's flush with the wall.
- Use a Spacer: Insert a spacing tool between the end of the first plank and the beginning of the second. This maintains the required gap between planks for expansion and contraction.
- Install Subsequent Rows: Stagger the seams of the planks in each subsequent row to create a brick-like pattern. This enhances the visual appeal and structural integrity of the installation.
- Cut Planks: Use a utility knife or a specialized flooring cutter to trim planks to fit around obstructions or corners. Ensure precise cuts for a seamless installation.
- Trim the Last Row: Measure and cut the last row of planks to fit. The planks should be positioned close to the wall but with a gap for expansion. Use a rubber mallet to tap them into place.
When laying vinyl plank flooring, it's crucial to avoid excessive force when tapping down planks. Excessive pressure can damage the planks and affect the overall look. Remember to wear appropriate protective gear, such as gloves and safety glasses, during the installation process.
3. Finishing Touches: Enhancing the Look and Functionality
To complete the installation and ensure a professional finish, follow these extra steps:
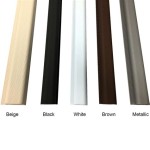
- Transition Strips: Use transition strips to seamlessly bridge the vinyl plank flooring with other flooring types, such as carpet or tile, in adjacent rooms.
- Baseboards: Install baseboards around the perimeter of the room to cover the gap between the flooring and the walls. This provides a clean and finished look.
- Clean Up: After installation, remove any debris or excess underlayment to ensure a clean and professional finish.
Vinyl plank flooring is a popular choice for many homes due to its versatility and durability. With careful planning, preparation, and attention to detail, you can install a beautiful and functional flooring system in your mobile home.

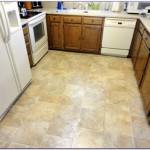
Vinyl Plank In A Mobile Home

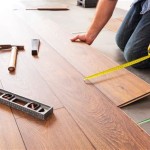
Installing Laminate Flooring In Mobile Homes

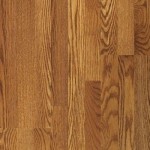
Vinyl Plank In A Mobile Home

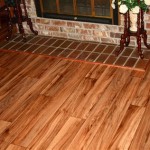
Installing Laminate Flooring In Mobile Homes

Installing New Floors In Single Wide Mobile Home Renovation Project

Diy Rv Renovation Installing Vinyl Plank Flooring Our Camper 2 The Mommy

The Right Floors For A Manufactured Home Ub Hardwoods Blog

How To Install Vinyl Plank Flooring Our Diy Camper 2 0 The Mommy

Installing Vinyl Floors A Do It Yourself Guide The Honeycomb Home

Mobile Homes Removing Vinyl Flooring Floor Prep For