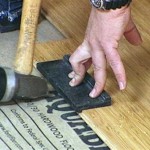
Installing Vinyl Flooring Tiles Over Existing Flooring: A Comprehensive Guide
Installing vinyl flooring tiles over existing flooring is a popular and cost-effective way to update your home's interior. Vinyl tiles are durable, easy to clean, and come in a wide variety of styles and colors. If you are considering installing vinyl flooring tiles over existing flooring, follow these step-by-step instructions to ensure a successful installation.
1. Prepare the Existing Flooring
Before installing vinyl flooring tiles, it's crucial to prepare the existing flooring to ensure a smooth and stable surface. Remove any furniture, baseboards, and moldings. Clean the floor thoroughly to remove dirt, dust, and debris. If the existing flooring is uneven or damaged, it may need to be repaired or leveled before installing the vinyl tiles.
2. Measure and Cut the Tiles
Measure the area where you will be installing the vinyl flooring tiles. Cut the tiles to the appropriate size using a utility knife or sharp scissors. Make sure to allow for slight gaps between the tiles and the walls to accommodate expansion and contraction.
3. Apply Adhesive
Apply a thin, even layer of adhesive to the back of each vinyl flooring tile. Use a notched trowel to ensure an even distribution of adhesive. Do not apply too much adhesive, as this can lead to buckling or warping of the tiles.
4. Install the Tiles
Place the vinyl flooring tiles in the desired pattern and press them firmly into place. Start from the center of the room and work your way outwards. Use a rolling pin or heavy object to press the tiles firmly into the adhesive. Avoid sliding or dragging the tiles, as this can damage the adhesive bond.
5. Trim Excess Tile
Once all the tiles are installed, trim any excess material around the edges of the room using a utility knife. Be careful not to cut into the subfloor or existing flooring.
6. Reinstall Moldings and Baseboards
Reinstall the baseboards, moldings, and any other removed items. Use a caulk gun to seal any gaps between the tiles and the walls or baseboards.
7. Protect the New Floor
Allow the adhesive to cure according to the manufacturer's instructions. Protect the new vinyl flooring tiles by covering them with plastic or cardboard until the adhesive has set completely. Do not walk on the floor until the adhesive has fully cured.
Conclusion
Installing vinyl flooring tiles over existing flooring is a straightforward project that can be completed in a day or two. By following these steps and using the proper materials, you can create a beautiful and durable new floor that will enhance the look of your home for years to come.

How To Lay Tile Over An Existing Vinyl Floor Today S Homeowner

Can I Install Vinyl Tiles Over Laminate Flooring Comprehensive Guide

How To Lay Vinyl Tile Over Existing Flooring Help

Diy L And Stick Vinyl Flooring Over Existing 10 Month Review

Lvt Flooring Over Existing Tile The Easy Way Vinyl Floor Installation Diy Luxury Plank Bathroom

How To Install Vinyl L And Stick Tile 1905 Farmhouse

How To Install Luxury Vinyl Plank Over Tile Flooring

How To Tile Over Vinyl Flooring 2024 Today S Homeowner

Lvt Flooring Over Existing Tile The Easy Way Vinyl Floor Installation Diy Luxury

How To Install L And Stick Vinyl Flooring Over Existing
Related Posts


